D-Link DFL-1660 Installation Manual
Hide thumbs
Also See for DFL-1660:
- User manual (595 pages) ,
- Reference manual (948 pages) ,
- Log reference manual (652 pages)
Table of Contents
Advertisement
Available languages
Available languages
Quick Links
Building Networks for Peopl e
Hardware Installation Guide
Firewall
This document will guide you through the basic installation
process for your new D-Link security device.
DFL-1660 / DFL-2560 / DFL-2560G
Quick Installation Guide
Installationsanleitung
Guide d'installation
Guía de instalación
Guida di Installazione
Documentation also available on
CD and via the D-Link Website
Advertisement
Table of Contents

Related Manuals for D-Link DFL-1660


Summary of Contents for D-Link DFL-1660
- Page 1 Building Networks for Peopl e Hardware Installation Guide Firewall This document will guide you through the basic installation process for your new D-Link security device. DFL-1660 / DFL-2560 / DFL-2560G Quick Installation Guide Installationsanleitung Guide d’installation Guía de instalación Guida di Installazione...
-
Page 2: About This Guide
LCD Panel Used to display status and operation This guide contains step-by-step instructions messages. for setting up the D-Link DFL-1660/DFL-2560/ Keypad These keys are used in conjunction with the messages on the LCD Panel. DFL-2560G Firewall. Please note that the... - Page 3 Table 4. Default Interface Assignment Table 5. Device Status LED Descriptions Note: D-Link NetDefend Firewalls only allow Web GUI access from the LAN1 port by default for security reasons. That means the Web GUI access is only allowed on port No. 7 of front plate by default for DFL-2560/DFL-2560G.
- Page 4 LCD Keypad Controls During Boot-up LCD Keypad Controls After Boot-up When you power on the DFL-1660/DFL-2560/ Next Button DFL-2560G, the LCD panel will display following message: “Press keypad to enter setup”. Once you press any key on the keypad, it will lead you to enter the startup menu.
-
Page 5: Installing Equipment
Installing and Connection 2. Use the screws provided with the equipment rack to mount the device in the rack. This chapter describes how to install a DFL-1660/ DFL-2560/DFL-2560G device in a standard 19-inch equipment rack and how to connect network and power cables to the device. -
Page 6: Initial Configuration
To access the device with the WebUI: 1. Use an Ethernet cable to connect your 4. Connect an RS-232 cable from the console workstation to LAN1 port, DFL-1660 LAN1 port to a computer for CLI (Command Line port is pre-allocated to the part labeled 4. -
Page 7: Finalizing The Configuration
After initial setup, please refer to the companion publications found in PDF format on the accompanying Reference CD for detailed Using a Console Connection (RS-232 DCE) instructions on configuring the DFL-1660/ The NetDefend Firewall provides an RS-232 DFL-2560/DFL-2560G. serial port that supports a connection to a... - Page 8 In addition to the user manual, the Reference CD also includes many device configuration examples. Additional help is available through D-Link worldwide offices listed in the appendix of the User Manual or online. To learn more about D-Link security product products, please visit the website http://security.dlink.com.tw.
- Page 9 Building Networks for Peopl e Handbuch zur Hardwareinstallation Firewall Diese Anleitung führt Sie durch den allgemeinen Installationsprozess für Ihr neues D-Link-Sicherheitsgerät. DFL-1660 / DFL-2560 / DFL-2560G Die Dokumentation ist auch auf CD und über die D-Link-Website verfügbar.
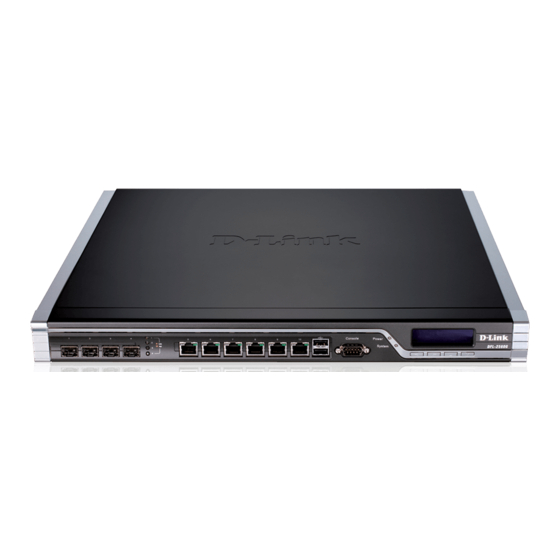
- Page 10 UTM-Servicepaket (nur lagergeführte LAN1-Port. Deshalb ist der Zugriff über die Bestandseinheit) Weboberfläche standardmäßig nur auf Port-Nr. Produktübersicht 4 an der Vorderseite der DFL-1660 möglich. Vorderseite – DFL-1660 Vorderseite - DFL-2560 und DFL-2560G Abbildung 1. Vorderseite der DFL-1660 Abbildung 2. Vorderseite der DFL-2560/DFL-2560G...
- Page 11 Verbindung hergestellt. Betrieb mit 1000 Mbit/s Hinweis: Standardmäßig ermöglichen Orangefarben blinkend – Port sendet oder empfängt Daten. D-Link NetDefend Firewalls aus Sicherheits- gründen nur den webbasierten Zugriff auf Tabelle 5. Beschreibungen der Status-LEDs des Geräts den LAN1-Port. Deshalb ist der Zugriff über die Weboberfläche standardmäßig nur auf...
- Page 12 NetDefendOS-Startvorgang automatisch fortgesetzt. Abbildung 6. Tastendefinitionen (nach dem Systemstart) Bestätigen Nachdem der Systemstart der DFL-1660/DFL-2560/ Nicht verwendet DFL-2560G abgeschlossen ist, können auf der LCD-Anzeige Informationen zum Gerätestatus angezeigt werden. Mithilfe des Tastenfeldes können Sie die gewünschte Anzeigeoption auswählen.
-
Page 13: Installation Und Verbindung
Böden, Lecks, beschädigte oder nicht an der Geräterückseite und schließen Sie das geerdete Stromkabel und fehlende Sicherheits- andere Ende an eine Wechselstromquelle an. erdungen. Hinweis: D-Link empfiehlt die Verwendung Installation des Geräts eines Überspannungsschutzes für die Stromver- Das DFL-1660/DFL-2560/DFL-2560G-Gerät bindung. - Page 14 1. Verbinden Sie den Arbeitsplatzrechner mithilfe 4. Verbinden Sie den Konsolenport mithilfe eines Ethernet-Kabels mit LAN1-Port; der eines RS-232-Kabels mit einem Computer, DFL-1660 LAN1-Port ist standardmäßig dem mit um die Verwaltung über die CLI (Command 4 gekennzeichneten Port zugewiesen. Line Interface, Befehlszeilenschnittstelle) zu Für DFL-2560/2560G ist der LAN1 Port...
- Page 15 Betrieb und zur Verwaltung der Computer oder Konsolenterminal zur Überwa- NetDefendOS-Firmware, dem proprietären chung und Konfiguration des Geräts unterstützt. Betriebssystem von D-Link, das die NetDefend Dieser Port verwendet einen DB-9-Verbindungs- Firewall steuert. Das Benutzerhandbuch enthält stecker zur Verbindung mit einem Datenkommu- genaue Anleitungen zu typischen Verwaltungs- nikationsgerät (DCE, z.
- Page 16 Niederlassungen von D-Link erhältlich, die im Anhang des Benutzerhand- buchs und online aufgelistet werden. Weitere Informationen zu den Sicherheitsprodukten von D-Link finden Sie auf der Website http:// security.dlink.com.tw. Wenn Sie technischen Support benötigen, besuchen Sie die Website http://support.dlink.com.tw. Dort werden Sie an Ihre regionale D-Link-Website weitergeleitet.
- Page 17 Guide d'installation matériel Pare-feu Ce document vous guidera tout au long de la procédure élémentaire d'installation de votre nouvel appareil de sécurité D-Link. DFL-1660 / DFL-2560 / DFL-2560G Documentation également dispo- nible sur CD et sur le site Web de...
-
Page 18: À Propos De Ce Guide
1 à 6 (de gauche à droite). manque aucun article et qu'ils sont tous en bon état. Si un des éléments est manquant ou Tableau 1. Description de la façade du DFL-1660 endommagé, veuillez contacter votre revendeur * Ports Ethernet Gigabit configurables avec détection D-Link local pour obtenir son remplacement. - Page 19 Remarque : Pour des questions de sécurité, le uniquement) Orange clignotant - Envoi ou réception de données. pare-feu NetDefend D-Link permet d'accéder à l'interface utilisateur Web uniquement à partir Tableau 5. Description des voyants d'état du périphérique du port LAN1. Autrement dit, par défaut, l'accès à...
- Page 20 Commandes de l'écran LCD pendant le Commandes de l'écran LCD après démarrage démarrage Bouton Suivant À la mise sous tension du DFL-1660/DFL-2560/ DFL-2560G, l'écran LCD affiche le message suivant : Appuyez sur une touche pour lancer la configuration. Appuyez sur n'importe quelle touche du clavier pour accéder au menu de...
-
Page 21: Installation Et Connexion
Branchez l'autre extrémité à une prise de courant CA. Installation du matériel Vous pouvez monter le DFL-1660/DFL-2560/ Remarque : D-Link recommande de protéger DFL-2560G dans un bâti standard de l'alimentation contre les surtensions à l'aide 19 pouces. -
Page 22: Configuration Initiale
4. Connectez un câble RS-232 entre le port le poste de travail au port LAN1 ; le port de console et un ordinateur pour l'accès à LAN1 du DFL-1660 est pré-attribué au port l'interface de gestion CLI (interface de ligne étiqueté 4. - Page 23 Pour utiliser une connexion via le port de console, NetDefendOS, le système d'exploitation vous devez disposer des éléments suivants : propriétaire de D-Link qui pilote et commande le pare-feu NetDefend. Le manuel d'utilisation 1. Un terminal ou un ordinateur équipé d'un comprend des instructions détaillées concernant...
-
Page 24: Informations Complémentaires
D-Link dans le monde, dont la liste est annexée à ce manuel d'utilisation ou disponible en ligne. Pour en savoir plus sur les produits de sécurité D-Link, visitez le site Web http://security.dlink.com.tw. Pour obtenir de l'aide, consultez le site Web http://support.dlink.com.tw ;... - Page 25 Guía de instalación de hardware Cortafuegos Este documento le guiará a través del proceso de instalación básico de su nuevo dispositivo de seguridad D-Link. DFL-1660 / DFL-2560 / DFL-2560G La documentación está también disponible en CD y a través del...
-
Page 26: Descripción General Del Producto
1 a 6 (de izquierda a derecha). de que están presentes todos los artículos y Tabla 1. Descripciones del panel frontal del DFL-1660 que no están dañados. Si falta algún artículo o está dañado, póngase en contacto con su * Puertos Gigabit Ethernet configurables con sensor proveedor local de D-Link para que lo reponga. - Page 27 Tabla 4. Asignación de interfaz predeterminada está funcionando a 100 Mbps. Naranja continuo - El puerto está funcionando a 1.000 Mbps. Nota: los cortafuegos D-Link NetDefend Luz apagada - No existe Conexión y Naranja sólo permiten el acceso de la interfaz gráfica transmisión/...
- Page 28 Figura 6. Definiciones de los botones Botón Confirmar (después del arranque) No se utiliza Una vez que el DFL-1660/DFL-2560/DFL-2560G ha finalizado su rutina de inicio del sistema, el panel LCD estará preparado para mostrar la información de estado del sistema. Puede utilizar el teclado para seleccionar una opción...
-
Page 29: Instalación Y Conexión
Enchufe el otro extremo en una fuente de alimentación CA. Puede montar el dispositivo DFL-1660/ DFL-2560/DFL-2560G en un estante de Nota: D-Link recomienda el uso de un equipos estándar de 19 pulgadas. Para instalar protector de sobretensión con la conexión de un dispositivo en un estante: alimentación. -
Page 30: Configuración Inicial
LAN1, el puerto acceso de gestión a CLI (Interfaz de línea LAN1 de DFL-1660 está preasignado al de comandos). puerto con la etiqueta 4. Para DFL-2560/2560G, el puerto LAN1 está... -
Page 31: Finalización De La Configuración
Utilización de una conexión de consola del DFL-1660/DFL-2560/DFL-2560G. (RS-232 DCE) Manual del usuario del cortafuegos D-Link El cortafuegos NetDefend proporciona un NetDefend puerto serie RS-232 que admite la conexión Este documento describe el funcionamiento y... -
Page 32: Información Adicional
Existe ayuda adicional disponible a través de las oficinas de D-Link en todo el mundo, que aparecen enumeradas en el apéndice del Manual del usuario o en línea. Para obtener más información acerca de los productos de seguridad D-Link, visite el sitio web http://security.dlink.com. - Page 33 Building Networks for Peopl e Guida di installazione Firewall In questo documento è descritta la procedura di installazione di base del dispositivo di sicurezza D-Link. DFL-1660 / DFL-2560 / DFL-2560G Documentazione disponibile anche su CD e tramite il sito Web...
-
Page 34: Informazioni Sulla Guida
* Porte Ethernet Gigabit configurabili con duplex zione al rivenditore D-Link di zona. autosensing e MDI/MDIX automatico. Quando si - Un (1) firewall DFL-1660 o DFL-2560(G) configura una delle porte, fare riferimento al nome NetDefend UTM d'interfaccia che corrisponde alla posizione della porta. - Page 35 1000 Mbps. Arancione lampeggiante - La Nota: per motivi di sicurezza, per impostazione porta invia o riceve dati. predefinita, i firewall D-Link NetDefend Tabella 5. Descrizione dei LED di stato del consentono l'accesso all'interfaccia grafica dispositivo Web esclusivamente attraverso la porta LAN1.
- Page 36 Figura 6. Definizioni dei pulsanti (dopo l'avvio) Pulsante Conferma Al termine della routine di avvio del sistema Non utilizzato da parte del dispositivo DFL-1660/DFL-2560/ DFL-2560G, sul pannello LCD verranno visua- lizzate le informazioni sullo stato del dispositivo. Per selezionare l'opzione di visualizzazione desiderata, è...
-
Page 37: Installazione Del Dispositivo
Collegare l'altra estremità alla sorgente di alimentazione CA. Installazione del dispositivo È possibile montare il dispositivo DFL-1660/ Nota: D-Link consiglia l'uso di un dispositivo di DFL-2560/DFL-2560G in un rack standard da protezione da sovratensioni sul collegamento 19 pollici. Per installare un dispositivo in un all'alimentazione. -
Page 38: Configurazione Iniziale
4. Collegare un cavo RS-232 dalla porta della workstation alla porta LAN1. La porta LAN1 console ad un computer per l'accesso di del dispositivo DFL-1660 è preallocata per gestione CLI (Command Line Interface). la porta contrassegnata con 4. Pe il dispositivo DFL-2560/2560G, la porta LAN1 è... - Page 39 Per utilizzare la connessione tramite la porta NetDefendOS, il sistema operativo proprietario della console, è necessario disporre di quanto di D-Link che consente di gestire e controllare segue: il firewall NetDefend. Questo manuale include 1. Terminale o computer dotato di porta seriale e istruzioni dettagliate sulle attività...
- Page 40 D-Link, visitare il sito Web http://security.dlink.com.tw. Per assistenza, visitare il sito Web http://support.dlink.com.tw, da cui è possibile accedere al sito Web D-Link per il proprio paese. Supporto tecnico http://www.dlink.it/support Supporto Tecnico dal lunedì al venerdì dalle ore 9.00 alle ore 19.00 con orario continuato Telefono: 199400057 40 ...
-
Page 41: Battery Caution
CE EMI CLASS A WARNING This is a class A product. In a domestic environment this product may cause radio inter- ference in which case the user may be required to take adequate measures. VCCI WARNING Statement D-Link NetDefend Firewall 41... - Page 42 NOTES 42 D-Link NetDefend Firewall...
- Page 43 NOTES D-Link NetDefend Firewall 43...
- Page 44 Ver. 2.00(EU) 2010/08/10 086W020000145...