
Related Manuals for Sony SLV-D985P AZ


Summary of Contents for Sony SLV-D985P AZ
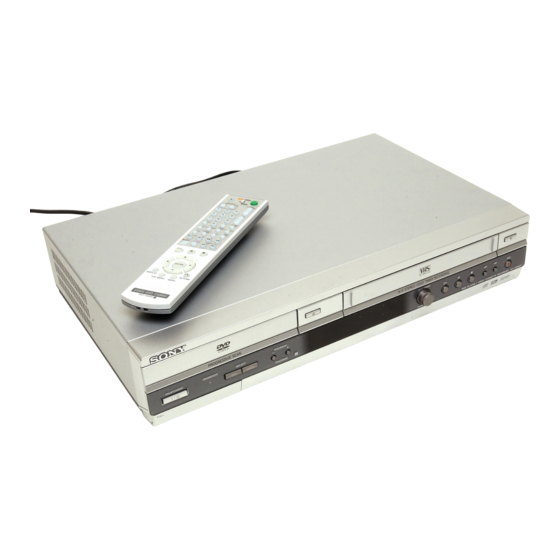
- Page 1 2-585-820-11 (2) GB DVD Player/ Video Cassette Recorder Operating Instructions PAL NTSC SLV-D985P AZ/ME/EA © 2005 Sony Corporation...
-
Page 2: Warning
To prevent fire or shock hazard, do not expose the Safety unit to rain or moisture. • SLV-D985P AZ operates on To avoid electrical shock, 220 – 240 V AC, 50 Hz. do not open the cabinet. SLV-D985P ME/EA operates Refer servicing to qualified on 110 –... -
Page 3: Welcome
Welcome! Caution For use of the VCR Thank you for purchasing this Sony DVD Player/Video Television programmes, films, Cassette Recorder. Before video tapes and other operating this player, please materials may be copyrighted. read this manual thoroughly Unauthorized recording of... -
Page 4: Table Of Contents
Table of contents 2 WARNING 3 Welcome! 3 Caution 6 About this manual 6 This player can play the following discs 8 Notes about discs Getting Started 9 Step 1 : Unpacking 10 Step 2 : Setting up the remote commander 12 Step 3 : Connecting the DVD-VCR 14 Step 4 : Setting up the DVD-VCR with the Auto Set Up function 17 Step 5 : Selecting a language... - Page 5 DVD Additional Operations 72 Using the DVD’s menu 73 Zooming into a scene 74 Changing the angles 75 Displaying the subtitle 76 Various play mode functions (Programme play, Shuffle play, Repeat play) 81 Changing the sound 83 Virtual surround setting 85 Playing an MP3 audio track 90 Playing JPEG image files 94 Playing VIDEO CDs with “PBC On/...
-
Page 6: About This Manual
About this manual This player can play the following discs • This manual mainly explains operations using the remote, but the same operations can also be performed using the buttons on the Format of discs DVD-VCR having the same or similar names. -
Page 7: Region Code
Region code Example of discs that the player cannot play Your player has a region code printed on the back of the unit and only will play DVD VIDEO The player cannot play the following discs: discs (playback only) labelled with identical •... -
Page 8: Notes About Discs
Note on playback operations of Notes about discs DVDs and VIDEO CDs Some playback operations of DVDs and VIDEO • To keep the disc clean, handle the disc by its CDs may be intentionally set by software edge. Do not touch the surface. producers. -
Page 9: Getting Started
• The supplied remote commander is for the exclusive use of this DVD-VCR. Check your model name The instructions in this manual are for the 3 models: SLV-D985P AZ, SLV-D985P ME and SLV-D985P EA. Check your model name by looking at the rear panel of your DVD-VCR. -
Page 10: Step 2 : Setting Up The Remote Commander
Using the remote Remote sensor commander You can use this remote commander to operate this DVD- VCR and a Sony TV. Buttons on the remote commander marked with a dot (•) can be used to operate your Sony TV. TV / If the TV does not have the DVD·VIDEO... - Page 11 Controlling other TVs with the remote commander The remote commander is preprogrammed to control non-Sony TVs. If your TV is listed in the following table, set the appropriate manufacturer’s code number. Set TV / DVD·VIDEO at the top of the remote commander to TV.
-
Page 12: Step 3 : Connecting The Dvd-Vcr
Step 3 : Connecting the DVD-VCR Note that “Advanced Hookups” (page 56) explains additional hookup methods that will optimize the picture and sound for a true “hometheatre” experience. Mains lead to mains AERIAL IN Aerial cable (supplied) : Signal flow Disconnect the aerial cable from your TV and connect it to on the rear panel of the... -
Page 13: Additional Connections
Additional connections To a TV that has audio/ video input jacks This additional connection improve picture and sound LINE OUT quality. Connect the TV as LINE IN shown on the right. Audio/video cord (not supplied) Connecting the DVD-VCR... -
Page 14: Step 4 : Setting Up The Dvd-Vcr With The Auto Set Up Function
Step 4 : Setting up the DVD-VCR with the Auto Set Up function Before using the DVD-VCR for the first time, set up the DVD-VCR using the Auto Set Up function. With this function, you can SET UP set TV channels automatically. Before you start…... - Page 15 Connect the mains lead to the mains. SLV-D985P AZ ENTER The DVD-VCR automatically turns on and the SYSTEM SELECTION “SYSTEM SELECTION” menu appears. SYSTEM - B/G (NEW ZEALAND) SYSTEM - B/B (AUSTRALIA) Step 3 is skipped. RETURN SET UP ENTER...
- Page 16 To change the RF channel If the picture does not appear clearly on the TV, change the RF channel on the DVD- VCR and TV. Select “Install” in the “OPTION” menu, then press V/v to select “Video Output CH.” Select the RF channel by pressing the B/b buttons and press ENTER.
-
Page 17: Step 5 : Selecting A Language
Step 5 : Selecting a language You can change the on-screen display language. SET UP Before you start… • Turn on the DVD-VCR and your TV. • To control the DVD-VCR, set TV / DVD·VIDEO to DVD·VIDEO on the remote (page 10). ENTER •... -
Page 18: Step 6 : Setting The Clock
Step 6 : Setting the clock You must set the time and date on the DVD- VCR to use the timer features properly. SET UP Before you start… • Turn on the DVD-VCR and your TV. • To control the DVD-VCR, set TV / DVD·VIDEO to DVD·VIDEO on the remote (page 10). - Page 19 Press b to select the minutes and set the CLOCK SET minutes by pressing V/v. ENTER Time Date Year 18:30 01/JAN /2005 SAT RETURN SET UP ENTER Set the day, month, and year in sequence by CLOCK SET pressing b to select the item to be set, and press V/v to select the digits, then press b.
-
Page 20: Step 7 : Selecting The Tv System
Step 7 : Selecting the TV system You must select the appropriate TV system for your area. SET UP Before you start… • Turn on the DVD-VCR and your TV. • To control the DVD-VCR, set TV / DVD·VIDEO to DVD·VIDEO on the remote (page 10). - Page 21 Press V/v to select “TV System,” then press B/b to select the appropriate TV system. ENTER SLV-D985P AZ Select the B/B TV System (Australia) the B/G TV System (New Zealand) SLV-D985P ME/EA Select the B/G TV System the D/K TV System the I TV System Press SET UP to exit the menu.
-
Page 22: Step 8 : Presetting Channels
Step 8 : Presetting channels If some channels could not be preset using the Auto Set Up function, you can preset them manually. SET UP Before you start… • Turn on the DVD-VCR and your TV. • To control the DVD-VCR, set TV / DVD·VIDEO to DVD·VIDEO on the remote (page 10). - Page 23 Press V/v to select the row which you want to MANUAL TUNING preset, then press b. SYSTEM ENTER – – – To display other pages for programme – positions 6 to 80, press V/v repeatedly. NAME – – – – MEMORY : ENTER RETURN...
- Page 24 If the picture is not clear If the picture is not clear, you may use the Manual Fine Tuning (MFT) function. After step 5, press V/v to select “MFT.” Press B/b to get a clear picture. Then press ENTER. Notes •...
- Page 25 Press V/v to select “Install,” then press INSTALL ENTER. Auto Setup ENTER Manual Setup The “INSTALL” menu appears. TV System CH68 Video Output CH SET UP ENTER RETURN Press V/v to select “Manual Setup,” then press TV STATION TABLE ENTER. NAME SYSTEM ENTER...
- Page 26 Disabling unwanted programme positions After presetting channels, you can disable unused programme positions. The disabled positions will be skipped later when you press the PROG +/– buttons. Before you start… • Turn on the DVD-VCR and your TV. • To control the DVD-VCR, set TV / DVD·VIDEO to DVD·VIDEO on the remote (page 10).
- Page 27 Press V/v to select “Manual Setup,” then press TV STATION TABLE ENTER. NAME SYSTEM ENTER AAB – LMN – CDE – I J K – SWAPPING : ENTER RETURN DELETE : CLEAR Press V/v to select the row which you want to TV STATION TABLE disable.
-
Page 28: Before You Start
Changing the station names You can change or enter the station names (up to 4 characters). SET UP Before you start… • Turn on the DVD-VCR and your TV. • To control the DVD-VCR, set TV / DVD·VIDEO to DVD·VIDEO on the remote (page 10). - Page 29 Press V/v to select the row which you want to MANUAL TUNING change or enter the station name, then press b. SYSTEM ENTER To display other pages for programme – positions 6 to 80, press v/V repeatedly. NAME – – – – MEMORY : ENTER RETURN...
-
Page 30: Basic Operations
Basic Operations Playing discs Depending on the disc, some operations may be different or restricted. Refer to the operating instructions supplied with your disc. Before you start... • Turn on the DVD-VCR and your TV. • Set your TV to the video channel so that the signal from the player appears on the TV screen. - Page 31 Press H. The disc tray closes and the DVD player starts playback. The display window shows the playback time.* Depending on the disc, a menu may appear on the TV screen. For DVDs, see page 72. For VIDEO CDs, see page 94. Hour Minute Second * “–...
- Page 32 Press Locate a point quickly m or M on the remote (or hold down m or M on the unit) during playback The playback speed changes as follows each time you press the button on the remote (or depending on how long you press the button on the unit): •...
- Page 33 Notes • No sound is output except for: – during normal play – during playback quickly or slowly with sound • You cannot perform playback quickly or slowly with sound when a virtual surround effect is set. • The fast reverse operation may not be possible for CD, MP3 and VIDEO CD depending on the recording method.
- Page 34 Notes on playing DTS* sound tracks on a CD • When playing DTS-encoded CDs, no audio out will be output from the analogue stereo jacks. To avoid possible damage to the audio system, the consumer should take proper precautions when the analogue stereo jacks of the DVD player are connected to an amplification system. •...
-
Page 35: Guide To The On-Screen Display
Guide to the on-screen display You can check disc information during playback. The displayed contents differ according to the type of disc being played. Number buttons V/v/B/b ENTER O RETURN DISPLAY Press DISPLAY during playback. The following information appears; type of disc, current title/track, chapter, counter position, voice language, subtitle language and Custom AV Mode setting. - Page 36 To playback the desired title/track or chapter You can playback the desired title/track or chapter using this menu. Press V/v during playback to select the desired item. 1/36 Press B/b to change the item. T 0:01:09 ENG 5.1CH ENG (3/5) Press ENTER to start playback.
- Page 37 Notes • The display may not change as operated depending on the disc. • The display window continue indicating the playing time even when the counter position information on the on-screen display is being changed. • The remaining time of the current track and the disc may not be indicated correctly for Copy Control CDs, CD EXTRA or CDs with jacket pictures on the disc, etc.
-
Page 38: Locking The Disc Tray (Child Lock)
Locking the disc tray (Child Lock) You can lock the disc tray so that the disc tray SELECT DVD is not opened by mistake. To lock the disc tray When the DVD-VCR is turned on, press x, X and SELECT DVD on the unit at the same time. -
Page 39: Playing A Tape
Playing a tape Before you start... • Turn on the DVD-VCR and your TV. • Set your TV to the video channel so that the signal from the player appears on the TRACKING +/– TV screen. • Set TV / DVD·VIDEO to DVD·VIDEO, then press SELECT VIDEO to control the VCR (page 10). - Page 40 Additional tasks Press Stop play Pause play∗ Resume play after pause X or H Fast-forward the tape M during stop Rewind the tape m during stop Eject the tape * If you pause the VCR for more than 5 minutes, the VCR will automatically resume play. To turn off the power while rewinding (Rewind Shut Off) Press ?/1 while the tape is rewinding.
- Page 41 To resume normal playback Press H. To set the colour system If the playback picture has no colour, or streaks appear during playback, set “Colour System” in the “USER SET” menu to conform to the system that the tape was recorded in (see page 109).
-
Page 42: Recording Tv Programmes
Recording TV programmes Before you start... • Turn on the DVD-VCR and your TV. • Switch the input selector on your TV so that the signal from the player appears on the TV screen. PROG +/– • Set TV / DVD·VIDEO to DVD·VIDEO, Number then press SELECT VIDEO to control the buttons... - Page 43 • To record a normal channel, press PROG +/– until the programme • PROG/ TRACKING position number you want appears in the display window. INPUT SELECT • To record from other equipment connected to one or more of the LINE inputs, press INPUT SELECT until the connected line appears in the display window.
- Page 44 To check the remaining time Press DISPLAY three times. With the display on, press DISPLAY again to check the remaining time. STEREO PR 1 BBC 1 AUTO REMAIN 0 : 0 0 : 2 1 : 4 Time counter Remaining tape length In order to get an accurate remaining time indication, be sure “Tape Select”...
- Page 45 Tips • To select a programme position, you can use the number buttons on the remote commander. For two-digit numbers, press -/-- (ten’s digit) followed by the number buttons. • If you connect additional equipment to a LINE connector or jack, you can select the input signal using the INPUT SELECT or PROG +/–...
-
Page 46: Recording Tv Programmes Using The Timer
Recording TV programmes using the timer You can preset up to six programmes at a time. Before you start… SELECT VIDEO • Check that the DVD-VCR clock is set to the correct time. • Turn on the DVD-VCR and your TV. •... - Page 47 Set the programme position, date, start and PR DATE START STOP SPEED stop times and tape speed: ENTER Press b to select each item in turn. Press V/v to set each item. To correct a setting, press B to return to that CLEAR SET UP setting and reset.
-
Page 48: Timer
To use the Auto Tape Speed function In step 3 above, press v to select “Auto.” When you are recording a programme in the SP mode and the remaining tape length becomes shorter than the recording time, the recording tape speed is automatically changed to the LP mode. Note that some noise will appear on the picture when the tape speed is changed. -
Page 49: Recording Tv Programmes Using Easy Timer
Recording TV programmes using EASY TIMER The Easy Timer function allows you to make PROGRAM +/– timer recordings of programmes without turning on your TV. Set the recording timer to record up to six programmes that will be broadcast within a month using EASY TIMER. - Page 50 Press EASY TIMER to set the start time. EASY TIMER “START” and the next quarter hour increment appear alternately in the display window. Turn EASY TIMER to set the recording start time. EASY TIMER You can set the recording start time in 15 minute intervals or adjust the time in one minute intervals by pressing the PROGRAM +/–...
-
Page 51: Easy Timer
Turn EASY TIMER to set the recording stop time. EASY TIMER You can set the recording stop time in 15 minute intervals or adjust the time in one minute intervals by pressing the PROGRAM +/– buttons on the unit. PROGRAM Press EASY TIMER. -
Page 52: Easy Timer
To return to the previous step To return to the previous step, press the PROGRAM + and – buttons on the unit at the same time during any of the Easy Timer settings. To set the clock Hold down EASY TIMER so that DAY indicator appears in the display window. However, if the clock has already been set, the current setting appears. -
Page 53: Easy Timer
About the Demonstration Mode The Easy Timer function has a Demonstration Mode that allows the user, such as a salesperson, to enter more than six examples of timer settings when demonstrating the use of EASY TIMER. It cancels the FULL notice which appears if six programmes have already been set. -
Page 54: Checking/Changing/Cancelling Timer Settings
Checking/changing/cancelling timer settings Before you start… CLEAR • Check that the DVD-VCR clock is set to the correct time. SET UP • Turn on the DVD-VCR and your TV. TIMER • Switch the input selector on your TV so that the signal from the player appears on the TV screen. - Page 55 Press ENTER to confirm the setting. ENTER Press ENTER to confirm all settings. If any settings remain, turn off the VCR to return to recording standby. ENTER To record from other equipment, leave the connected equipment switched When the timer settings overlap The programme that starts first has priority and the second programme starts recording only after the first programme has finished.
-
Page 56: Advanced Hookups
Advanced Hookups A/V Receiver hookup A Use this hookup if your A/V receiver has a Dolby* Surround (Pro Logic) decoder and 3 to 6 speakers You can enjoy the Dolby Surround effects only when playing Dolby Surround audio or multi-channel audio (Dolby Digital) discs. * Manufactured under license from Dolby Laboratories. - Page 57 B Use this hookup if your A/V receiver has a Dolby Digital, MPEG audio or DTS* decoder, a digital input jack and 6 speakers This connection will allow you to use the Dolby Digital, MPEG audio or DTS decoder function of your AV amplifier (receiver). You are not able to enjoy the surround sound effects of this player.
-
Page 58: Video/Component Hookup
S-Video/Component hookup Make audio connections using the OUT AUDIO L/R jacks or DIGITAL AUDIO OUT (OPTICAL or COAXIAL) jacks when you use S-VIDEO/Component hookup. A Use this hookup if your TV has an S-VIDEO input jack Connect an S-VIDEO cord (not supplied). You will enjoy high quality images. DVD-VCR l : Signal flow (DVD only) - Page 59 B Use this hookup if your TV has component video input jacks Connect your TV via the COMPONENT VIDEO OUT jacks using a component video cord (not supplied) or three video cords (not supplied) of the same kind and length. You will enjoy accurate colour reproduction and high quality images. See page 58 for audio connections.
-
Page 60: Dvd Settings And Adjustments
DVD Settings and Adjustments Audio Setup “Audio Setup” allows you to set the sound SET UP according to the playback and connection conditions. V/v/B/b ENTER Press SET UP when the DVD player is in stop SET UP DVD SETUP mode, then press V/v to select (DVD) Language Setup Audio Setup... - Page 61 Press B/b to select an item. ENTER Press SET UP to exit the menu. SET UP Menu choices The default setting is indicated in bold print. • Dolby Digital Selects the type of Dolby Digital signal. D-PCM Select this when the player is connected to an audio component lacking a built-in Dolby Digital decoder.
- Page 62 • Audio DRC (Dynamic Range Control) Makes the sound clear when the volume is turned down when playing a DVD that conforms to “Audio DRC.” This affects the output from the following jacks: – OUT AUDIO L/R jacks – DIGITAL AUDIO OUT (OPTICAL or COAXIAL) jack only when “Dolby Digital”...
-
Page 63: Screen Setup
Screen Setup “Screen Setup” allows you to set the screen SET UP according to the playback and connection conditions. V/v/B/b ENTER O RETURN Press SET UP when the DVD player is in stop SET UP DVD SETUP mode, then press V/v to select (DVD) Language Setup Audio Setup... - Page 64 Press B/b to select an item. ENTER Press SET UP to exit the menu. SET UP Menu choices • TV Type Selects the aspect ratio of the connected TV (4:3 standard or wide). The default setting is indicated in bold print. 4:3 Letter Box Select this when you connect a 4:3 screen TV.
- Page 65 To set the “Progressive” setting If your TV accepts progressive (480p) format signals, you will enjoy accurate colour reproduction and high quality image. Follow step 1 and 2 on page 63, then press V/v to SCREEN SETUP select “Progressive.” TV Type 4:3 Letter Box Progressive RETURN...
- Page 66 • The “Progressive” setting can be canceled in stop mode by pressing X on the unit continuously for 5 seconds or more, or selecting “Off” in step 2. Note • If you select progressive signal when you connect the DVD player to a TV that cannot accept the signal in progressive format, the image quality will deteriorate.
-
Page 67: Setting The Display Or Sound Track Language
Setting the display or sound track language You can set various languages for the disc’s menu, sound track or subtitle. SET UP V/v/B/b ENTER Press SET UP when the DVD player is in stop SET UP DVD SETUP mode, then press V/v to select (DVD) Language Setup Audio Setup... -
Page 68: Audio Language
Press V/v to select the language setup item from the displayed list: “DVD Menu,” “Audio,” or “Subtitle.” ENTER Then press ENTER. Press V/v to select the desired language, then press ENTER. • DVD MENU LANGUAGE DVD MENU LANGUAGE ENTER You can select the desired language for the English disc’s menu. -
Page 69: Parental Control
Parental Control (limiting playback by children) Playback of some DVD VIDEOs can be limited according to a predetermined level such as the age of the users. The parental control function allows you to set a playback limitation level. Number buttons SET UP V/v/B/b ENTER... - Page 70 Press b to select “Yes.” • If you have not entered a password CREATE PASSWORD ENTER The display for registering a new password Enter Password appears. – – – – Enter a 4-digit password using the number buttons. RETURN The display for confirming the password CREATE PASSWORD appears.
- Page 71 To change the password Select “Change Password” in step 4 on page 70. The display for entering a new password appears. Enter a new 4-digit password using the number buttons. The display for confirming the password appears. Re-enter the new password. To turn off the Parental Control function Set “Use Password”...
-
Page 72: Dvd Additional Operations
DVD Additional Operations Using the DVD’s menu A DVD is divided into long sections of a picture or a music feature called “titles.” Number When you play a DVD VIDEO which buttons contains several titles, you can select the title you want using the TOP MENU button. -
Page 73: Zooming Into A Scene
Zooming into a scene You can zoom into a scene during playback ZOOM or still mode. To zoom into a JPEG image, see “Playing JPEG image files” on page 90. V/v/B/b ENTER Press ZOOM. MUTING/ ZOOM “ ” appears. Press V/v/B/b to move “ ”... -
Page 74: Changing The Angles
Changing the angles If various angles (multi-angles) for a scene are recorded on the DVD, “ ” appears in Number the display window. This means that you can buttons change the viewing angle. ANGLE Press ANGLE during playback. ANGLE The angle number appears on the display. The number after the slash indicates the total number of angles. -
Page 75: Displaying The Subtitle
Displaying the subtitle If subtitles are recorded on the disc, you can change the subtitles or turn them on and off whenever you want while playing a DVD. SUBTITLE V/v/B/b Press SUBTITLE during playback. SUBTITLE/ TIMER Press B/b repeatedly to select the language. Depending on the DVD, the choice of language varies. -
Page 76: Various Play Mode Functions (Programme Play, Shuffle Play, Repeat Play)
Various play mode functions (Programme play, Shuffle play, Repeat play) You can set the following play modes: • Programme play (page 76), Programme play MP3 audio tracks (page 87) • Shuffle play (page 78), Shuffle play MP3 audio tracks (page 88) •... -
Page 77: Programme Play, Shuffle Play
Press B/b to select “PROGRAM,” then press PROGRAM ENTER. Track Program Order ENTER – – – – – – – – – – – – – – – – – – – – – – – – – – – – –... -
Page 78: Programme Play, Shuffle Play
Playing in random order (Shuffle play) You can shuffle the playback order of tracks. Subsequent “shuffling” may produce a CLEAR different playing order. REPEAT To shuffle MP3 audio tracks, see page 88. ENTER Press REPEAT when the DVD player is in stop REPEAT/ PROGRAM SHUFFLE... -
Page 79: Programme Play, Shuffle Play
Playing repeatedly (Repeat play) You can play all of the titles or tracks on a disc or a single title, chapter, or track CLEAR repeatedly. REPEAT Press REPEAT during playback. REPEAT/ INDEX Press REPEAT or B/b to select the item to be repeated. REPEAT/ INDEX When playing a DVD... -
Page 80: Programme Play, Shuffle Play
To return to normal play Select “Off” in step 2 or press CLEAR during repeat play. • When you press x during repeat play, repeat play is cancelled. Notes • You cannot repeat play with DVD-RW in VR mode. • You cannot repeat play VIDEO CDs with PBC function on. See “Playing VIDEO CDs with “PBC On/Off”... -
Page 81: Changing The Sound
Changing the sound When playing a DVD recorded in multiple audio formats (PCM, Dolby Digital, MPEG or DTS), you can change the audio format. If the DVD is recorded with multilingual AUDIO tracks, you can also change the language. With CDs or VIDEO CDs, you can select the sound from the right or left channel and listen to the sound of the selected channel through both the right and left speakers. - Page 82 Notes • If you select DTS audio setting in step 2, you cannot select surround setting (page 83). • You cannot perform DTS audio output during playback quickly or slowly with sound (page 33). Changing the sound...
-
Page 83: Virtual Surround Setting
Virtual surround setting When you connect a stereo TV or 2 front speakers, SURROUND lets you enjoy surround sound effects by using sound SURROUND imaging to create virtual rear speakers from the sound of the front speakers without using actual rear speakers. Press SURROUND during playback. - Page 84 To cancel the setting Select “Off” in step 2. Notes • When the playing signal does not contain a signal for the rear speakers, the surround effects will be difficult to hear. • When you activate the surround effect, turn off the surround setting of the connected TV or amplifier (receiver).
-
Page 85: Playing An Mp3 Audio Track
Playing an MP3 audio track You can play back DATA CDs (CD-ROMs/ CD-Rs/CD-RWs) or DATA DVDs (DVD- ROWs/DVD+RWs/DVD+Rs/DVD-RWs/ DVD-Rs) recorded in MP3 (MPEG1 Audio Layer 3) format. CLEAR REPEAT V/v/B/b ENTER O RETURN TOP MENU Press Z and place a DATA CD or DATA DVD on the disc tray, then press Z to close the tray. -
Page 86: To Stop Play
Press O RETURN, then press V/v to select the desired directory in the left column, then track 1 00:00 DIRECTORY:007 FILES:014 album 1 track 1 press ENTER. RETURN album 2 track 2 album 3 track 3 album 4 track 4 album 5 track 5 album 6... - Page 87 To programme MP3 audio tracks Press x twice, then press REPEAT. PROGRAM SHUFFLE Press B/b to select “PROGRAM,” then press PROGRAM ENTER. 00:00 DIRECTORY:007 ORDER:000 album 1 album 2 album 3 album 4 album 5 album 6 album 7 RETURN CLEAR ENTER Press V/v to select the desired directory in the left...
- Page 88 To shuffle MP3 audio tracks Press x twice, then press REPEAT. PROGRAM SHUFFLE Press B/b to select “SHUFFLE,” then press ENTER. To return to normal play Press CLEAR during shuffle play. Tips • Shuffle play will stop when all the tracks are played back. •...
- Page 89 The Playback order of MP3 audio tracks The playback order of albums and tracks recorded on a DATA CD or DATA DVD is as follows. • Structure of disc contents Tree 1 Tree 2 Tree 3 Tree 4 Tree 5 album track When you insert a DATA CD or DATA DVD and press H, the numbered tracks are...
-
Page 90: Playing Jpeg Image Files
Playing JPEG image files You can play JPEG image files on DATA CDs (CD-ROMs/CD-Rs/CD-RWs) or DATA DVDs (DVD-ROWs/DVD+RWs/DVD+Rs/ DVD-RWs/DVD-Rs). CLEAR ./> V/v/B/b ENTER MENU TOP MENU Press Z and place a DATA CD or DATA DVD on the disc tray, then press Z to close the tray. Select a Media Type When you load a DATA CD or DATA DVD 1 MP3... - Page 91 Press V/v to select “JPEG,” then press Album Photo : ENTER. ENTER The “Album” display will appears. If you do not press ENTER after selecting a media type, the selected media will be SLIDE SHOW automatically played. Press ./> to select the next/previous album page, then press V/v/ B/b to select an image in the “Album”...
- Page 92 To zoom in an image Press V/v/B/b to select an image in the “Album” display, then press ENTER. IMAGE Press B/b to select “ ,” then press ENTER. “ ” appears. Press V/v/B/b to move “ ” to the position where you want to zoom in.
- Page 93 About JPEG image files You can play back DATA CDs (CD-ROMs/CD-Rs/CD-RWs) or DATA DVDs (DVD- ROMs/DVD+RWs/DVD+Rs/DVD-RWs/DVD-Rs) recorded in JPEG format. However, the discs must be recorded according to ISO9660 Level 1/Level 2 or Joliet format and DATA DVDs of Universal Disk Format (UDF) for the player to recognize the tracks (or files).
-
Page 94: Playing Video Cds With "Pbc On/Off" Functions
Playing VIDEO CDs with “PBC On/Off” functions The PBC (Playback control) function allows you to search and perform other operations Number interactively. PBC playback follows a buttons selection menu displayed on your TV screen. ENTER O RETURN MENU Press MENU to select “PBC On.” The menu for your selection appears. - Page 95 Press ENTER. ENTER Follow the instructions in the menu for interactive operations. Refer to the instructions supplied with the disc, as the operating procedure may differ depending on the VIDEO CD. To return to the menu Press O RETURN. To play using “PBC Off” Press MENU to select “PBC Off.”...
-
Page 96: Vcr Additional Operations
VCR Additional Operations Quick Timer Recording After you have started recording, you can have the VCR stop recording automatically after a specified duration. z REC While recording, press z REC. Press z REC repeatedly to set the duration time. In SP mode Each press advances the time in increments of 30 minutes. - Page 97 To extend the duration Press z REC repeatedly to set a new duration time. To cancel the duration Press z REC repeatedly until the indicator disappears and the VCR returns to normal recording mode. To stop while recording Press x. Notes •...
-
Page 98: Recording Stereo And Bilingual Programmes
Recording stereo and bilingual programmes In the ZWEITON (German stereo) system This VCR automatically receives and records stereo and bilingual programmes based on the ZWEITON system. When a stereo or bilingual programme is received, the STEREO indicator appears in the display window. To select bilingual sound while recording Press AUDIO to select the sound you want. -
Page 99: Programmes
In the NICAM system This VCR receives and records stereo and bilingual programmes based on the NICAM system (NICAM appears on the TV screen). When a stereo or bilingual programme is received, the STEREO indicator appears in the display window. To record a NICAM programme, “NICAM”... - Page 100 How sound is recorded on a video tape The VCR records sound onto two separate tracks. Hi-Fi audio is recorded onto the main track along with the picture. Monaural sound is recorded onto the normal audio track along the edge of the tape. Stereo Bilingual Usually mixed...
-
Page 101: Searching Using Index Function
Searching using index function The VCR automatically marks the tape with an index signal at the point where each recording begins. Use these signals as INDEX references to find a specific recording. To find a specific recording by scanning (Index scan) Insert an indexed tape into the tape compartment. - Page 102 To search a specific recording (Index search) Insert an indexed tape into the VCR. Press INDEX, then press m/M twice. REPEAT/ INDEX • To search ahead, press M twice. • To search backwards, press m twice. INDEX SEARCH Press m/M depending on the direction where your desired programme is located.
-
Page 103: Adjusting The Picture (Tracking)
Adjusting the picture (tracking) Adjusting the tracking Although the VCR automatically adjusts the tracking when playing a tape, distortion may occur if the recording is in poor condition. In this case, manually adjust the tracking. T R A C K I N G – – – – – – –... - Page 104 Press V/v to select “User Set,” then press USER SET ENTER. [ Auto ] Colour System ENTER [ On ] NICAM [ On ] SET UP RETURN Press V/v to select “ASC,” then press b. USER SET [ Auto ] Colour System ENTER [ On ]...
-
Page 105: Changing Menu Options
Changing menu options SET UP V/v/B/b ENTER Press SET UP when the DVD player is in stop SET UP OPTION mode, then press V/v to select :English Language Clock (OPTION) or (VIDEO) and press Install User Set ENTER. [ Off ] Auto Power Off [ On ] Screen Messages... - Page 106 Press B/b to change the setting. ENTER Press SET UP to exit the menu. SET UP Menu choices The default settings are indicated in bold print. OPTION Menu option Set this option to Auto Power Off • “Off” to deactivate the Auto Power Off function. •...
-
Page 107: Editing
Editing How to connect to record on this VCR Connect the line outputs of the other VCR to the input connector of this VCR. Refer to the examples A through B and choose the connection that best suits your VCR. Example A Your VCR (Recorder) LINE IN 1... - Page 108 How to connect to a stereo system Connect the LINE-2 IN VIDEO/AUDIO L/R jacks on this DVD-VCR to the audio output jacks on the stereo system, using an audio cord (not supplied). Notes • Make sure you connect the plugs to jacks of the same colour. •...
-
Page 109: Additional Information
Additional Information General setup information Changing setup options SET UP V/v/B/b ENTER Press SET UP when the DVD player is in stop SET UP OPTION mode, then press V/v to select Language :English Clock (OPTION) and press ENTER. Install User Set [ Off ] Auto Power Off Screen Messages... - Page 110 Press B/b to change the setting. When changing the “RF Output Channel,” confirmation messages will ENTER appear. Press ENTER to confirm the messages. Press SET UP to exit the menu. SET UP Menu choices Initial settings are indicated in bold print. Menu option Set this option to Colour System...
-
Page 111: Troubleshooting
Troubleshooting If you have any questions or problems not covered below, please consult your nearest Sony service facility. General Troubleshooting Symptom Remedy The ?/1 (on/standby) switch does • Connect the mains lead to the mains securely. not function. The power is turned on but the DVD- •... - Page 112 DVD Troubleshooting Symptom Remedy There is no picture/picture noise • Re-connect the connecting cord securely. appears. • The connecting cords are damaged. • Check the connection to your TV (page 12) and switch the input selector on your TV so that the signal from the player appears on the TV screen.
- Page 113 Symptom Remedy The sound volume is low. • The sound volume is low on some DVDs. The sound volume may improve if you set “Audio DRC” to “Wide Range” (page 62). The disc does not play. • The disc is turned over. •...
- Page 114 • The video heads are dirty (see the last page of Troubleshooting). Clean the video heads using a Sony video head cleaning cassette. If a Sony cleaning cassette is not available in your area, have the heads cleaned at your nearest Sony service facility (a standard service charge will be required).
- Page 115 Symptom Remedy No TV programme appears on the • Make sure the TV is set to the video channel. If you are TV screen. using a monitor, set it to video input. • Existing broadcasts may interfere with the VCR. Reset the RF channel output of your VCR (page 16).
- Page 116 Symptoms caused by contaminated video heads • Normal picture • Rough picture • Unclear picture • No picture (or black & white screen appears) initial terminal contamination Troubleshooting...
-
Page 117: Glossary
Glossary Chapter (page 35) DVD (page 6) Sections of a picture or a music feature that A disc that contains up to 8 hours of moving are smaller than titles. A title is composed of pictures even though its diameter is the same several chapters. - Page 118 Interlace format Interlace format shows every other line of an image as a single “field” and is the standard method for displaying images on television. The even number field shows the even numbered lines of an image, and the odd numbered field shows the odd numbered lines of an image.
-
Page 119: Specifications
23.39 mm/s (recording/playback) Power back-up NTSC 33.35 mm/s (recording*(line input Back-up duration: only)/playback) SLV-D985P AZ: up to 6 hours at a time LP: PAL 11.70 mm/s (recording/playback) SLV-D985P ME/EA: up to 24 hours at a time NTSC 16.67 mm/s (playback only) General EP: NTSC 11.12 mm/s (recording*(line input... -
Page 120: Index To Parts And Controls
Index to parts and controls Refer to the pages indicated in parentheses ( ) for details. Front panel A ?/1 ON/STANDBY switch (11) (33) K H (play) button* (31) (39) (40) L EASY TIMER (49) B PROGRESSIVE indicator (59) (65) Remote sensor (10) C Disc tray (30) N PROGRAM/TRACKING +/–... -
Page 121: Display Window
Display window A DVD indicator (31) I Tape indicator (39) B Angle indicator (74) J Timer indicator (47) C MONTH indicator (52) K STEREO indicator (98) D DAY indicator (49) L Playing time/clock/current status indicator (31) (39) E YEAR indicator (52) M SURR (surround) indicator (83) F DATE indicator (49) N DTS indicator (61) -
Page 122: Rear Panel
Rear panel DVD player and VCR DVD player only A Mains lead (12) F LINE OUT AUDIO L/R jacks (58) G COMPONENT VIDEO OUT C (in from aerial) connector (12) jacks (59) (out to tv) connector (12) H S-VIDEO OUT jack (58) D LINE IN 1 VIDEO/AUDIO L/R jacks I DIGITAL AUDIO OUT jack (107) - Page 123 A Z (open/close) button (30) (32) Remote commander for DVD B TV / DVD·VIDEO switch (10) C SELECT DVD button (10) D Number buttons* (11) (70) E CLEAR button (27) (77) F SURROUND button (83) G SET UP button (17) H SUBTITLE button (75) I AUDIO button* (81) SKIP button (31)
- Page 124 A Z (eject) button (40) Remote commander for VCR B TV / DVD·VIDEO switch (10) C SELECT VIDEO button (10) D Number buttons* (11) E CLEAR button (27) (41) F SET UP button (17) G TIMER button (46) H AUDIO button* (98) SKIP button (40) REPLAY button (40) K SP (Standard Play)/LP (Long Play)
-
Page 125: Dvd Audio/Subtitle Language
DVD Audio/Subtitle Language Abbreviation Language Arabic Bulgarian Chinese Croatian Czech Danish German English Spanish Finish French Greek Hungarian Indonesian Hindi Icelandic Italian Hebrew Japanese Korean Malay Dutch Norwegian Polish Portuguese Russian Swedish Thai Turkish Vietnamese Afrikaans DVD Audio/Subtitle Language... -
Page 126: Index
Index Numerics 16:9 64 Index scan 101 Recording 42 4:3 Letter Box 64 Instant Advance 32 daily/weekly 47 4:3 Pan Scan 64 Instant Replay 32 quick timer recording 96 Instant Skip 40 saving 44 using EASY TIMER 49 Adjusting while watching another picture 103 JPEG 6 programme 44... - Page 128 Sony Corporation AK68-00624A Printed in Indonesia...