Table of Contents
Advertisement
Before servicing this chassis, it is important that the service person reads the "SAFETY PRECAUTIONS" and "PRODUCT
SAFETY NOTICE" in this service manual.
Copyright © 2013 Mitsubishi Electric Corporation All Rights Reserved.
These model are RoHS-compliant. Provide
servicing referring to "NOTES FOR SERVICING
RoHS-COMPLIANT PRODUCTS" described in
the service manual.
Pb Solder, Pb Joints, Pb PCA
This product uses lead-free solder
on the circuit boards. For repairing
circuit boards, see "Precautions for
resoldering" in this Service Manual.
CAUTION
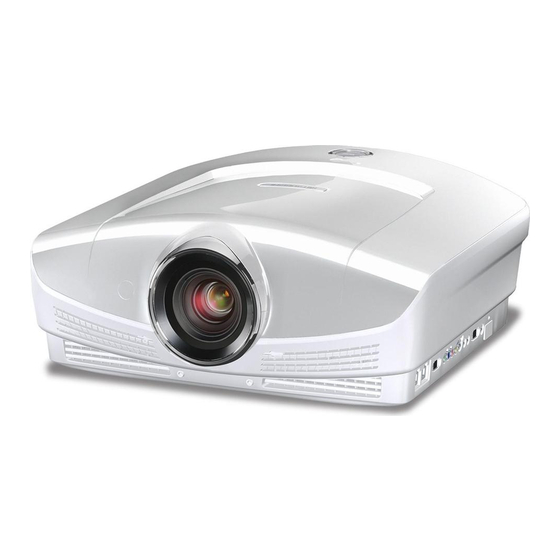
HOME THEATER PROJECTOR
MODEL
HC5/
HC5W
2013
Advertisement
Table of Contents

Related Manuals for Mitsubishi Electric HC5


Summary of Contents for Mitsubishi Electric HC5
- Page 1 "Precautions for resoldering" in this Service Manual. CAUTION Before servicing this chassis, it is important that the service person reads the “SAFETY PRECAUTIONS” and “PRODUCT SAFETY NOTICE” in this service manual. Copyright © 2013 Mitsubishi Electric Corporation All Rights Reserved.
-
Page 2: Notes For Servicing Rohs-Compliant Products
NOTES FOR SERVICING RoHS-COMPLIANT PRODUCTS Follow the notes and instructions below when servicing RoHS-compliant products. 1. For RoHS-compliant products, be sure to use RoHS-compliant service parts. 2. Check the presence of <G> marking on the rating plate to distinguish RoHS- compliant product from non-RoHS-compliant product. -
Page 3: Specifications
SPECIFICATIONS • Rated power supply : 100-240 V AC, 50/60 Hz • Video input : 1.0 Vp-p 75Ω(negative sync) • Power consumption : 4.0A • Analog RGB input : RGB: 0.7 Vp-p 75Ω(negative sync) • Display technology : 0.61 inch SXRD panel YPbPr/YCbCr: Y->... -
Page 4: Table Of Contents
CONTENTS – FILE “COVERPGE” – NOTES FOR SERVICING RoHS-COMPLIANT PRODUCTS ................SPECIFICATIONS ..............................CONTENTS ................................– FILE “DIAGNO” – DIAGNOSIS INFORMATION ..........................STATUS LED indicator ............................. SPECIFICATION OF INPUT SIGNALS IN EACH INPUT OF THE PROJECTOR ..........– FILE “EXPOSED” – TRADE MARK, REGISTERED TRADEMARK ...................... -
Page 5: Diagnosis Information
DIAGNOSIS INFORMATION STATUS LED indicator Flash (On 0.5Sec, Off 0.5Sec.) LED Indication Numbers of flash Failure Red / orange alternately PROM communication error Green fl ash Fan error Green / orange alternately Temp error Green / orange alternately PCB-MEMC error Green / orange alternately Lamp cover error (Lamp cover switch open.) Green fl... -
Page 6: Specification Of Input Signals In Each Input Of The Projector
SPECIFICATION OF INPUT SIGNALS IN EACH INPUT OF THE PROJECTOR HDMI Signal mode Resolution Horizontal frequency Vertical frequency Normal mode (H x V) (kHz) (Hz) (H x V)*1 480i60.00Hz(Double Rate) 15.75 60.00 1440x1080 480i59.94Hz(Double Rate) 15.73 59.94 1440x1080 576i50.00Hz(Double Rate) 15.63 50.00 1440x1080... - Page 7 Component Signal mode Resolution Horizontal frequency Vertical frequency Normal mode (H x V) (kHz) (Hz) (H x V)*1 480i 60.00Hz 15.75 60.00 1440x1080 480i 59.94Hz 15.73 59.94 1440x1080 576i 50.00Hz 15.63 50.00 1440x1080 480p 60.00Hz 31.50 60.00 1440x1080 480p 59.94Hz 31.47 59.94 1440x1080...
-
Page 8: Trademark, Registered Trademark
TRADEMARK, REGISTERED TRADEMARK Microsoft Windows 95/98/Me/Vista/XP are either registered trademarks or trademarks of Microsoft Corporation in the United States and/or other countries. Other brand or product names are trademarks or registered trademarks of their respective holders. PRODUCT SAFETY NOTICE Many electrical and mechanical parts in the projector have special safety related characteristics. These characteristics are often not evident from visual inspection nor can the protection afforded by them necessarily be obtained by using replacement components rated for higher voltage, etc. -
Page 9: Safety Precautions
SAFETY PRECAUTIONS North america NOTICE: Observe all cautions and safety related notes located inside the cabinet and on the chassis. Warning 1. Operation of this projector outside the cabinet or with the cover removed presents a shock hazard from the projector power supplies. -
Page 10: Precautions For Resoldering
PRECAUTIONS FOR RESOLDERING Lead-free solder is handled in a different way from eutectic solder. See below for details. How to distinguish circuit boards using lead-free solder from those using eutectic solder Circuit boards using lead-free solder A mark of Solder, Joints, PCA or LFS (for limited marking space) is printed near the board assembly number on the component side. -
Page 11: Pcb Location
PCB LOCATION Fig.1 - 4 -... - Page 12 Parts list : See page 2 of PARTS LIST Item No. Part name I/O PCB ASSY TEMP SENSOR PCB ASSY (INLET) HDMI PCB ASSY LFT PCB ASSY SCALER PCB ASSY MEMC PCB ASSY IR PCB ASSY (REAR) LAMP POWER PCB ASSY KEY SWITCH PCB ASSY LAMP COVER PCB ASSY TEMP SENSOR PCB ASSY (POWER)
-
Page 13: Exposed View
EXPOSED VIEW Chassis ASSY 1 Qx11 Fig.2-1 - 6 -... - Page 14 Parts list : See page 3 of PARTS LIST Part name Number of screw 1.Lens cap None 2.Lamp cover unit Ax2, Ex2 3.Top cover ASSY Bx1, Cx8, Dx2 4.KEY SWITCH PCB ASSY 5.Key ASSY None 6.IR PCB ASSY(Front) 7.Cover holder 8.WW Logo inlay None 9.Top cover unit...
-
Page 15: Chassis Assy 2
Chassis ASSY 2 Fig.2-2 - 8 -... - Page 16 Parts list : See page 3 of PARTS LIST Part name Number of screw 1.Power unit Ax2, Bx1 2.Power fan holder ASSY 3.Power fan None 4.Power shield plate 2 5.POWER PCB ASSY 6.Duct unit (Inlet) 7.Duct cover (Inlet) 8.Duct fan (Inlet) None 9.MEMC/scaler shield plate ASSY 10.Scaler shield plate 1...
-
Page 17: Chassis Assy 3
Chassis ASSY 3 Fig.2-3 - 10 -... - Page 18 Parts list : See page 4 of PARTS LIST Part name Number of screw 1.Bottom duct ASSY Ax6, Bx2 2.Thermostat 3.IR PCB ASSY (REAR) 4.AC inlet ASSY Ex2, Fx1 5.AC inlet 6.Optical ASSY 7.Lamp unit 8.Cooling fan (optical) 9.Optical unit 10.I/O PCB ASSY Lx4, Mx4, Nx7 11.HDMI shield plate...
-
Page 19: Disassembly
DISASSEMBLY Note : On the lead connector, the connector name Top cover ASSY isn't indicated. When disconnecting the lead connector, place labels (INDEX LABELs) bearing the reference markings (connector names) near the lead connectors and the connectors on the board to prevent wrong disconnection. After re-connecting the lead connectors, remove the labels. -
Page 20: Removal Of The Temp Sensor Pcb Assy (Power)
5. Removal of the TEMP SENSOR Power shield Lamp power plate 1 sheet PCB ASSY (POWER) Power sheet 1. Remove the Top cover ASSY according to “1. Removal of the Top cover ASSY”. LAMP POWER PCB ASSY 2. Remove the four screws (a) and Power shield plate 1 as shown in Fig. -
Page 21: Removal Of The Temp Sensor Pcb Assy (Outlet)
7. Removal of the TEMP SENSOR PCB ASSY (OUTLET) 1. Remove the Top cover ASSY according to “1. Removal Top duct ASSY cx11 of the Top cover ASSY”. 2. Remove the Power shield plate 1 according to “5. Removal of the TEMP SENSOR PCB ASSY (POWER)”. 3. -
Page 22: Removal Of The Power Fan
9. Removal of the Power fan 1. Remove the Top cover ASSY according to “1. Removal of the Top cover ASSY”. 2. Remove the Power shield plate 1 according to “5. Removal of the TEMP SENSOR PCB ASSY (POWER)”. Power unit 3. -
Page 23: Removal Of The Duct Fan (Inlet)
11. Removal of the Duct fan (Inlet) 1. Remove the Top cover ASSY according to “1. Removal of the Top cover ASSY”. 2. Remove the five screws (a) and Duct unit (Inlet) as shown in Fig. 3-5. 3. Remove the six screws (b) and Duct cover (Inlet) as shown in Fig. -
Page 24: Removal Of The Lft Pcb Assy
12. Removal of the LFT PCB ASSY Memc/Scaler shield 1. Remove the Top cover ASSY according to “1. Removal plate ASSY of the Top cover ASSY”. 2. Remove the eight screws (a) and Memc/Scaler shield plate ASSY as shown in Fig. 3-6. 3. -
Page 25: Removal Of The Lamp Unit / Optical Unit / Cooling Fan (Optical)
15. Removal of the Lamp unit / Cooling fan Optical unit / Cooling fan (optical) (optical) Plate 1. Remove the Top cover ASSY according to “1. Removal of the Top cover ASSY”. 2. Remove the Lamp power ASSY according to “6. Removal of the LAMP POWER PCB ASSY”. -
Page 26: Removal Of The Ir Pcb Assy (Rear)
16. Removal of the IR PCB ASSY (REAR) 1. Remove the Top cover ASSY according to “1. Removal of the Top cover ASSY”. 2. Remove the Power shield plate 1 according to “5. Removal of the TEMP SENSOR PCB ASSY (POWER)”. Bottom duct ASSY 3. -
Page 27: Removal Of The I/O Pcb Assy / Temp Sensor Pcb Assy (Inlet)
18. Removal of the I/O PCB ASSY / AC inlet TEMP SENSOR PCB ASSY (INLET) 1. Remove the Top cover ASSY according to “1. Removal of the Top cover ASSY”. 2. Remove the Power shield plate 1 according to “5. Removal of the TEMP SENSOR PCB ASSY (POWER)”. -
Page 28: Lead Dress
LEAD DRESS Note : The inner wires are clamped so that they do not come close to heat generating or high voltage parts. After servicingroute all wires in their original position. Note : On the lead connector, the connector name isn't indicated. When disconnecting the lead connector, place labels (INDEX LABELs) bearing the reference markings (connector names) near the lead connectors and the connectors on the board to prevent wrong disconnection. - Page 29 Connection diagram ZZ-○○○○ : Reference number of the lead connector, not the connector name on the board. *1 : Optical unit section HORIZONTAL VERTICAL ZOOM FOCUS FILTER SHIFT SHIFT MOTOR MOTOR MOTOR MOTOR MOTOR VERTICAL HORIZONTAL ZOOM FILTER FOCUS LAMP ROTARY ROTARY PI SENSOR...
- Page 30 LEAD CONNECTOR Reference number for Reference number for Page describing the Lead connector connector insertion connector insertion connection Brown DDB PCB ASSY : (6) SCALER PCB ASSY : (6) (OPTICAL UNIT) [ZZ-1] [ZZ-2] DDB PCB ASSY : (5) SCALER PCB ASSY : (10) (OPTICAL UNIT) [ZZ-3] Yellow /Yellow / Black / Orange / Red /...
- Page 31 Reference number for Reference number for Page describing the Lead connector connector insertion connector insertion connection VERTICAL ROTARY ENCODER PCB ASSY (OPTICAL UNIT) Black / Brown [ZZ-16] SCALER PCB ASSY : (6) [ZZ-15] HORIZONTAL ROTARY Red / Orange ENCODER PCB ASSY Black (OPTICAL UNIT) [ZZ-17]...
- Page 32 Reference number for Reference number for Page describing the Lead connector connector insertion connector insertion connection TEMP SENSOR PCB ASSY Black (INLET) [ZZ-30] Yellow TEMP SENSOR PCB ASSY LFT PCB ASSY : (9) (OUTLET) [ZZ-29] [ZZ-31] TEMP SENSOR PCB ASSY (POWER) Blue [ZZ-32]...
- Page 33 Reference number for Reference number for Page describing the Lead connector connector insertion connector insertion connection Black tape side Yellow tape side DDB PCB ASSY : (1) MEMC PCB ASSY : (1) (OPTICAL UNIT) [ZZ-42] [ZZ-41] power switch-3 [ZZ-44] POWER PCB ASSY : (1) [ZZ-43] power switch-4 Black...
- Page 34 Location of BAND KM L=100mm 10 bands are used. MEMC/SCALER SHIELD PLATE ASSY (TOP) POWER SWITCH I/O PCB ASSY SCALER PCB ASSY&DDB PCB ASSY - 27 -...
- Page 35 L=200mm 23 bands are used. I/O PCB ASSY THERMOSTAT LAMP POWER PCB ASSY CORE ( HDMI SHIELD PLATE ) POWER SHIELD PLATE1 - 28 -...
- Page 36 TOP DUCT ASSY MEMC/SCALER SHIELD PLATE ASSY : Run the band through two holes in the sheet metal and then wind it two times around the core. : Run the band through two square holes in the sheet metal and then wind it two times around the core. AC POWER CORE - 29 -...
- Page 37 MEMC PCB ASSY / SCALER PCB ASSY / LFT PCB ASSY ZZ-39 ZZ-41 open ZZ-42 open open open ZZ-40 Rear side ZZ-13 ZZ-3 open ZZ-15 ZZ-20 ZZ-11 ZZ-201 CN11 ZZ-200 ZZ-202 ZZ-51 ZZ-37 ZZ-29 ZZ-33 ZZ-103 open ZZ-101 ZZ-1 ZZ-27 ZZ-100 ZZ-102 ZZ-104...
- Page 38 Y-pro-LVDS1 ( Yellow tape ) [ZZ-41] - MEMC-LVDS1 ( Black tape ) [ZZ-42] Y-pro-LVDS2 ( Yellow tape ) [ZZ-39] -MEMC-LVDS2 ( Black tape ) [ZZ-40] ZZ-39 ZZ-15 ZZ-11 ZZ-201 ZZ-20 ZZ-42 ZZ-40 ZZ-202 ZZ-200 ZZ-11 ZZ-201 ZZ-200 ZZ-3 ZZ-51 ZZ-29 open ZZ-103 ZZ-1 ZZ-33...
- Page 39 POWER PCB ASSY section Reference number for Reference number for Product condition Assembly condition Part specification Assembly condition Product condition connector insertion connector insertion [ZZ-35] LEAD CONNECTOR No. 15 [ZZ-36] Tightening torque =5±0.2Kgf cm or over Green / Yellow LEAD CONNECTOR No. 3 POWER SWITCH-1 POWER SWITCH-1 [ZZ-5]...
- Page 40 Reference number for Reference number for Product condition Assembly condition Part specification Assembly condition Product condition connector insertion connector insertion DDB PCB ASSY : (3) LEAD CONNECTOR No. 20 [ZZ-48] 8 pin 6 pin POWER PCB ASSY : (4) [ZZ-46] 6 pin (2) I/O PCB ASSY-2 [ZZ-49]...
- Page 41 POWER PCB ASSY ZZ-8 ZZ-43 ZZ-54 ZZ-46 ZZ-47 ZZ-32 Clamper Reference number for Clamper No. connector insertion [ZZ-43] [ZZ-54] [ZZ-46] [ZZ-46] [ZZ-47] - 34 -...
- Page 42 LFT PCB ASSY section Reference number for Reference number for Assembly condition Product condition Connector / Lead connector connector insertion connector insertion L=720mm POWER FAN LFT PCB ASSY [Lead directly : (1) connected to [ZZ-100] the fan] L=530mm DUCT UNIT (INLET) LFT PCB ASSY [Lead directly : (2)
- Page 43 Reference number for Reference number for Assembly condition Product condition Connector / Lead connector connector insertion connector insertion TEMP SENSOR PCB ASSY LEAD CONNECTOR No. 13 (INLET) [ZZ-30] 14 pin Black 4 pin 4 pin TEMP SENSOR PCB LFT PCB ASSY ASSY : (9) (OUTLET)
- Page 44 SCALER PCB ASSY section Reference number for Reference number for Assembly condition Product condition Connector / Lead connector connector insertion connector insertion LEAD CONNECTOR No. 5 5 pin 5 pin FILTER SENSOR PCB ASSY SCALER PCB ASSY : (1) (OPTICAL UNIT) [ZZ-11] [ZZ-12] Orange / Red / Brown / Black / open...
- Page 45 Reference number for Reference number for Assembly condition Product condition Connector / Lead connector connector insertion connector insertion LEAD CONNECTOR No. 9 ZOOM PI SENSOR PCB FOCUS PI SENSOR ASSY Orange / Yellow / Green (OPTICAL UNIT) 3 pin [ZZ-21] SCALER PCB ASSY : (4) ZOOM PI SENSOR [ZZ-20]...
- Page 46 Reference number for Reference number for Assembly condition Product condition Connector / Lead connector connector insertion connector insertion LEAD CONNECTOR No. 21 Black / Red / Yellow IR PCB ASSY (REAR) [ZZ-52] Brown / Orange / Green SCALER PCB ASSY : (7) [ZZ-51] IR PCB ASSY (FRONT) [ZZ-53]...
- Page 47 (8) IRIS1 MOTOR PCB ASSY [ZZ-13] (9) KEY SWITCH PCB ASSY [ZZ-37] (10) DDB PCB ASSY [ZZ-3] [ZZ-48] [ZZ-18] DDB PCB ASSY : (5) [ZZ-4] Clamp by the BAND KM (L=200mm) (7) IR PCB ASSY (FRONT) / IR PCB ASSY (REAR) [ZZ-51] (6) HORIZONTAL ROTARY ENCODER/ VERTICAL ROTARY ENCODER [ZZ-15] (5) HORIZONTAL SHIFT MOTOR / VERTICAL SHIFT MOTOR [ZZ-202] (4) ZOOM PI SENSOR / FOCUS PI SENSOR [ZZ-20]...
- Page 48 MEMC PCB ASSY Reference number for Reference number for Connector / Lead connector Label connector insertion connector insertion LEAD CONNECTOR No. 18 41 pin : Black tape side 41 pin : Yellow tape side Y-pro PCB ASSY : (1) MEMC PCB (OPTICAL UNIT) ASSY : (1) Ypro-NDAOCI-Cabel-1...
- Page 49 I/O PCB ASSY section Reference number for Reference number for Product condition Assembly condition Connector / Lead connector Assembly condition Product condition connector insertion connector insertion LEAD CONNECTOR No. 20 DDB PCB ASSY : 8 pin 6 pin [ZZ-48] Check the lead is held by tape.
- Page 50 MEMC PCB ASSY section (1) SCALER PCB ASSY-1 [ZZ-24] (2) SCALER PCB ASSY-2 [ZZ-26] (1) HDMI PCB ASSY-1 [ZZ-23] (2) HDMI PCB ASSY-2 [ZZ-25] (2) I/O PCB ASSY-2 [ZZ-49] (1) I/O PCB ASSY-1 [ZZ-50]...
- Page 51 IR PCB ASSY (FRONT) , IR PCB ASSY (REAR) , SHIFT MOTOR, FILTER SENSOR PCB ASSY [ZZ-51] Connector Connector Connector [ZZ-52] Color Black Brown Orange [ZZ-53] Yellow IR PCB ASSY (FRONT) Green ZZ-53 IR PCB ASSY (REAR) ZZ-52 FILTER SENSOR PCB ASSY ZZ-12 [ZZ-11] [ZZ-12]...
- Page 52 OPTICAL UNIT section Reference number for Reference number for Product condition Assembly condition Assembly condition Product condition Connector / Lead connector connector insertion connector insertion LAMP POWER LAMP UNIT PCB ASSY (OPTICAL UNIT) [ZZ-301] [ZZ-300] Check the lead is held by tape. LEAD CONNECTOR No.
- Page 53 LENS section VERTICAL SHIFT MOTOR ZOOM MOTOR Bottom HORIZONTAL SHIFT MOTOR FOCUS MOTOR FILTER MOTOR FILTER MOTOR - 46 -...
- Page 54 IRIS1 MOTOR PCB ASSY ZZ-14 ZZ-13 [ZZ-14] [ZZ-13] Connector Connector Color Black Brown Orange - 47 -...
- Page 55 FILTER SENSOR PCB ASSY FILTER MOTOR ZZ-12 FILTER SENSOR PCB ASSY ZZ-11 [ZZ-11] [ZZ-12] Connector Connector Color Black Brown Orange - 48 -...
-
Page 56: Label Position
LABEL POSITION CAUTION LABEL MAIN SW LABEL CAUTION LABEL CAUTION LABEL INPUT:100-240V~ 50/60Hz <G> PC013281699 - 0 NAME LABEL CAUTION LABEL AC IN LABEL CAUTION LABEL Fig.4 - 49 -... -
Page 57: Packing
PACKING Fig.5-1 Parts list : See page 6 of PARTS LIST Item No. Part name PACKING SHEET ACCESSORY AC POWER CORD HOLD PLATE PACKING CUSHION F PACKING CUSHION R PACKING CASE LENS CAP Table 5-1 - 50 -... - Page 58 ACCESSORY 11 / 12 / 13 HC5W HC5W HC5W HC5W HC5W Fig.5-2 - 51 -...
- Page 59 Parts list : See page 6 of PARTS LIST Item No. Part name REMOTE HAND UNIT POWER CORD US POWER CORD EU POWER CORD UK BATTERY VGA CABLE D-SUB CABLE PACKING BAG LAMP REPLACEMENT TRAY LAMP REPLACEMENT TRAY SHEET PACKING BAG SAFETY MANUAL INSTRUCTION BOOK CAUTION SHEET...
-
Page 60: Replacing The Lamp
REPLACING THE LAMP This projector is equipped with a lamp to project images. This lamp is a consumable. It may burn out or its brightness may decrease during use. In such cases, replace the lamp with a new one as soon as possible. Be sure to replace the lamp with a new lamp sold separately that is exclusive to this projector. - Page 61 7. Put the handle back to the original position. To replace the lamp: Make sure that the handle is locked. 1. Turn off the main power switch and unplug the 8. Tighten up 2 screws (c) using a Phillips screwdriver (+). power cord.
- Page 62 When removing the lamp from the ceiling-mounted projector When removing the lamp from the ceiling-mounted projector, use the lamp replacement tray packed with the projector or option lamp to prevent glass fragments from scattering. Assemble the lamp replacement tray according to the procedure shown on it. 1.
-
Page 63: Maintenance
MAINTENANCE Warning: Important: If the filter is damaged or becomes extremely dirty, Never use flammable air duster or other materials when change it with a new filter. Contact your dealer for a new cleaning the air-filter. Flammable substances may ignite filter. -
Page 64: Download Of The Firmware
DOWNLOAD OF THE FIRMWARE Outline Download the firmware to the ROM of the projector by the program. Operating conditions ® ® Microsoft Windows XP/Vista shall operate correctly. (Older ® versions of Windows are not supported.) A display device supporting VGA (640 x 480) or above is re- quired. - Page 65 9. Click “Finish” to fi nish the installation. 6. In the fi le selection window, select “UpdateFW.ptp” in the (An Updater shortcut icon appears on the desktop.) data folder. 7. In the window shown below, set the COM port channel ac- cording to the PC to be used.
- Page 66 18. Click the Browse button to select the file to be updated (“Reon_******_*.brec”). (The fi le is in the HC9000Dv*** folder.) Click the Browse. 15. Select “USB” from the Target on list. 19. Click the Update Firmware button. (The data are trans- ferred and loaded.) Select the USB.
-
Page 67: Life Time Of The Consumable Parts
LIFE TIME OF THE CONSUMABLE PARTS Following are the reference of the life times of the consumable parts. • Lamp ........Max. 4,000 hours (When Lamp Mode is Normal.) • Optical unit ......Approx. 10,000 hours • Fan (outlet) ......Approx. 10,000 hours •... -
Page 68: Parts List
PARTS LIST MODEL : HC5 / HC5W Purpose of this parts list : To expedite delivery of replacement parts ordered. Please specify : 1. Model number/serial number 2. Part number and its description 3. Quantity Unless all the required information is supplied, the delivery of your order may be delayed. -
Page 69: Pcb Location
(RoHS-compliant model) - Parts listed below are all RoHS-compliant. - When servicing this model, use RoHS-compliant parts only. The parts on this page correspond to those on page 4 in the EXPOSED fi le. ITEM NO. PART NO. PART NAME DESCRIPTION PCB LOCATION 934D174O60... -
Page 70: Exposed View
PART NAME DESCRIPTION EXPOSED VIEW Chassis ASSY 1 (Fig. 2-1) 750D085O40 LENS CAP 750D085O30 LAMP COVER UNIT [HC5] 750D096O30 LAMP COVER UNIT [HC5W] - - - - - - - - - - TOP COVER ASSY 934D174O10 KEY SWITCH PCB ASSY... -
Page 71: Chassis Assy 2
(RoHS-compliant model) - Parts listed below are all RoHS-compliant. - When servicing this model, use RoHS-compliant parts only. The parts on this page correspond to those on page 8 in the EXPOSED fi le. ITEM NO. PART NO. PART NAME DESCRIPTION EXPOSED VIEW Chassis ASSY 2 (Fig. -
Page 72: Chassis Assy 3
(VER.2) 934D174O60 I/O PCB ASSY - - - - - - - - - - HDMI SHIELD PLATE 934D174O30 TEMP SENSOR PCB ASSY (INLET) 750D085O50 LENS COVER UNIT [HC5] 750D096O20 LENS COVER UNIT [HC5W] 620D363O10 FILTER [HC5] 620D363O20 FILTER [HC5W]... -
Page 73: Packing And Accessory
ACCESSORY - - - - - - - - AC POWER CORD HOLD PLATE 803D384O10 PACKING CUSHION F 803D384O20 PACKING CUSHION R 801D166O60 PACKING CASE [HC5] 801D166O70 PACKING CASE [HC5W] 750D085O40 LENS CAP ACCESSORY (Fig. 5-2) 939D331O10 REMOTE HAND UNIT... -
Page 74: Electrical Parts And Others
871D589O90 INSTRUCTION BOOK 934D175O20 AC INLET 859D310O10 LAMP JIG SHEET (LAMP REPLACEMENT TRAY) 288D079O40 COOLING FAN (OPTICAL) 801D166O60 PACKING CASE [HC5] 288D079O20 DUCT FAN UNIT (DUCT FAN (INLET)) 801D166O70 PACKING CASE [HC5W] 288D079O50 FAN UNIT (OUTLET) (FAN (OUTLET) )) ) - Page 75 Home Theater Projector MODEL HC5/HC5W Controlling the projector using a personal computer This projector can be controlled by connecting a personal computer with RS-232C terminal. PC-controllable functions: • Turning the power ON or OFF • Changing input signals • Inputting commands by pressing the buttons on the control panel and remote control •...
- Page 76 2) Control command diagram The command consists of the header, action, function code, data code, and end code. The length of the com- mand varies among the functions. Header Action Space Function code Space Data code End code 3F or 21 ASCII ? or ! 3) Control sequence...
- Page 77 5) Remote commands (Not executable in stand-by mode other than power on and off.) Some remote control operations can be achieved by the remote command codes. The remote commands have no data codes. Button’s name on Action Action Function Function Data Data Description...
- Page 78 6) Reading command diagram The projectors operating status, such as POWER-ON/OFF and the currently selected input terminal, etc. can be monitored. Action Action Function Function Data (Receive) Data (Receive) Description (ASCII) (HEX) (ASCII) (HEX) (ASCII) (HEX) Lamp Mode 0 : Normal, 30, 31 Command for 4C 50 50...
- Page 79 7) Menu setting commands (Not executable in stand-by mode.) The menu setting commands are used for the menu setting of this projector. If the personal computer sends the command without attaching the data code, the projector attaches to the received command its current setting value as the data code and send it back to the PC.
-
Page 80: Block Diagram
BLOCK DIAGRAM EWI0136009 PCB-FILTER SENSOR (85204x5pin) 85204-5(Pin) PCB-HDMI 87216-50pin 88260-2(Pin) Wire 2pin x FILTER MOTOR EWI0146009 87216-50pin Wire 4pin x ZOOM MOTOR 85204-08(Pin) 87216-18pin Wire 4pin x M FOCUS MOTOR EWI0145009 R Thermo Sensors 87216-18pin PCB-LFT EWI0123009 G Thermo Sensors ZOOM PI SENSOR(85204x3pin) 85204-06(Pin) EWI0143009... - Page 81 [MEMO]...
-
Page 82: Schematic Diagrams
NOTE SCHEMATIC DIAGRAMS (PCI Scaler) PCB-SCALER (1/19) This is a basic schematic diagram. Some sets may be subject to modify according to engineering improvement. SERVICING PRECAUTION SYMBOLS INDICATE COMPONENTS Scaler-1 IO HAVING SPECIAL CHARACTERISTICS PCI6100 IMPORTANT TO SAFETY AND PERFORMANCE. THEREFORE VO2_TE2P VO2_TE2N REPLACEMENT OF ANY SAFETY PARTS... - Page 83 (FPGA HDMI_OUT) PCB-SCALER (2/19) From HDMI H_Red_Pr[11..0] H_Red_Pr[11..0] H_Green_Pr[11..0] H_Green_Pr[11..0] H_Blue_Pb[11..0] H_Blue_Pb[11..0] U400A TEST11 U400B TEST12 R403 0R/0603 TWI_SCL_0 TEST11 LVDS_L1p/DQ1L LVDS_L8p LVDS_L13p/DQ1L LVDS_L22n TWI_SDA_0 F_RSTn TEST12 LVDS_L1n/DQ1L LVDS_L8n LVDS_L13n/DQ1L LVDS_L23p H_Blue_Pb0 F_CTL5 H_VIFLD R402 0R/0603 LVDS_L2p/DQ1L/nRESET LVDS_L9p LVDS_L14p/DQ1L LVDS_L23n H_Blue_Pb1 H_Green_Y2 LVDS_L9n...
- Page 84 (FPGA REON IN/OUT) PCB-SCALER (3/19) From Scaler TO Scaler Port-A A_RED_PR[9..0] DVODAT[29..0] A_RED_PR[9..0] DVODAT[29..0] A_BLUE_PB[9..0] A_BLUE_PB[9..0] A_GREEN_Y[9..0] A_GREEN_Y[9..0] U400C U400D A_BLUE_PB9 LR_F DVODAT2 AA13 DVODAT20 LVDS_B6p/DQ5B LVDS_B1p LVDS_B19p/DQ5B LVDS_B23n A_BLUE_PB1 DVODAT1 AB13 AA17 DVODAT13 LVDS_B7p/DQ5B LVDS_B1n LVDS_B19n/DQ5B LVDS_B25p A_BLUE_PB8 VICLK1 DVODAT4 AA14 AB17...
- Page 85 (FPGA LVDS) PCB-SCALER (4/19) U400E U400F AA21 VO2_TCLK2P LVDS_R35p/DM1R3 LVDS_R23p LVDS_R18p LVDS_R7p/DQ1R AA22 VO2_TCLK2N LVDS_R35n LVDS_R23n/DQ1R LVDS_R18n LVDS_R7n/DM1R0 VO2_TC1P LVDS_R34p LVDS_R22p/DQS1R LVDS_R17p/CRC_ERROR LVDS_R6p/DQ1R VO2_TC1N LVDS_R34n/DQS3R LVDS_R22n LVDS_R17n/INIT_DONE LVDS_R6n/nAVD/DQ1R VO2_TA1P VO2_TCLK1P LVDS_R33p LVDS_R21p/DEV_CLRn LVDS_R16p/CLKUSR LVDS_R5p VO2_TA1N VO2_TCLK1N LVDSR_33n/DQ1R LVDS_R21n/DEV_OE LVDS_R16n/nCEO LVDS_R5n/PADD23/DQ1R VO2_TB1P VO2_TD1P VO2_TD2P...
- Page 86 (FPGA DDR) PCB-SCALER (5/19) TO Exteranl DDR F_DDR_A[12..0] F_DDR_A[12..0] F_DDR2_DQ[15..0] F_DDR2_DQ[15..0] F_DDR1_DQ[15..0] F_DDR1_DQ[15..0] U400G U400H F_DDR1_DQ7 F_DDR_A2 F_DDR2_DQ2 LVDS_T32p/DQ5T LVDS_T32n LVDS_T15n/DQ5T LVDS_T15p F_DDR1_DQ4 F_DDR_A3 F_DDR2_DQ1 LVDS_T31n/DQ5T LVDS_T31p LVDS_T14n/DQ5T LVDS_T14p/PADD15 F_DDR1_DQ1 F_DDR_A6 F_DDR2_DQ3 F_DDR_CASn LVDS_T29p/DQ5T LVDS_T30n LVDS_T13n/PADD16/DQ5T LVDS_T8p F_DDR1_DQ0 F_DDR_A0 F_DDR2_DQ4 F_DDR_CSn LVDS_T29n/DQ5T LVDS_T28p...
- Page 87 (FPGA JTAG) PCB-SCALER (6/19) F3V3 F2V5 F1V8 F3V3 U801 D800 3V3_STB nCSO DCLK F1V2 R800 DATA F3V3 U400I 100K/0603 ASDO BAV70 C802 VCCD_PLL1 F3V3 HOLD 0.1uF/16V/0402 F_RSTn nCONFIG VCCD_PLLA2 VCCD_PLL3 M25P40-VMN6TPG VCCD_PLL4 S800 C800 S801 C801 4Mbit Serial Flash ROM TS-A01NHA-3-S033 0.1uF/16V/0402 TS-A01NHA-3-S033...
- Page 88 (FPGA External DDR) PCB-SCALER (7/19) F_DDR2_DQ[15..0] F_DDR1_DQ[15..0] F_DDR_A[12..0] F_DDR_A[12..0] U901A U900A F_DDR_A0 F_DDR2_DQ0 F_DDR_A0 F_DDR1_DQ0 F_DDR_A1 F_DDR2_DQ1 F_DDR_A1 F_DDR1_DQ1 F1V8 F_DDR_A2 F_DDR2_DQ2 F_DDR_A2 F_DDR1_DQ2 F1V8 F_DDR_A3 F_DDR2_DQ3 U901B U900B F_DDR_A3 F_DDR1_DQ3 F_DDR_A4 F_DDR2_DQ4 F_DDR_A4 F_DDR1_DQ4 F_DDR_A5 F_DDR2_DQ5 F_DDR_A5 F_DDR1_DQ5 F_DDR_A6 F_DDR2_DQ6 F_DDR_A6 F_DDR1_DQ6...
- Page 89 (VX-210) PCB-SCALER (8/19) U1001A U1001B EMC1005 U1001D PCI_AD[31:0] R1006 33R/0402 NC/0402 VICLK1 VOCLK PORTA VICLK1 VICLK1 VOCLK VOCLK PICLK AA20 AF10 Flash_AD0 B_VICLK R1024 PICLK B_VICLK VICLK2 PORTB AD12 Flash_AD1 RN1001 VOHS 0R/0402 NC/0402 EMC1001 VOHS VOHS AA26 AE11 Flash_AD2 POCLK1 VOVS PORTA...
- Page 90 (VX-210 DDRI_F) PCB-SCALER (9/19) U1001C DQS0 0R/0603 MCLK R1104 MDQS0 MCLK MCLK DQS1 0R/0603 /MCLK R1105 MDQS1 MCLK /MCLK DQS2 0R/0603 MCLKE R1103 MDQS2 MCLKE MCLKE DQS3 MDQS3 DQS4 /MRAS MDQS4 MRAS /MRAS DQS5 /MCAS MDQS5 MCAS /MCAS C1103 DQS6 /MWE MDQS6 /MWE...
- Page 91 (DDR_Memory) PCB-SCALER (10/19) MAD[13..0] MAD[13..0] CV2P5 CV2P5 CV2P5 CV2P5 U1201 U1202 U1203 U1204 MAD0 MDQS0 MAD0 MDQS3 MAD0 MDQS7 MAD0 MDQS4 LDQS LDQS LDQS LDQS MAD1 MDQS2 MAD1 MDQS1 MAD1 MDQS5 MAD1 MDQS6 UDQS UDQS UDQS UDQS MAD2 MAD2 MAD2 MAD2 MAD3 MDQ7...
- Page 92 U1001I (VX-210 De-coupling) PCB-SCALER (11/19) VSS1 VSS64 VSS2 VSS65 VSS3 VSS66 U1001J CV1P2 CV1P2 VSS4 VSS67 VSS5 VSS68 VDD1 VDD19 VSS6 VSS69 VDD2 VDD20 VSS7 VSS70 VDD3 VDD21 VSS8 VSS71 VDD4 VDD22 VSS9 VSS72 VDD5 VDD23 VSS10 VSS73 VDD6 VDD24 VSS11 VSS74 VDD7...
- Page 93 (Flash&Reset) PCB-SCALER (12/19) CV3P3 CV3P3 C1401 C1402 OSD Configuration Memory (32K x 8) 0.1uF/16V/0402 0.1uF/16V/0402 C1400 CV3P3 R1400 R1406 R1407 0.1uF/16V/0402 10K/0603 10K/0603 10K/0603 Flash_AD[23..0] U1400 PCI_AD[31..0] CV3P3 24LC256T-I/SN TWI ADDR = AE U1401 R1410 R1411 GPIO23 PCI_AD24 DQ15/A-1 0R/0603 0R/0603 CV3P3 Flash_AD0...
- Page 94 (Interface) PCB-SCALER (13/19) PCA9555 I2C ADDERSS 0 1 0 0 A2 A1 A0 R/W FBMA-11-160808-601 3V3_STB FBMA-11-160808-601 CV3P3 FBMA-11-160808-601 TWI ADDR = 0x42 CV3P3 For PCB-DRIVER R1516 FBMA-11-160808-601 FBMA-11-160808-601 S_CN12 D_RXDA L1500 CV3P3 D_TXDA L1501 R1513 R1511 R1512 10K/0603 NC 10K/0603 DGND NC 10K/0603 D_LOAD_RX...
- Page 95 ZOOM/FOCUS MOTOR (Motor Driver) PCB-SCALER (14/19) CV3P3 TWI ADDR = 0x4C CV5P0 1uF/16V/0603 0.1uF/16V/0402 CV3P3 C1601 CV3P3 47uF/25V/EC6.3 CV5P0 R1603 R1601 R1602 C1604 C1607 NC 10K/0603 10K/0603 10K/0603 FBMA-11-160808-301A20 C1600 0.1uF/16V/0402 FBMA-11-160808-301A20 U1601 FBMA-11-160808-301A20 U1600 FBMA-11-160808-301A20 MOTORB_IN1 FOCUS IO_00 MOTORC_IN1 MOTORC_OUT1 L1600 MOTORB_IN2...
- Page 96 (MCU) PCB-SCALER (15/19) UART SW Standby Power On 3V3_STB CTL_0 5VSB CTL_1 3V3_STB R1714 5VSB U1700 L1702 3V3_STB 3V3_STB 3V3_STB 3V3_STB 4.7K/0603 R1715 C1738 PC0403-2R2M C1737 10K/0603 270K/0603/1% C1701 /PGO 0.1uF/16V/0402 R1746 PSON C1700 R1712 PSON C1702 0.1uF/16V/0402 0.1uF/16V/0402 VOUT 4.7K/0603 U1705 U1706...
- Page 97 (MCU2) PCB-SCALER (16/19) 5VSB L1800 U1800 3V3PS FBMA-11-160808-601 R1804 0R/0603 C1801 C1802 C1800 10U/10V/1206 1U/16V/ 0.1U/16V/0402 0603 TLV70033DDCT 3V3PS 3V3PS U1801 R1808 33R/0402 DVCC DVSS R1809 33R/0402 CN1800 P1.0/ACLK XIN/P2.6 TP1800 C1803 /PWR_KEY SBWTCK P1.1 XOUT/P2.7 TP1801 0.1U/16V/0402 M_IR1 SBWTCK SBWTDIO P1.2 TEST/SBWTCK...
- Page 98 (F_POWER) PCB-SCALER (17/19) U1901 CV5P0 F2V5 1A Max F2V5 C1902 C1903 22uF/16V/EC5 C1904 AP1117E25 0.1uF/16V/0402 0.1uF/16V/0402 C1905 10uF/16V/1206 F3V3 U1900 F1V8 DDR_VREF VDDQ R1900 DDR_VREF VREF 0R/0603 AVIN PVIN VSENSE FVTT FVTT FVTT C1908 C1907 C1901 100uF/10V/EC6.3 C1900 0.1uF/16V/0402 G2996F1Uf 0.1uF/16V/0402 22uF/16V/EC5 C1906...
- Page 99 (F_POWER2) PCB-SCALER (18/19) R2010 0R/0805 F3V3 L2000 R2012 F3V3 0R/0805 0.1uF/16V/0402 PCRH124-220M R2011 + C2027 C2012 + C2021 C2004 D2000 100uF/10V/EC6.3 U2000 R2009 0.1uF/16V/0402 100uF/10V/EC6.3 0R/0805 B340A 6.19K/0603/1% BOOT CV5P0 DGND C2014 COMP R2000 0R/0603 39pF/16V/0402 R2006 VSNS C2009 2K/0603/1% R2003 0.1uF/16V/0402 C2000...
- Page 100 (Core Power) PCB-SCALER (19/19) CV5P0 0R/0603 R2702 3.9K/0603 R2701 C2704 C2706 NC/0603 U2700 NC/0603 R2703 + C2700 DGND 100uF/10V/EC6.3 2K/0603/1% 3.3 Volt Supply 2A-max D2700 R2704 R2716 B340A 6.19K/0603/1% OCSET OUTPUT C2702 C2703 0R/0805 C2705 CV3P3 OUTPUT L2700 R2713 NC/0603 0.1uF/16V/0402 1uF/ CV3P3...
- Page 101 (DDR2) PCB-MEMC (1/10) IC3000-8 IC3000-8 PNX5100_M1A PNX5100_M1A DDR2 DDR2 DDR2-A0 DDR2-D0 33R/0402 33R/0402 R3000 R3000 DDR2-A1 DDR2-D1 33R/0402 33R/0402 R3001 R3001 AB25 DDR2-A2 33R/0402 33R/0402 R3010 R3010 DDR2-D2 DDR2-A3 33R/0402 33R/0402 R3002 R3002 AC26 DDR2-D3 DDR2-A4 33R/0402 33R/0402 R3003 R3003 AC25 DDR2-D4 DDR2-A5...
- Page 102 (NAND FLASH) PCB-MEMC (2/10) +3V3 2k2/0402 2k2/0402 R3093 R3093 L3000 L3000 AMC1608Q301 AMC1608Q301 XIO-ACK C3048 C3048 C3049 C3050 C3050 100n/0402 100n/0402 100n/ 100n/0402 100n/0402 0402 IC3003 IC3003 NAND512W3A2BN6 NAND512W3A2BN6 100R/0402 100R/0402 PCI-AD24 R3085 R3085 PCI-AD24 NAND-AD(0) I/O0 100R/0402 100R/0402 PCI-AD25 R3086 R3086 PCI-AD25...
- Page 103 (LVDS TX/VDO) PCB-MEMC (3/10) CN3000 CN3000 FI-RE41S-HF FI-RE41S-HF L3001 L3001 TX2E- TX2EN TP14 TP14 TP13 TP13 TX2E+ TX2EP L3002 L3002 ATCM2012-670 ATCM2012-670 TX4E- TX4EN JTAG-RSTn SDA2 SDA2 L3003 L3003 TX2D- TX4E+ TX2DN TX4EP SCL2 SCL2 ATCM2012-670 TX2D+ TX2DP L3004 L3004 ATCM2012-670 ATCM2012-670 TX4D-...
- Page 104 (LVDS RX) PCB-MEMC (4/10) "LEFT" "RIGHT" R_2nd_RXA- L_2nd_RXA- RX2AN L_2nd_RXA+ R_2nd_RXA+ RX2AP L_2nd_RXB- R_2nd_RXB- RX2BN R_2nd_RXB+ IC3000-5 IC3000-5 L_2nd_RXB+ RX2BP R_2nd_RXC- PNX5100_M1A PNX5100_M1A L_2nd_RXC- RX2CN L_2nd_RXC+ R_2nd_RXC+ RX2CP TP24 TP24 LVDS_RX LVDS_RX TP25 TP25 R_2nd_RXCLK- L_2nd_RXCLK- AE17 RX1AP RX2CLKN L_2nd_RXCLK+ R_2nd_RXCLK+ AF17 RX1AN...
- Page 105 (XIO Output) PCB-MEMC (5/10) +3V3 IC3000-2 IC3000-2 PNX5100_M1A PNX5100_M1A PCI_XIO PCI_XIO TPF5 TPF5 PCI-AD0 PCI-CBE1 PCI-AD0 PCI-AD1 PCI-CBE2 PCI-AD1 TPF2 TPF2 TPF3 TPF3 TPF6 TPF6 TPF8 TPF8 TPF7 TPF7 PCI-FRAME FRAME TPF4 TPF4 PCI-IRDY IRDY TPF9 TPF9 PCI-TRDY TRDY TPF10 TPF10 PCI-STOP STOP...
- Page 106 (POWER) PCB-MEMC (6/10) For EMC L3025 L3025 AMC2012Q121 AMC2012Q121 PNX5130 = +1.32V AFPI10054R7NT/6A "3.5A" Clip Clip Clip Clip Clip Clip Clip Clip +1V2 R3156 R3156 AFPI10056R8NT AFPI10056R8NT C3100 C3100 L3026 L3026 6R8uH/Max 5.4A 2.2R/0603/1% 2.2R/0603/1% "DC INPUT CONNECTOR" 33uF/25V 33uF/25V IC3004 IC3004 C3054...
- Page 107 (EJTAG/GPIO/Misc) PCB-MEMC (7/10) IC3000-3 IC3000-3 IC3000-7 IC3000-7 PNX5100_M1A PNX5100_M1A LCD-I2C-EN PNX5100_M1A PNX5100_M1A GPIO GPIO AMBI AMBI AF10 TPF36 TPF36 R3171 R3171 10R/0402 10R/0402 AE24 GPIO(0) AE10 TPF37 TPF37 R3172 R3172 NC/10R/0402 NC/10R/0402 AF25 AD10 TPF33 TPF33 R3173 R3173 NC/10R/0402 NC/10R/0402 AF26 AC10 TPF34...
- Page 108 (RS232) PCB-MEMC (8/10) R3218 R3218 NC/0R/0603 NC/0R/0603 R3217 R3217 NC/0R/0603 NC/0R/0603 +3V3 C3094 C3094 100n/0402 100n/0402 IC3009 IC3009 SP3232ECA SP3232ECA J3005 J3005 2.54P-10 2.54P-10 T1out T1IN T1OUT T2out T2IN T2OUT R3221 R3221 33R/0402 33R/0402 +3V3 R1in R1OUT R1IN R3219 R3219 33R/0402 33R/0402 T1out...
- Page 109 (I2S/Reset) PCB-MEMC (9/10) +3V3 +3V3 +3V3 C3099 C3099 IC3010 IC3010 100n/0402 100n/0402 BU4228G BU4228G PNX-RSTn OUTP (RST) 10R/0402 10R/0402 R3224 R3224 IC3000-6 IC3000-6 PNX5100_M1A PNX5100_M1A AUDIO AUDIO NAND-WP 10R/0402 10R/0402 R3223 R3223 TPF50 TPF50 TPF51 TPF51 AC22 AF21 OSCLK OSCLK TPF52 TPF52 TPF53...
- Page 110 (PNX5100 SUPPLY) PCB-MEMC (10/10) +1V8 +1V2 +3V3 +3V3 +3V3 IC3000-11 IC3000-11 PNX5100_M1A PNX5100_M1A 100n/0402 100n/0402 C3101 C3101 SUPPLY_2 SUPPLY_2 +3V3 L3041 L3041 AMC1608Q300 AMC1608Q300 AB18 VDDA-1V2-DLL VDDA_3V3_LVDSIN VDDA_1V2_DLL7 C3102 C3102 100n/0402 100n/0402 AB19 VSSA_LVDSIN VSSA_DLL7 +1V2 AMC1608Q300 AMC1608Q300 +1V2 L3047 L3047 AMC1608Q300 AMC1608Q300...
- Page 111 (Image IN) PCB-I/O (1/8) Component C105 CN100 CN101 L102 FBMA-10-160808-121T HSP-251VYP 5.6pF/50V/0603 RCA_Y L106 CVBS_IN L101 FBMA-10-160808-121T 1.8uH/0603 RCA_Pb R118 L103 FBMA-10-160808-121T C100 C101 75R/0603 220pF/50V/0603 220pF/50V/0603 RCA_Pr D103 KM04025P-01P LSFI0402-240E0R05P-LF R112 R113 R114 D100 D101 D102 LSFI0402-240E0R05P-LF LSFI0402-240E0R05P-LF LSFI0402-240E0R05P-LF C106 CN103 5D2.2111B-51630.104...
- Page 112 (AD9984A) PCB-I/O (2/8) C212 C213 CV3P3 CV3P3 10uF/10V/1206 10uF/10V/1206 L201 U201 9984_V1P8 500mA Max U200 9984_PV18 L200 300mA Max VOUT 9984_V1P8 VOUT 9984_PV18 FBMA-11-160808-121A30T FBMA-11-160808-121A30T C217 C216 C219 9984_RESET 0R/0603/NC 1uF/16V/0603 C214 9984_RESET 0.1uF/16V/0402 1uF/16V/0603 100uF/10V/EC6.3 R200 G9001-180T11U G916-180T1Uf C215 R201 0.1uF/10V/0402 10K/0603...
- Page 113 (TVP5160) PCB-I/O (3/8) CV3P3 5160_AVDD_V3P3 5160_PVDD_V1P8 5160_DVDD_V1P8 CV3P3 C318 C319 C320 C321 C322 C323 C324 C325 C326 C327 C328 C329 C330 C331 C332 C300 C301 C302 C303 C304 C305 C306 C307 0.1uF/16V/0402 0.1uF/16V/0402 0.1uF/16V/0402 0.1uF/16V/0402 0.1uF/16V/0402 0.1uF/16V/0402 0.1uF/16V/0402 0.1uF/16V/0402 De-coupling capacitors for U2 CVBS_IN C308 0.1uF/16V/0402...
- Page 114 (IO CTL) PCB-I/O (4/8) 3V3_SB D404 0R/0603 R410 CV3P3 0R/0603 R411 CN400 5D1.22121-351A0.209 0.1uF/16V/0402 BAV70 C400 L400 RS232_RX RS232_RX U400 L401 RS232_TX RS232_TX R404 0R/0603 U_TX RS232_TX RS232_TX T1OUT T1IN U_TX D_LOAD_TX1 R408 D_LOAD_TX 0R/0603 T2OUT T2IN FBMA-11-100505-101 FBMA-11-100505-101 R405 U_RX RS232_RX 0R/0603...
- Page 115 (TRIGGER) PCB-I/O (5/8) PCB-POWER TRIGGER1 PWR_12V +12V/0.1A R504 FBMA-11-322513-201A40 L500 TR_CN500 EC500 TRIGGER1 Q500 47u/25V/EC6.3 3.9K/0603 MMBT3904 R502 PJ-3843AF L502 0R/1206 Q502 3.9K/0603 AO3407 +12V/0.2A C500 D500 F500 LSFI0402-240E0R05P-LF TRIGGER1 0.1uF/16V/0402 R500 1812L050 2K/0603 TRIGGER_CTL1 PCB-POWER PWR_12V TRIGGER2 R505 Q501 3.9K/0603 EC501 +12V/0.1A...
- Page 116 (PCI Scaler) PCB-I/O (6/8) Scaler-1 IO PCI600 VO2_TE2P VO2_TE2N VO2_TD2P VO2_TD2N 2nd Pixel VO2_TCLK2P VO2_TCLK2N VO2_TC2P VO2_TC2N VO2_TB2P VO2_TB2N VO2_TA2P VO2_TA2N VO2_TE1P VO2_TE1N VO2_TD1P VO2_TD1N 1st Pixel VO2_TCLK1P VO2_TCLK1N VO2_TC1P VO2_TC1N VO2_TB1P VO2_TB1N VO2_TA1P VO2_TA1N 9984_RESET TWI_SCL_0 /5160_RESET TWI_SCL_0 /5160_RESET TWI_SDA_0 /5160_PWDN B_Blue_Pb[0..9]...
- Page 117 (PCI MEMC) PCB-I/O (7/8) MEMC IO PCI700 VO2_TA2N L_2nd_RXA- VO2_TA2P L_2nd_RXA+ L_2nd_RXB- VO2_TB2N 2nd Pixel VO2_TB2P L_2nd_RXB+ L_2nd_RXC- VO2_TC2N VO2_TC2N VO2_TC2P L_2nd_RXC+ VO2_TC2P VO2_TCLK2N L_2nd_RXCLK- VO2_TCLK2N VO2_TCLK2P L_2nd_RXCLK+ VO2_TCLK2P L_2nd_RXD- VO2_TD2N VO2_TD2P L_2nd_RXD+ VO2_TE2N L_2nd_RXE- VO2_TE2P L_2nd_RXE+ VO2_TA1N L_1st_RXA- VO2_TA1P L_1st_RXA+ L_1st_RXB- VO2_TB1N...
- Page 118 (IO POWER) PCB-I/O (8/8) MEMC Power PW_CN800 ME12V L800 FBMA-11-322513-201A40 CV5P0 0R/0603 EC800 CV3P3 CV3P3 CV3P3 47u/25V R801 87506-0600L 3.9K/0603 R800 C809 C810 C811 C806 C808 10uF/1206 10uF/1206 10uF/1206 NC/0603 NC/0603 U800 R802 EC801 DGND IO Power 2K/0603/1% 100uF/10V/EC6.3 3.3 Volt Supply 2A-max D800 PW_CN801 R803...
- Page 119 (HDMI connector) PCB-HDMI (1/3) ESD SUPPRESSOR HDMIA_5V HDMIA_RX2+ HDMIA_OUT_RX2+ HDMIA_IN_RX0+ HDMIA_RX0+ HDMIA_RX2- HDMIA_OUT_RX2- 4.7K/0603 4.7K/0603 EMC50 HDMIA_5V WCM-2012-900T HDMIA_5V HDMIA_RX1+ HDMIA_OUT_RX1+ HDMIA_IN_RX0- HDMIA_RX0- HDMIA_RX1- HDMIA_OUT_RX1- 0R/0402 HDMIA1_SDA HDMIA_IN_RX1+ HDMIA_RX1+ DDC_SDA 10uF/16V/1206 HDMIA1_SCL DDC_SCL 0R/0402 HDMIA_IN_RX2- EMC51 RX2- HDMIA_IN_RX2+ WCM-2012-900T RX2+ HDMIA_IN_RX1- RX1- HDMIA_IN_RX1+...
- Page 120 (HDMI Sil9223) PCB-HDMI (2/3) CV5P0 9223_V12 600mA Max 9223_V12 CV5P0 PC0403-2R2M 9223_V12 AVCC12 FBMA-11-160808-121A30T CVCC12 0.1uF/16V/0402 18pF/50V/0603 500mA Max 9223_V33 270K/1%/0603 10K/0603 9223_V33 VOUT 0.1uF/16V/0402 APVCC12 10uF/50V/1206 FBMA-11-160808-121A30T VOUT 0.1uF/16V/0402 10uF/16V/1206 RT8008 10uF/16V/1206 AVCC12 FBMA-11-160808-121A30T 0.1uF/16V/0402 1uF/16V/0603 0.1uF/16V/0402 270K/1%/0603 0.1uF/16V/0402 10uF/16V/1206 RT9013-33PB APVCC12...
- Page 121 (Data connector) PCB-HDMI (3/3) 87216-50-BLK H_Red_Pr[0..11] H_Red_Pr[0..11] H_Red_Pr11 H_Red_Pr10 H_Red_Pr9 H_Red_Pr8 H_Red_Pr7 H_Red_Pr6 H_Red_Pr5 H_Red_Pr4 H_Red_Pr3 H_Red_Pr2 H_Red_Pr1 H_Red_Pr0 H_Green_Y[0..11] H_Green_Y[0..11] H_Green_Y11 H_Green_Y10 H_Green_Y9 H_Green_Y8 H_Green_Y7 H_Green_Y6 H_Green_Y5 H_Green_Y4 H_Green_Y3 H_Green_Y2 H_Green_Y1 H_Green_Y0 H_Blue_Pb[0..11] H_Blue_Pb[0..11] H_Blue_Pb11 H_Blue_Pb10 H_Blue_Pb9 H_Blue_Pb8 H_Blue_Pb7 H_Blue_Pb6 H_Blue_Pb5 H_Blue_Pb4...
- Page 122 PCB-LFT +3.3 +3.3_DA 0R/0603/5% 0R/0603/5% +3.3 VIA138N-256P VIA138N-256P VIA138N-256P VIA138N-256P VIA138N-256P VIA138N-256P VIA138N-256P VIA138N-256P fan lock or logic gate +3.3_DA IC12 IC12 FAN CONTROLLER VoutA FAN1_LOCK VoutB 0R/0603/5% 0R/0603/5% FAN2_LOCK FAN5_LOCK +3.3_DA VrefH 0R/0603/5% 0R/0603/5% FAN3_LOCK FAN6_LOCK +3.3 0R/0603/5% 0R/0603/5% FAN4Grop_LOCK VrefL IOVdd...