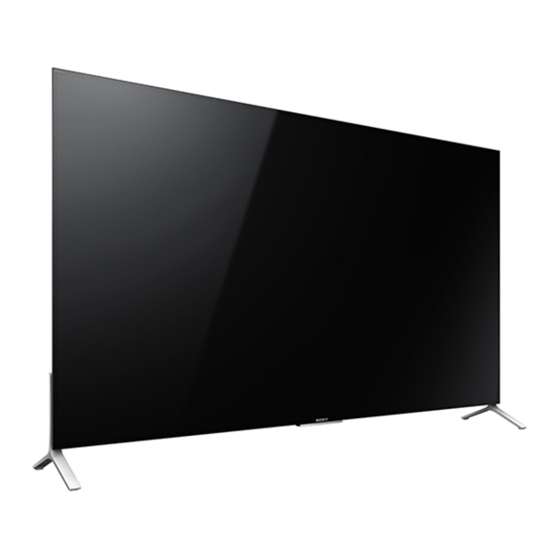
Sony Bravia KD-65X9000C Reference Manual
Hide thumbs
Also See for Bravia KD-65X9000C:
- Reference manual (60 pages) ,
- Startup manual (2 pages) ,
- Startup manual (2 pages)
Table of Contents
Advertisement
Quick Links
Advertisement
Table of Contents

Related Manuals for Sony Bravia KD-65X9000C


Summary of Contents for Sony Bravia KD-65X9000C
- Page 1 Television Reference Guide KD-65X9000C / 55X9000C...
-
Page 2: Table Of Contents
Introduction Table of Contents Thank you for choosing this Sony product. Before operating the TV, please read this manual thoroughly and retain it for future reference. Note • Before operating the TV, please read “Safety information” (page 2). • Instructions about “Installing the TV to the Wall” are included within this TV’s instructions manual. - Page 3 • Leave space around the TV set as shown below. • Do not use a poor fitting AC power outlet (mains socket). • It is strongly recommended that you use a Sony Wall-Mount Bracket in order to provide adequate air circulation.
- Page 4 Wall- immediately if any of the following problems occur. Mount Bracket may fall and cause injury or Ask your dealer or Sony service centre to have it checked by property damage. qualified service personnel.
-
Page 5: Precautions
3D video images or playing careful of unauthorised interception. We cannot be responsible stereoscopic 3D games. Sony recommends that all viewers take for any trouble as a result. regular breaks while watching 3D video images or playing stereoscopic 3D games. -
Page 6: Parts And Controls
Parts and Controls Controls and Indicators Remote Control sensor* / Light sensor* / TV Illumination LED Switch to a TV channel or input from other applications. The illumination LED lights up or blinks according to the status of the TV. •... -
Page 7: Inputs And Outputs
Inputs and Outputs LAN HDMI 輸入 1/3/4 • If the device has a DVI jack, connect it to HDMI 3 聲音輸入 HDMI IN 3 through a DVI - HDMI adaptor For HDMI 3 analogue audio connection. interface (not supplied), and connect the device’s audio out jack to HDMI 3 AUDIO ... -
Page 8: Using Remote Control
Using Remote Control Remote Control Parts Description IR (infrared) Remote Control Touchpad Remote Control 輸入選擇 Colour buttons In TV mode: Display and select the input Execute correspondent function at that time. source. 足球模式 In Text mode: Hold the current page. Turn Live Football Mode on or off (when the 電視電源... -
Page 9: Using The Touchpad Remote Control
Internet. If you do not have a network connection, you will be able to download //// (Item select/Enter) the software from the Sony support website using your PC. For details on how to upgrade, please visit 音量 +/– the Sony support website. -
Page 10: Attaching The Table-Top Stand (Alternative)
Attaching the Table-Top Stand (Alternative) You can change the Table-Top Stand from the edge to the middle position by referring to the instructions below. Middle position Note Attach the Spacers (N4), Support Belts • Two or more people are needed to carry out this installation. (N1) with screws (N2) and (N3) (supplied •... - Page 11 • It is necessary to attach both pieces of Support Belts together. • The wood screws may not be able to be used for 1.5 N∙m/1,5 N∙m some TV rack types. In this case, ask Sony dealers or {15 kgf∙cm} licensed consultants for their recommendation of suitable screw types.
- Page 12 To bundle the cables Attach stand covers G (supplied with the TV). KD-65X9000C Stand cover KD-55X9000C Attach the support Belt with a wood screw (supplied with the TV ) to the TV rack. Note • Two or more people are needed to carry out this installation.
-
Page 13: Connecting The Tv
To connect with component cables Connecting the TV Note • To select an input device connected to the TV, press 輸入選擇 . To attach the terminal cover After connecting cables, attach the terminal cover. Terminal Terminal cover (right) cover (left) To connect with an HDMI cable To AUDIO To COMPONENT... - Page 14 To connect with AV composite cables To connect MHL device MHL device Use authorized MHL CABLE with MHL logo (not supplied) The TV simultaneously charges the MHL- compatible connected device while playing photo/music/video files. You can use the TV remote control to control the connected MHL- To VIDEO OUT compatible device.
- Page 15 Picture Quality • AV composite cable • Component cable • HDMI cable • Antenna (aerial) cable 4K / HD Standard definition (SD) videos have picture signals with a High definition (HD) videos have picture signals vertical resolution of 480 (NTSC) or 576 (PAL/SECAM) lines. with a vertical resolution of 720 or 1,080 lines.
-
Page 16: Installing The Tv To The Wall
To Sony Dealers and Contractors Sufficient expertise is required for installing this product. Be sure to read this instruction manual thoroughly to do the installation work safely. Sony is not liable for any damages or injury caused by mishandling or improper installation. - Page 17 Prepare necessary items. Wall-Mount Bracket accessories Paper Template Wall-Mount Bracket U-shaped Bar Cushion Lock pin (H2) Lock plate (H1) Wall-Mount Bracket (H3) Screws for Wall-Mount Bracket (8 mm in diameter, not supplied) (4) Remove the screws from the rear of the TV before attaching the U-shaped Bar. M6 ×...
- Page 18 Attach the cushions K to the rear of the TV. Cushions K Make sure that the wall has enough space for the TV and is capable of supporting a weight of at least four times that of the TV. Refer to the following table on installing the TV to the wall. See page 27-29 (Specifications) for the TV’s weight.
- Page 19 Pull the lock pin (H2) and detach the lock plate (H1) from the Wall-Mount Bracket H. Lock plate (H1) Lock pin (H2) Wall-Mount Bracket (H3) Tape the Paper Template A to the wall and drill holes according to the numbering on the Paper Template A using an electric drill.
- Page 20 Remove the terminal covers and detach the Table-Top Stand from the TV while holding the bottom of the TV. Hang the U-shaped Bar to the Wall-Mount Bracket on the wall. Attach the lock plate (H1) (supplied with the TV). Lock plate (H1)
- Page 21 Insert the lock pin (H2) (supplied with the TV). Lock pin (H2) Connect cables with TV by tilting it forward. Note • Two people are needed to carry out this installation. • Be sure to fasten the U-shaped Bar when attaching them to the TV. Use only a flat head screwdriver to install the U-shaped Bar.
-
Page 22: Using An Optional Wall-Mount Bracket
Sufficient expertise is required for installing this product, especially to determine the strength of the wall for withstanding the TV’s weight. Be sure to entrust the attachment of this product to the wall to Sony dealers or licensed contractors and pay adequate attention to safety during the installation. Sony is not liable for any damage or injury caused by mishandling or improper installation. - Page 23 Remove the screws from the rear of the TV before attaching the U-shaped Bar. M6 × 16 Attach the U-shaped Bar J (supplied with the TV) to the rear of the TV. U-shaped Bar J 1.5 N∙m/1,5 N∙m {15 kgf∙cm} M6 ×...
- Page 24 Make sure that the wall has enough space for the TV and is capable of supporting a weight of at least four times that of the TV. Refer to the following table on installing the TV to the wall. See page 27 (Specifications) for the TV’s weight. Screen centre point Unit: mm Length for mounting...
- Page 25 Attach the Mounting Hook using the four screws supplied with the Wall-Mount Bracket. Note • Be sure to fasten the U-shaped Bar when attaching them to the TV. Use only a flat head screwdriver to install the Wall-Mount Attachment. Use of another tool might result in over torqueing the Wall-Mount Attachment and damaging the TV.
-
Page 26: Troubleshooting
TV. If the problem persists, contact your dealer or Sony service centre with the number of times the illumination LED flashes red (interval time is three seconds). Disconnect the mains lead, and inform your dealer or Sony service centre. -
Page 27: Specifications
Cannot find the required network name in network setup. Specifications Select [[Manual entry]] and press to enter network name. System Panel system LCD (Liquid Crystal Display) Panel, LED Backlight TV system Analogue: M Digital: DVB-T Colour/video system Analogue: PAL (Video only), SECAM (Video only), NTSC3.58, NTSC4.43 (Video only) Digital: Refer to the Help Guide Channel coverage... - Page 28 Power and others MHL (HDMI IN 2) Video (2D): Power requirements 4096 × 2160p (24 Hz)*, 3840 × 2160p (24, 30 Hz), Rating: Input 110 V AC, 60 Hz 1080p (30, 60 Hz), 1080/24p, 1080i (60 Hz), Screen size (measured diagonally) (Approx.) 720p (30, 60 Hz), 720/24p, 480p, 480i KD-65X9000C: 65 inches / 163.9 cm * 3840 ×...
-
Page 29: Trademark Information
Inc. Portions © UEI 2000 – 2014 • The Bluetooth® word mark and logos are owned by the Bluetooth SIG, Inc. and any use of such marks by Sony Corporation is under license. Other trademarks and trade names are those of their respective owners. - Page 32 Customer Support and Contact: ©2015 Sony Corporation Printed in Japan 4-562-129-E1(1)