Table of Contents
Advertisement
This product is eligible for the AVCCAM
3 Year Warranty Repair Program. For
details, see page 6.
Before operating this product, please read the instructions carefully and save this manual
for future use.
M1210YM0 -PS
Operating Instructions
Memory Card Camera-Recorder
AG-HMC41EJ
Model No.
ENGLISH
VQT3M75 (E)
Advertisement
Table of Contents

Related Manuals for Panasonic AG-HMC41EJ


Summary of Contents for Panasonic AG-HMC41EJ
-
Page 1: Operating Instructions
This product is eligible for the AVCCAM 3 Year Warranty Repair Program. For Operating Instructions details, see page 6. Memory Card Camera-Recorder AG-HMC41EJ Model No. Before operating this product, please read the instructions carefully and save this manual for future use. ENGLISH... -
Page 2: Read This First
Read this first! indicates safety information. WARNING: CAUTION: Do not lift the unit by its handle while the tripod is attached. When the tripod is attached, its weight will also affect the unit’s handle, possibly causing the handle to break and hurting the user. -
Page 3: Caution For Ac Mains Lead
If you lose the fuse cover the plug must not be used until a replacement cover is obtained. A replacement fuse cover can be purchased from your local Panasonic Dealer. Note: Camera-Recorder The rating plate is on the underside of the viewfinder. - Page 4 A replacement fuse cover can be purchased from your local Panasonic Dealer. Pursuant to at the directive 2004/108/EC, article 9(2) Panasonic Testing Centre Panasonic Service Europe, a division of Panasonic Marketing Europe GmbH Winsbergring 15, 22525 Hamburg, F.R. Germany...
- Page 5 Panasonic products and batteries manufactured by other companies and certified by Panasonic. (Batteries which do not support this function cannot be used). Panasonic cannot in any way guarantee the quality, performance or safety of batteries which have been manufactured by other companies and are not genuine Panasonic products.
-
Page 6: To Remove The Battery
AVCCAM 3 Year Warranty Repair Program* Thank you for purchasing this Panasonic AVCCAM device. Register as a user for this device to receive a special service warranty up to three years of free warranty repairs. Customers who register as users on the website will receive an extended warranty repair valid for up to three years. - Page 7 The SDHC logo is a trademark. The miniSD logo is a trademark. “AVCHD” and the “AVCHD” logo are trademarks of Panasonic Corporation and Sony Corporation. This product has been manufactured under license from Dolby Laboratories. Dolby and the double-D symbol are trademarks of Dolby Laboratories.
-
Page 8: Table Of Contents
Contents Read this first! ..........2 Shooting Before use Basic shooting operations ......34 Preparing for recording........34 Operating precautions ......... 10 SD Memory Card ACCESS lamp ....34 Precaution for use ........12 Shooting in auto mode ........35 SD Memory Cards compatible with Checking photos taken (REC CHECK) ... - Page 9 Specifying the time code ........ 60 Menu Setting user information ........61 Shooting photos ........... 62 Using the setup menus ........ 96 Setting the aspect ratio / recording pixels ..63 Using the menus ..........96 Setting the picture quality ........ 63 Using Quick Menu and Function Navi .....
-
Page 10: Operating Precautions
Operating precautions Do not allow any water to get into the camera- • The battery charger may make some noise when recorder when using it in the rain or snow or at you are using it, but this is normal. the beach. - Page 11 What to remember when throwing memory cards away or transferring them to others Formatting memory cards or deleting data using the functions of the unit or a computer will merely change the file management information: it will not completely erase the data on the cards. When throwing these cards away or transferring them to others, either physically destroy them or use a data deletion program for computers (commercially...
-
Page 12: Precaution For Use
Panasonic makes no guarantees for your recordings. • Please understand that Panasonic makes no guarantees for your recordings in cases where images and/ or sound were not recorded as you intended due to problems with the camera-recorder or SD/SDHC Memory Cards. -
Page 13: Sd Memory Cards Compatible With This Product
It is recommended that you use SD Memory Cards or SDHC Memory Cards of SD speed class 2 or above, or the following Panasonic SD Memory Cards (correct as of August 2009). Speed class 4 or above is required for recording in PH mode or HA mode. -
Page 14: (Sd Speed Class 4)
Precaution for use (continued) This product (SDHC-compatible device) is compatible both with SD Memory Cards and with SDHC Memory Cards. SDHC Memory Cards may be used with SDHC Memory Card-compatible devices, but cannot be used with devices that are only compatible with SD Memory Cards. (Always check the relevant product’s operating instructions when using SDHC Memory Cards with other devices.) SDHC-compatible device... -
Page 15: Compatibility Of Recorded Video
Compatibility of recorded video Recorded video cannot be used with non-AVCHD-compatible equipment. For details, please see your product’s operating instructions. Recorded video cannot be played back on non-compatible (non- AVCHD-compatible) equipment. Playback may not always be possible on all AVCHD-compatible equipment. -
Page 16: Accessories
Accessories Battery Battery chager / Wireless remote control and battery (CR2025) (For areas other than the U.K.) Eye cup Shoulder strap Handle AV cable → See “Attaching the → See “Fitting the eye → See “Attaching the handle”. (Page 26) cup”. -
Page 17: Optional Accessories
Optional accessories • Super-directional Electret Microphone AG-MC200G • XLR Microphone Adapter AG-MYA30G • Battery VW-VBG130 (7.2 V, 1320/1250 (typ./min.) mAh: compatible with supplied battery charger) VW-VBG260 (7.2 V, 2640/2500 (typ./min.) mAh: equivalent to accessory battery) VW-VBG6 (7.2 V, 5800/5400 (typ./min.) mAh: compatible with supplied battery charger) •... -
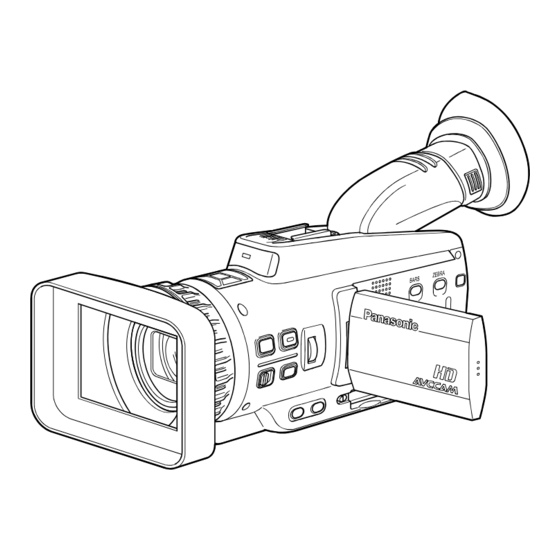
Page 18: Description Of Parts
Description of parts Right side and rear side 1 REC CHECK/PHOTO button (Page 62) 2 Zoom lever (Page 39) 3 Tally lamp (Page 28) Remote control sensor (Page 27) 4 Built-in mic (Page 54) 5 Lens hood (inner) (Page 17) 6 Lens hood (outer) (Page 17) 7 Viewfinder (Page 30) 8 Battery compartment (Page 24) -
Page 19: Left Side
Left side 1 FOCUS ring (Page 41) 21 RESET button (Page 59) 2 FOCUS ASSIST button (Page 42) 22 LCD monitor (Page 31) 3 FOCUS button (Page 41) 23 Q.MENU button (Page 97) 4 IRIS dial (Page 42) 24 START/STOP button (Page 35) 5 RING switch (Page 41) 25 Zoom buttons (Page 39) 6 WHITE BAL button (Page 43) -
Page 20: Terminals And Mounting Parts
Description of parts (continued) Terminals and mounting parts 1 Tripod hole (Page 12) 2 XLR adapter terminal (Page 83) 3 HDMI terminal (Page 85) 4 USB2.0 terminal (Pages 84, 86) 5 MIC terminal (Page 83) 6 Shoulder strap attachment point (Page 25) 7 Battery release button (Page 24) 8 A/V OUT terminal (Pages 84, 85) 9 COMPONENT OUT terminal (Page 85) -
Page 21: Remote Control
Remote control To use the remote control, set the IR REMOTE item on the OTHER FUNCTIONS menu to ON. The default setting for this item is OFF. (Page 110) 1 EXT. DISPLAY button (Page 77) 2 DATE/TIME button (Page 77) 3 PHOTO SHOT button (Page 62) Performs only the PHOTO function of the REC CHECK/PHOTO button on the camera. -
Page 22: Recharging The Battery
Recharging the battery Recharging The battery does not come ready charged when the camera is purchased. Charge the battery before use. It is recommended that you keep one extra battery as a spare. ■ Charging time and available recording time Connect the power cable to the battery (Approx.) charger. - Page 23 ■ Remaining battery capacity displays • Keep metal objects (such as necklaces and When using Panasonic-manufactured batteries hairpins) away from the battery. compatible with this product, the remaining battery Short-circuiting may occur across the capacity is displayed in hours and minutes.
-
Page 24: Power Sources
Power sources Using the battery Installation Removal Insert the battery until it clicks into place. Set the POWER switch to OFF, and check that the mode lamp is off. Remove the battery while pressing the battery release button. • Support the battery with your hand to ensure that it will not fall. -
Page 25: Adjusting The Hand Strap
Adjusting the hand strap Adjust the hand strap to suit your hand. Open the cover and adjust the length. Close the cover. • Make sure the cover is fully closed. Attaching the shoulder strap Attach the shoulder strap and use it as a precaution against dropping the camera. When the handle is not attached When the handle is attached Detaching and attaching the lens hood... -
Page 26: Attaching The Handle
Attaching the handle The handle comes in handy for taking low-angle Coin screw shots or carrying the camera-recorder around. Pull the viewfinder towards you. Slide the handle into place. Tighten the coin screw to secure the handle firmly. • If the coin screw is loose, the camera- recorder may drop off. -
Page 27: The Remote Control
The remote control Insert the battery Remote control usable range Push the catch in the direction shown by The distance between the remote control and the arrow to remove the holder. unit’s remote control sensor: Within approx. 5 m Angle: Approximately 15° upward, approximately 10°... -
Page 28: Quick Start Mode
Quick Start mode • Quick Start mode will be canceled in the following cases. The camera remains in Quick Start standby mode for more than 30 minutes Battery is low ■ Setting Battery has been removed Hold down the QUICK START button for at least POWER switch is set to OFF two seconds while the power is on. -
Page 29: Touch Panel
Touch panel This camera utilizes a touch panel LCD monitor. You can navigate setting menus and other displays Touch this to return from a function or setting by touching items in the LCD monitor directly. screen to a previous screen. Example: Using the touch panel Icons are selected when you release your finger... -
Page 30: Viewfinder
Viewfinder This camera has two viewfinders; one is a Adjust the diopter adjustment lever until miniature LCD in the viewfinder and the other is a text display in the viewfinder is clear. retractable 69 mm (2.7-inch) LCD. Use the viewfinder that best suits the application and shooting conditions. -
Page 31: Using The Lcd
Using the LCD Emphasizing outlines Set the POWER switch to ON. (Page 27) When EVF DTL is assigned to one of the USER buttons 1 to 3, you can press that button to Open the LCD monitor. emphasize the outlines of images in the viewfinder The monitor opens up to 90°. -
Page 32: Adjusting The Screen Display
Viewfinder (continued) Adjusting the screen display Touch to adjust the selected item. Set the POWER switch to ON. (Page 27) Press the MENU button. • Menu operation (Page 96) • Operations may also be performed using buttons on the remote control that correspond to those on the camera. -
Page 33: Setting The Calendar
Setting the calendar The CLOCK SET value is recorded in the contents Setting the clock (clip), and affects the sequence of playback of the thumbnails. Before carrying out recording, be sure Set the POWER switch to ON. (Page 27) to check and set CLOCK SET and TIME ZONE. Press the MENU button. -
Page 34: Basic Shooting Operations
Basic shooting operations Preparing for recording • Set the camera’s power switch to OFF. (Page 27) Performing these operations may damage the • Check that the mode lamp is off. SD Memory Card or its contents, or cause the camera to fail to operate correctly. Slide the card cover release lever, and open Opening the card door and removing the SD the SD Memory Card cover. -
Page 35: Shooting In Auto Mode
Shooting in auto mode Turn the POWER switch to ON. (Page 27) • Check that the mode lamp (CAMERA) is lighted red. Switch the AUTO/MANUAL switch to AUTO to select auto mode. • appears on the viewfinder and LCD monitor. •... -
Page 36: Checking Photos Taken (Rec Check)
Basic shooting operations (continued) Press the REC CHECK/PHOTO button while in recording standby mode. The last two seconds of video and audio will be played, and the camera returns to recording standby mode. • Only the POWER and START/STOP buttons are operable during REC CHECK. -
Page 37: Sd Memory Card Recording Times
SD Memory Card recording times Recording mode SD Memory Card capacity 512 MB Approx. 2 min Approx. 3 min Approx. 4 min Approx. 10 min 1 GB Approx. 5 min Approx. 7 min Approx. 9 min Approx. 21 min 2 GB Approx. -
Page 38: Removing Sd Memory Card
Card to the “LOCK” position to prevent recorded contents being accidentally erased from the card. Write-protect switch For details on how to use it, read the operating instructions (PDF file). The AVCCAM Viewer can also be downloaded from the following website. http://pro-av.panasonic.net/... -
Page 39: Using The Zoom Function
Using the zoom function This camera has a 12 x optical zoom function. Use Digital zoom function the zoom lever or assign zoom functions to the FOCUS ring to perform zoom operations. By setting D.ZOOM to any of the USER 1 - 3 buttons, you can use the camera’s digital zoom Zoom lever function. -
Page 40: Shooting In Progressive Mode
Shooting in progressive mode Selecting 1080/25P for the REC FORMAT option in the setting menu RECORD SETUP screen (Page 103) enables shooting in progressive mode. In 720 mode, the camera always shoots in progressive mode. 25P mode (with 1080 mode): Shoot 25 frames a second in the progressive mode. -
Page 41: Shooting In Manual Mode
Shooting in manual mode Set the unit to manual mode when manually When switching from auto mode to manual adjusting the focus, shutter speed, iris, gain and mode: white balance. • Iris and focus are set to AUTO. You can switch them to manual mode by Switching to manual mode pressing the IRIS button and FOCUS button. -
Page 42: Using Focus Assist
Shooting in manual mode (continued) Using focus assist Setting the aperture and gain Pressing the FOCUS ASSIST button enlarges IRIS dial the center of the viewfinder and LCD monitor screens, or displays a bar at the bottom center of the screen. These displays make aligning the focus easier and are particularly useful in manual focus mode. -
Page 43: Adjusting The White Balance And Black Balance
Adjusting the white balance and black White balance and black balance balance adjustments Use the AUTO/MANUAL switch to set to When white balance adjustments are performed, manual mode. (Page 41) black balance adjustments are performed at the same time. Set the shutter speed. (Page 51) White balance Place a white pattern in a location with the In order to reproduce the white accurately, adjust... - Page 44 Shooting in manual mode (continued) • White balance cannot be adjusted if the ATW (Auto Tracking White) function is working. • Black balance cannot be adjusted during recording. • White balance cannot be adjusted during auto mode. Only black balance can be adjusted. •...
-
Page 45: Shooting Techniques For Different Targets
Shooting techniques for different targets Touch auto focus (CAMERA mode • Touch auto focus will not function in the only) following conditions. Dark shooting conditions You can align focus on a subject by touching the Fast-moving subjects LCD monitor. Excessive camera shake Zoom is in use Set the POWER switch to ON. -
Page 46: Zebra Pattern
Shooting techniques for different targets (continued) Marker • Images played back by pressing the REC CHECK button cannot be inverted horizontally. If you press the ZEBRA button while zebra patterns • Operation status displays during self-portrait are displayed, a marker appears near the center recording of the display (if you have set the setup menu, No display: Cannot record (no card, etc.) -
Page 47: Pre Rec
PRE REC Record video and audio from three seconds before the time of the operation to begin recording. Operation to start Operation to stop recording recording (Time) • This function will not be as effective when the Actual recording time vibration is severe or when tracking a moving subject. -
Page 48: Backlight Compensation
Shooting techniques for different targets (continued) Backlight compensation Adjusting the headphone volume while shooting Press the USER button you have allocated to the BACKLIGHT feature when shooting subjects lit Touch the LCD monitor and display the from the back. Function Navi. BACK LIGHT appears on the screen, and appears at the bottom right of the screen. -
Page 49: Interval Recording
Interval recording • Do not remove the battery or disconnect the AC adaptor during interval recording. Doing so may damage recorded image data or result in data loss. • When INTERVAL REC is enabled, the following setting items automatically change as follows. -
Page 50: Time Stamp Function
Shooting techniques for different targets (continued) Time stamp function LAST CLIP function The date and time of recording can be recorded to The most recently recorded clip can be deleted at video images. the touch of a button by allocating the LAST CLIP Select ON in the TIME STAMP item on the settings function to any of the USER 1 - 3 buttons. -
Page 51: Adjusting The Shutter Speed
Adjusting the shutter speed Set the AUTO/MANUAL switch to MANUAL to select manual mode. (Page 41) Touch the LCD monitor and display the Function Navi. Touch to display the operation menu. Touch SHTR. • The shutter speed appears at the left of the screen. - Page 52 Adjusting the shutter speed (continued) CAMERA mode: With the 1080/50i, 1080/25P, 720/50P or 720/25P formats Standard (1/50) SYNCRO SCAN 1/12 1/25 1/50 1/2000 1/1000 1/500 1/250 1/120 1/60 PHOTO mode: Standard (1/50) 1/12 1/25 1/50 1/100 1/125 1/180 1/2000 1/1500 1/1000 1/750 1/500...
-
Page 53: Synchro Scan
Synchro scan Adjust the shutter speed to match the frequency of the television or computer monitor to minimize the horizontal noise that appears when shooting such subjects. • If SYNC is displayed in grey, it cannot be used with the current recording format. This function will only operate for preset values for each recording format. -
Page 54: Adjusting The Mic Input Level
Adjusting the mic input level You can adjust the input level for the built-in microphone or external microphones during recording. Touch the LCD monitor and display the Function Navi. Touch to display the operation menu. Touch • This does not appear when MIC LEVEL SEL in the setting menu RECORD SETUP screen is set to FIX. -
Page 55: Using Scene Files
Using scene files You can store various scene file setting items for • Simply changing the scene file in FILE different shooting conditions within a scene file. SELECT will not change the settings. Be sure By changing scene files, you can recall necessary to perform LOAD with LOAD/SAVE/INIT. -
Page 56: Initializing Scene Files
Using scene files (continued) Initializing scene files You can return current setting values to their factory default settings. Set the POWER switch to ON. (Page 27) • The CAMERA lamp lights red. Press the MENU button. Touch SCENE1 or SCENE2 for FILE SELECT in the setting menu SCENE FILE screen. -
Page 57: Clip Metadata
Clip metadata You can add the name of the videographer, If there is no information in the metadata upload shooting location, text memos and other file, consecutive five-digit numbers will be information to the video data you have recorded on applied to the clips in the order that they were the SD Memory Card. -
Page 58: Loading The Metadata
Clip metadata (continued) META DATA REC: Loading the metadata You can perform any of the following operations. If necessary, make preparations prior to undertaking the operations. META The factory setting for this mode is OFF. Loading the metadata USER CLIP NAME: •... -
Page 59: Using The Counter
The COUNT value is indicated as a four-digit number. The COUNT value is incremented each time a new clip is captured if clip metadata has been read in and TYPE2 has been selected as the recording method. The COUNT value can be reset using the following procedure. -
Page 60: Charging The Built-In Battery/Setting The Time Code
Charging the built-in battery/Setting the time code Recharging the built-in battery Specifying the time code The camera’s internal battery saves the date and Set TC PRESET so you can record a value of time. your choice as the initial setting for the time code When SET DATE AND TIME is displayed even to be used at the start of recording. -
Page 61: Setting User Information
Touch ENTER when all items have been set. Touch ENTER when all items have been set. Setting user information Setting user information allows you to store 8-digit information in the hexadecimal format. User information is automatically saved in the memory and retained after you turn off the power. Set the POWER switch to ON. -
Page 62: Shooting Photos
Shooting photos : AWB information display Set the POWER switch to ON. (Page 27) • For details on other screen displays, see “Screen • The CAMERA lamp lights red. displays”. (Page 87) Lower and hold the POWER switch. ■ • The PHOTO lamp lights red. -
Page 63: Setting The Aspect Ratio / Recording Pixels
Setting the aspect ratio / recording Setting the picture quality pixels You can select the quality for recorded pictures. You can select an aspect ratio based on the your Set the picture quality with the QUALITY item in intended print or playback method. In addition, the the setting menu PICTURE screen. -
Page 64: Maximum Number Of Photos
Shooting photos (continued) Maximum number of photos Aspect ratio Recording pixels 3520×2640 3264×2448 2560×1920 640×480 Quality 8 MB Memory 16 MB Card 32 MB capacity 64 MB 128 MB 1010 256 MB 1380 2150 512 MB 2760 4300 1 GB 5550 8660 2 GB... - Page 65 Aspect ratio 16:9 Recording pixels 4224×2376 3328×1872 2560×1440 Quality 8 MB Memory 16 MB Card 32 MB capacity 64 MB 128 MB 256 MB 512 MB 1 GB 2 GB 1480 4 GB 1070 1090 1720 1850 2900 6 GB 1030 1620 1660...
-
Page 66: Thumbnail Screen
Thumbnail screen Video data recorded in CAMERA mode is referred to as a clip, while still image data recorded in PHOTO mode is referred to as a photo. When you enter PB mode, thumbnail images of clips or photos appear on the LCD monitor (The thumbnails may take longer to display with higher quantities of clips and photos.). -
Page 67: During Photo Playback
During photo playback Press the T (+) and W (-) zoom buttons (or zoom lever) to change the display of the thumbnail screen in the following sequence. 20 photo display←→9 photo display (default)←→1 photo display 9 photo display 1 photo display 1 Photo number 12 DPOF settings mark Displays in the order recorded. -
Page 68: Thumbnail Operations
Thumbnail operations Selecting the thumbnail display method ■ ■ During clip playback During photo playback You can display the kind of clips you want to see You can display thumbnails by the date on which as thumbnails. the photos were recorded. You can also set more precisely how you want the Touch [Select date]. -
Page 69: Format Card And Card Information
Format card and card information SD Memory Cards can be formatted, and SD SD Memory Card information screen Memory Card information can be checked. Press the MENU button. Menu operation (Page 96) Touch the OTHER FUNCTIONS setting menu. Remaining capacity: Displays the remaining SD Memory Card capacity. -
Page 70: Confirming Clip Information
Thumbnail operations (continued) Confirming clip information Adding a SHOT MARK to a clip You can confirm and view information related to Adding a SHOT MARK ( ) will make it easier to clips. find the clips you are looking for. Press the T (+) zoom button (or zoom lever) while Press the T (+) zoom button (or zoom lever) displaying the thumbnail screen to display clip... -
Page 71: Playing Back Clips
Playing back clips • The operation icons disappear after about 3 Thumbnail screen seconds without operation. Touch the screen to display them again. ■ Changing the thumbnail screen display Press the T (+) and W (-) zoom buttons (or zoom lever) while thumbnails are displayed, to change the display of the thumbnail screen in the following sequence. - Page 72 Playing back clips (continued) ■ ■ Adjusting the volume Frame-playback Adjust the speaker/headphone volume during You can perform frame-by-frame playback for playback using the zoom buttons. videos. 1) Pause playback. Keep the operation icons displayed. 2) Touch and release quickly ( for reverse slow playback).
- Page 73 ■ Direct playback 1) Touch to display the direct playback bar. 2) Touch the direct playback bar. Direct playback bar • The playback images will skip in a paused state to the position that you touch. • Playback will begin when you release the playback bar.
-
Page 74: Clip Playback Settings
Clip playback settings Make settings for playback format and method. Repeat playback Set playback format Use this setting to repeatedly play back all available clips. Set format for playback. Press the MENU button. Touch [Playback format selection] in the Menu operation (Page 96) thumbnail screen. -
Page 75: Playing Back Photos
Playing back photos Thumbnail screen Touch the operation icons to operate playback. Set the POWER switch to ON. (Page 27) • The CAMERA lamp lights red. Operation icons Start/pause slideshow playback Lower the POWER switch. • The PB lamp lights green. Play back previous photo Play back next photo Touch [Video/photo selection], and select... -
Page 76: Playback By Date
Playing back photos (continued) ■ Changing slideshow settings in PB mode Playback by date 1) Touch [Slideshow]. This function selects only photos shot on a specified date for playback. Touch [Select date]. Select date Slideshow 2) Touch an interval duration. •... -
Page 77: Useful Playback Functions
Useful playback functions Adjust volume (remote control) Checking the date and time Adjust the audio output of the built-in Press the DATE/TIME button on the remote speaker and headphones during playback. control to show the date and time of shooting on Press the ZOOM/VOL buttons. -
Page 78: Deleting Clips/Photos (Videos And Photos)
Deleting clips/photos (videos and photos) • Clips and photos that are deleted cannot be Selecting clips or photos to delete restored. Be sure to check carefully before deleting them. Press the button while the clip or photo thumbnail screen is displayed. Touch SELECT. -
Page 79: Setting Protection (Videos And Photos)
Setting protection (videos and photos) You can set protection for clips and photos to Protecting photos prevent accidental deletion. (Even protected data will be deleted if you format the memory.) Press the MENU button while the photo thumbnail screen is displayed. Protecting clips Touch YES for the SCENE PROTECT item in Press the MENU button while the clip... -
Page 80: Dpof Settings (Photos)
DPOF settings (photos) ■ Information (DPOF data) such as which photos Canceling all DPOF settings to print and the number of copies to print can be Touch CANCEL ALL for the DPOF SET item in the written to the SD Memory Card. setting menu PHOTO SETUP screen. -
Page 81: Printing Photos On A Printer (Pictbridge)
Printing photos on a printer (PictBridge) • A PictBridge-compatible printer is necessary. Select the print size. (Refer to the operating instructions for the STANDARD : Standard size set for the printer printer.) 4X5 INCH : 10.2X12.7 cm (4X5 inch) size 5X7 INCH : 12.7X17.8 cm (5X7 inch) size 4X6 INCH... - Page 82 Printing photos on a printer (PictBridge) (continued) • To prevent printing errors, do not do the following while printing is in progress. Disconnect the USB connection cable Open the card cover and remove the SD Memory Card Change modes Turn the power off •...
-
Page 83: Connecting External Units
Connecting external units Headphones 3.5-mm stereo mini jack • Sound is no longer heard from the speaker when the headphones (optional) are connected. External microphone (Stereo mini jack compatible) Stereo microphone from other manufacturers External microphone (XLR Microphone Adapter (optional) compatible) Super-directional Electret Microphone AG-MC200G (optional) XLR Microphone Adapter... -
Page 84: Computer (Non-Linear Editing/File Transfer)
Connecting external units (continued) Computer (non-linear editing/file transfer) USB connection cable (optional) Computer Mini-B Ferrite core (included) • For details on the computer’s conditions and other factors, see page 86. • When connecting the camera with a PC using a USB connection cable, attach the two ferrite cores (included) to the USB connection cable, one at a position about 5 cm from the PC terminal and the other at a position about 5 cm from the camera terminal. -
Page 85: Tv/Monitor
Always take sufficient care when handling the ferrite core, as it can be easily damaged when dropped or subjected to other impact. • It is recommended that you use Panasonic’s HDMI cable. • HDMI output will take priority if both HDMI cable and VIDEO OUT cable are connected at the same time. -
Page 86: Nonlinear Editing
Nonlinear editing Non-linear editing of video data on SD Memory Perform non-linear editing on the computer. Cards can be performed by connecting the camera The contents of the SD Memory Card will via the USB connection cable to a computer for appear as a removable disk icon within My editing. -
Page 87: Screen Displays
Screen displays Regular displays For details on information display, mode check information display, and safety zone, see page 91. CAMERA mode/PHOTO mode PB mode... - Page 88 Screen displays (continued) During self-portrait recording 1 Time code display 3 Recording function display Each time you press the COUNTER button, the : Displayed when PREREC MODE is set display switches over to the following data (or to ON. (Page 47) no indication).
- Page 89 7 Remaining battery capacity display 9 Media information display When using Panasonic-manufactured batteries Displays basic information about inserted SD compatible with this product, the remaining Memory Card. battery capacity is displayed (“m” indicates : (White) Playback possible minutes). (Green) Recognizing card...
- Page 90 Screen displays (continued) 22 Face detection frame display 30 Focus control information display Displayed when the FACE FRAMING item in the setting menu SW&DISP SETUP screen is set to PRIMARY or ALL, and FACE DETECT ON is enabled. 23 Optical Image Stabilizer display 95 (Focal distance: infinity) Displayed when Optical Image Stabilizer is ON.
- Page 91 35 Auto iris control display 44 Safety zone STD: Standard auto-iris control The range of the zone is indicated by the SAFETY ZONE item (Page 108) on the Auto iris control for backlight SW&DISP SETUP screen. compensation This indicates the position which is 36 Iris display cropped to 4:3.
-
Page 92: Main Warning Displays
Screen displays (continued) Main warning displays The main warning displays appearing on the LCD monitor or viewfinder are listed below. If a warning display is not listed, check carefully the message displayed. ■ CARD FULL. ALL DATA WILL BE DELETED. The card is full. -
Page 93: Error Displays
■ Error displays REC STOPPED. The following messages are displayed when NOW WRITING. an error has occurred in the camera or the SD Video recording has been stopped. Data is now Memory Card. If the problem is not solved by being written to the card. -
Page 94: Setting The Display Items
Screen displays (continued) Setting the DISPLAY items Display the following items on the viewfinder and LCD monitor by pressing the DISP/MODE CHK button or by configuring OTHER DISPLAY of the SW&DISP SETUP screen of the setup menus. (Page 109) : Displayed x : Not displayed —... - Page 95 34 Date and time display — — 35 Auto iris control display — — 36 Iris display — — 37 DPOF display — — 38 Clip & Photo number display — — 39 Photo folder/filename display — — 40 Monitor audio level meter —...
-
Page 96: Using The Setup Menus
Using the setup menus Use the setup menus to change the settings to Touch the item you want to set. suit the scenes you are shooting or what you are recording. • To return to a previous screen, touch Touch the setting option. •... -
Page 97: Using Quick Menu And Function Navi
Using Quick Menu and Function Navi Certain items can be set quickly using Quick Menu and Function Navi. ■ Quick Menu Touch the items to set them. You can set the following items in Quick Menu. Press the Q.MENU button. •... -
Page 98: Initializing The Menu Settings
Using the setup menus (continued) ■ Function Navi Initializing the menu settings Touch the LCD monitor. You can return the setting values for each item to their factory default settings with the MENU Touch INIT item in the setting menu OTHER FUNCTION screen. -
Page 99: Setup Menu Structure
Setup menu structure CAMERA mode menu PHOTO mode menu Video recording menu Photo recording menu SCENE FILE FILE SELECT CAMERA SETUP I.EXPOSURE (Page 101) LOAD/SAVE/INIT (Page 102) DETAIL LEVEL DETAIL LEVEL CHROMA LEVEL V DETAIL LEVEL A.IRIS LEVEL DETAIL CORING SKIN TONE DTL CHROMA LEVEL PICTURE... -
Page 100: Pb Mode Menu
Setup menu structure (continued) PB mode menu Clip playback menu Photo playback menu PLAY SETUP REPEAT PLAY PHOTO SETUP SCENE PROTECT (Page 106) RESUME PLAY (Page 106) DPOF SET DELETE OPERATION CLIP PROTECT (Page 106) DELETE SW&DISP SETUP USER1 SW (Page 107) USER2 SW SW&DISP SETUP... -
Page 101: Setup Menu List
Setup menu list SCENE FILE screen Display Item Description of settings mode FILE SELECT CAMERA Selects the scene file. SCENE1 SCENE2 LOAD/SAVE/ CAMERA Loads, saves, or initializes the scene file selected with FILE SELECT. INIT LOAD: Loads the scene file settings set on this camera. SAVE: Saves changed scene file settings. -
Page 102: Camera Setup Screen
Setup menu list (continued) SCENE FILE screen (continued) Display Item Description of settings mode KNEE CAMERA To avoid overexposure, select the compression level (knee point) of the high intensity video signals received through the pickup device. AUTO: Sets the level automatically according to the received signals. LOW: Low setting (Compression starts at approx. -
Page 103: Record Setup Screen
RECORD SETUP screen Display Item Q.MENU Description of settings mode REC FORMAT CAMERA Selects the recording format. PH 1080/50i PH 1080/25P PH 720/50P PH 720/25P HA 1080/50i HG 1080/50i HE 1080/50i • You cannot change the format during interval recording. PREREC CAMERA Sets PRE RECORDING to ON or OFF. - Page 104 Setup menu list (continued) RECORD SETUP screen (continued) Display Item Q.MENU Description of settings mode MIC LEVEL CAMERA Selects whether to fix built-in mic and external mic input to a standard level. FIX: Fixes the input level. MANUAL: Enables manual input level adjustment. •...
-
Page 105: Picture Screen
PICTURE screen Display Item Q.MENU Description of settings mode PICTURE SIZE PHOTO Sets the recording pixels during photo shooting. 4:3 image aspect ratio: : 3520×2640 : 3264×2448 : 2560×1920 : 640×480 3:2 image aspect ratio: : 3984×2656 : 3264×2176 : 2592×1728 16:9 image aspect ratio: : 4224×2376 : 3328×1872... -
Page 106: Play Setup Screen
Setup menu list (continued) PLAY SETUP screen Display Item Description of settings mode REPEAT PLAY When set to ON, supported clips are played repeatedly. ON OFF RESUME PLAY PB When set to ON, playback resumes from the video position at which clip playback stopped. -
Page 107: Sw&Disp Setup Screen
SW&DISP SETUP screen Display Item Q.MENU Description of settings mode IRIS DIAL CAMERA Sets the rotation direction and the aperture control of the IRIS dial. (In PHOTO MANUAL IRIS mode) DOWN OPEN: The iris opens when the IRIS dial is turned downward. - Page 108 Setup menu list (continued) SW&DISP SETUP screen (continued) Display Item Q.MENU Description of settings mode SMOOTH CAMERA Selects the method in which zoom operations are stopped. ZOOM STOP PHOTO Smooth stop. OFF: Precise stop. CAM GAIN CAMERA Sets the maximum value for camera gain. LIMIT PHOTO CAMERA mode...
- Page 109 SW&DISP SETUP screen (continued) Display Item Q.MENU Description of settings mode VIDEO OUT CAMERA Select ON to output the information displayed on the screen together PHOTO with the signals from the VIDEO OUT jack. ON OFF • Even when set to ON, the time code display, audio level meter display, focus information display, and zoom position display are not displayed.
-
Page 110: Other Functions Screen
Setup menu list (continued) OTHER FUNCTIONS screen Display Item Description of settings mode CARD CAMERA Formats the SD Memory Card. FORMAT PHOTO YES: Formats the card. CARD STATUS Displays the SD Memory Card status. YES: Displays the card status. IR REMOTE CAMERA Sets the operations of the supplied remote control unit. - Page 111 OTHER FUNCTIONS screen (continued) Display Item Description of settings mode POWER SAVE CAMERA Selects the power-saving mode when the camera is not operated for about 5 PHOTO minutes while an SD Memory Card is inserted in CAMERA mode. The camera-recorder’s power is set to OFF. OFF: The camera-recorder’s power is not set to OFF.
- Page 112 Setup menu list (continued) OTHER FUNCTIONS screen (continued) Display Item Description of settings mode MENU INIT CAMERA Returns menu settings to factory default settings. PHOTO • Returns all items except CLOCK SET, TIME ZONE, and OPERATION TIME to factory default settings. SYSTEM INFO CAMERA Displays the version of the system in this camera.
-
Page 113: Before Calling For Service
Before calling for service Power supply There’s no power. • Make sure the battery and AC adaptor are connected properly. Check the connections again. Power shuts off for no • To prevent the battery from running down needlessly, the camera- P111 apparent reason. - Page 114 Before calling for service (continued) Recording Cannot record even • Is the write-protect switch on the SD Memory Card in the “LOCK” through the SD Memory position? The card cannot be recorded to if the switch is in the Card is inserted correctly. “LOCK”...
- Page 115 PC connection Computer does not • Check the operating environment. recognize camera when • If your computer has multiple USB terminals, please try connecting USB connection cable is the camera to a different USB terminal. connected. • Switch the camera’s power off and back on again, and reconnect the USB connection cable.
- Page 116 Before calling for service (continued) ■ Mixture of different recording formats Recording mode = PH mode Playback format = 1080/50i(25P) Recording format Recording format Recording format Recording format PH 1080/50i PH 1080/50i PH 720/50P PH 1080/50i Playback is smooth. Not played back as clip is Video pauses of different format.
-
Page 117: Updating The Firmware
Updating the firmware For the latest information on firmware updates, visit the support page at the following Web site. http://pro-av.panasonic.net/ Cleaning When cleaning, do not use benzene or thinner. • Using benzine or paint thinners may deform the camera-recorder and/or cause the surface finish to peel off. -
Page 118: Storage Precautions
Storage Precautions Before storing the camera-recorder, remove both SD Memory Cards the SD Memory Card and battery. • After ejecting an SD Memory Card from the unit, Store all of these items in a place with low humidity be absolutely sure to stow it in its own case. and relatively constant temperature. -
Page 119: Recording Format
Recording format Frame rate Recording mode 1080/25P 1080/50i 1080/50i (over 50i) 720/25P 720/50P 720/50P (over 50P) 1080/50i 1080/50i – 1080/50i 1080/50i – 1080/50i 1080/50i –... -
Page 120: How To Handle Data Recorded On Sd Memory Card
The AVCCAM Viewer can be downloaded from the following website. Both a Windows version and a Mac version are available. (Compatible OS: Windows XP/Windows Vista/Mac OS 10.5.1/ Mac OS 10.5.2) http://pro-av.panasonic.net/ ■ Concerning the handling of the camera’s metadata A special manufacturer area in the control file area under the AVCHD standard is employed for the metadata which is supported by this camera. -
Page 121: Specifications
Specifications [General] Shutter speed settings CAMERA mode: Supply voltage:DC 7.2 V Preset (when the battery is used) 50i/50P mode: DC 7.3 V (when the AC adaptor is used) Power consumption: 25P mode: 1/25, 1/50, 1/60, 1/120, 1/250, 1/500, 7.8 W (MAX) : When XLR Microphone 1/1000, 1/2000 seconds Adapter (AG-MYA30G) is Synchronous scan settings:... - Page 122 Specifications (continued) Transmission rate [Audio IN/OUT] PH mode: Approx. 21 Mbps (VBR) XLR adapter Dedicated mini jack HA mode: Approx. 17 Mbps (VBR) AUDIO output HG mode: Approx. 13 Mbps (VBR) A/V OUT terminal audio output, 2ch HE mode: Approx. 6 Mbps (VBR) Output: 316 mV, 600 Ω...
- Page 123 Memo...
- Page 124 Note for the battery symbol (bottom two symbol examples): This symbol might be used in combination with a chemical symbol. In this case it complies with the requirement set by the Directive for the chemical involved. Web Site: http://panasonic.net...