Table of Contents
Advertisement
This service information is designed for experienced repair technicians only and is not designed for use by the general public.
It does not contain warnings or cautions to advise non-technical individuals of potential dangers in attempting to service a product.
Products powered by electricity should be serviced or repaired only by experienced professional technicians. Any attempt to service or repair
the product or products dealt with in this service information by anyone else could result in serious injury or death.
SERVICE MANUAL
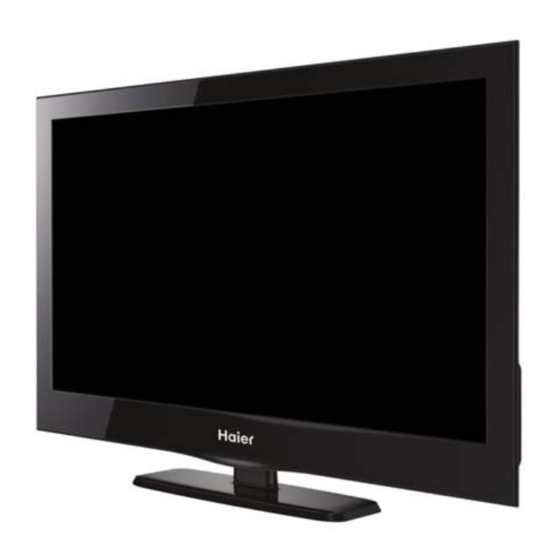
Model No. LE26B13200
WARNING
©2009 Qingdao Haier Electronics Co., Ltd.
All rights reserved. Unauthorized copying and distribution is a violation of law.
Haier Group
LE32B13200
MSD318
LED TV
Chassis
Advertisement
Table of Contents

Related Manuals for Haier MSD318


Summary of Contents for Haier MSD318
-
Page 1: Service Manual
Products powered by electricity should be serviced or repaired only by experienced professional technicians. Any attempt to service or repair the product or products dealt with in this service information by anyone else could result in serious injury or death. ©2009 Qingdao Haier Electronics Co., Ltd. All rights reserved. Unauthorized copying and distribution is a violation of law. -
Page 2: Table Of Contents
Chapter 1: General Information 1-1. Table of Contents 1. General Information................1-1. Table of Contents 1-2. General Guidelines 1-3. Important Notice 1-4. How to Read this Service Manual ..................3. Location of Controls and Components........... 3-1. Board Location 3-2. Main Board & AV Board 3-3. - Page 3 9. Trouble-shooting………….............. 9-1. Simple Check 9-2. Main Board Failure Check 9-3. Panel Failure - 02 -...
-
Page 4: General Guidelines
1-2. General Guidelines When servicing, observe the original lead dress. If a short circuit is found, replace all parts which have been overheated or damaged by the short circuit. After servicing, see to it that all the protective devices such as insulation barriers, insulation papers shields are properly installed. -
Page 5: Safety Check After Repairment
1-3-6 Safety Check after Repairment in the original positions, or whether there are the positions which are deteriorated around the serviced places serviced or not. Check the insulation between the antenna terminal or external metal and the AC cord plug blades. And be sure the safety of that. General Servicing Precautions 1. -
Page 6: Ordering Spare Parts
Electrostatically Sensitive (ES) Devices Some semiconductor (solid-state) devices can be damaged easily by static electricity. Such components commonly are called Electrostatically Sensitive (ES) Devices. Examples of typical ES devices are integrated circuits and some field-effect transistors and semiconductor "chip" components. The following techniques should be used to help reduce the ncidence of component damage caused by static by static electricity. -
Page 7: How To Read This Service Manual
1-3-8. Photo used in this manual The illustration and photos used in this Manual may not base on the final design of products, which may differ from your products in some way. 1-4. How to Read this Service Manual Using Icons: each icon is described in the table below: Note: A “note”... -
Page 8: Speci Cations
Service Manual Model No.: 2. Speci cations Model LE26B13200 LE32B13200 Screen Size 31.5 inch inch Aspect Ratio 16:9 16:9 Resolution 1366* 1366* 6.5 (GRAY TO 6.5 (GRAY TO Response Time (ms) GRAY) GRAY) +88/-88(H), +88/-88 +88/-88(H), +88/-88 Angel of View (V) Typ. -
Page 9: Location Of Controls And Components
3. Location of Controls and Components 3-1 Board Location A Board B Board Description LE32B13200 LE26B13200 A Board Main Board TB300711800M TB300711700M B Board Power Board 514C2632M04 514C3205M02 3-2 Main Board - 08 -... - Page 10 3-2-1 Function Description: Main Board Process signal which incept from exterior equipment then translate into signal that panel can display. 3-2-2 Connector defnition Main board connector Power connectors (J15 J16) Pin number Signal name Pin number Signal name high voltage POWER ON/OFF +5VSTB +12V...
- Page 11 Keypad and remote connector (12) Pin number Signal name Description LED_R LAMP RED LED_G LAMP GREEN REMOTE CONTROL POWER FOR REMOTE KEY1 KEY0 Speaker connector J11 Pin number Signal nameD escription - 10 -...
-
Page 12: Power Board
3-3. Power Board 514C2632M04 514C3205M02 3-3-1 Function Description: Supply power for Main board, Panel. 514C2632M04 514C3205M02 Pin number Signal name Pin number Signal name ON/BK POWER ON/OFF POWER ON/OFF +5VSTB +5VSTB +12V +12V +12V +12V - 11 -... -
Page 13: Lcd Panel
3-4. LCD Panel MTC315LED-C02H( CMO:V315B6-P01) LE32B13200 LE26B13200 MTC260LED-I01H( IVO: P260TWR1) - 12 -... - Page 14 3-4-1 Function Description: Display the signal. LE26B13200 Pin # Signal Name Description Remarks Not connected Not connected Not connected Ground RX0- Negative LVDS differential data input RX0+ Positive LVDS differential data input Ground RX1- Negative LVDS differential data input RX1+ Positive LVDS differential data input Ground RX2-...
- Page 15 LE32B13200 CNF1 Connector Pin Assignment Pin No. Symbol Description Note Power supply: +12V Power supply: +12V Power supply: +12V Power supply: +12V Ground Ground Ground Ground SELLVDS Select LVDS data format ODSEL Overdrive Lookup Table Selection Ground RX0- Negative transmission data of pixel 0 RX0+ Positive transmission data of pixel 0 Ground...
-
Page 16: Disassemble And Assemble
4. Disassemble and assemble 4-1 Remove the Pedestal 4-3. Remove the adhesive tape (The location of the adhesive tape as follows) LE26B13200 faces upward LE32B13200 Remove the adhesive tape indicated on the 4-2Remove the Back Cover unit. - 14 -... -
Page 17: Remove The Terminal Bracket
4-3 Remove the Terminal Bracket 4-4 Remove the power module LE26B13200 LE32B13200 four 4-5 Remove the Main board Disconnected the coupler J7 J9 J15 J5 J11 - 15 -... -
Page 18: Remove The Speaker
4-6 Remove the speaker 4-7 Remove the remote control take out the remote control board Take out the speaker 5. Installation Instructions 5-1 External Equipment Connections Accessories POWER MUTE MTS/SAP RECALL MENU SOURCE ENTER EXIT TV DISPLAY AUTO ASPECT SLEEP V-CHIP DVD/USB GOTO... - Page 19 - 17 -...
- Page 20 You can use the input terminals on TV set rear as follows. HDMI1 HDMI1 HDMI2 HEADPHONE PC AUDIO COAXIAL HDMI VIDEO EQUIPMENT with YPbPr Yellow (video) White(audio L) Red(audio R or Pr) Blue(Pb) Green(Y) VIDEO AC-INPUT 100-240V~50/60Hz COMPOSITE COMPONENT VIDEO EQUIPMENT TO VIDEO OUTPUTS TO AUDIO OUTPUTS...
- Page 21 STEPS: Be sure both the TV and computer are set to Power off. 1.Connect VGA and audio cable. 2.Connect the power cord. 3.Power on the TV, switch to PC mode. 4.Power on the PC. This sequence is very important. HDMI1 HDMI2 HEADPHONE PC AUDIO COAXIAL...
-
Page 22: Hdmi Connections
5-2 HDMI Connections When the source device supports HDM How To Connect 1. Connect the source device to HDMI port of this TV with an HDMI cable(not supplied with this product). 2. No separated audio connection is necessary. How To Use If the source device supports Auto HDMI function, the output resolution of the source device will be automatically set to 1280x720p. -
Page 23: Cable Sample
Cable sample HDMI Cable (not supplied with the product) HDMI to DVI Cable ( not supplied with the product) Analog Audio Cable (Stereo to RCA type) (not supplied with the product) Connecting Headphones You can connect a set of headphones to your set if you wish to watch a TV programmer without disturbing the other people in the room. - Page 24 Power source TO USE AC POWER SOURCE Use the AC polarized line cord provided for operation on AC. Insert the AC cord plug into a standard polarized AC outlet. NOTES: Use the attached power cord only. electrician replace the obsolete outlet. simply unplug the unit from the AC outlet and plug it back in.
-
Page 25: Operation Instructions
6. Operation Instructions Basal information 6-1 Front panel controls 6.2 Back panel controls REAR Connections VIDEO AC-INPUT 100-240V~50/60Hz COMPOSITE COMPONENT All the terminals are (from left to right): POWER SOCKET, VIDEO, AUDIO INPUT, YPbPr INPUT Note: AV and YPbPr share one audio channel. SIDE Connections HDMI1 HDMI2... -
Page 26: Setting Up Your Remote Control
6-3 Setting Up Your Remote Control 1: POWER To set the TV standby or on. 2: NUMBER KEY For direct access to program. Displays the main on-screen menu. 4: CURSOR YPbPr To move within the menu. 5: EXIT Used to exit menu. HDMI STRENGTH 6: VOL+/-... -
Page 27: Electrical Parts
7. Electrical parts 7-1. Block diagram Headphone Coaxial MSD318QT Main IC - 25 -... -
Page 28: Circuit Diagram
7-2. Circuit Diagram - 26 -... - Page 29 - 27 -...
- Page 30 - 28 -...
- Page 31 R192 10K R192 10K R193 10K R193 10K V800AA V800AA V800AA V800AA - 29 -...
- Page 32 7 5 3 1 7 5 3 1 7 5 3 1 7 5 3 1 7 5 3 1 7 5 3 1 8 6 4 2 8 6 4 2 8 6 4 2 8 6 4 2 8 6 4 2 8 6 4 2 7 5 3 1...
- Page 33 - 31 -...
- Page 34 - 32 -...
- Page 35 R145 R145 R144 R144 R143 R143 - 33 -...
- Page 36 R145 R145 R144 R144 R143 R143 - 34 -...
-
Page 37: Wiring Connection Diagram
7-3 .Wiring Connection Diagram NO.N Connection Wire(For Speaker) Connection Wire(Power For Mainboard) LVDS Wire Connection Wire(For Keyboard and Remote) Connection Wire(Control for Backlight on/off) - 35 -... -
Page 38: Tv Operation
8. TV OPERATION - 36 -... - Page 39 - 37 -...
- Page 40 Press ENTER Key To Select - 38 -...
- Page 41 Press ENTER Key To Select - 39 -...
- Page 42 - 40 -...
- Page 43 8.1 How to enter into the factory model 1. You can press "source-2-5-8-0" to go into factory setting. Presse the key "exit" to shut the factory setting. Content: 1: ADC setting: set ADC value of YUV,VGA. It can also be auto-set. Adopt 100% color bar to yuv and Checkerboard signal to vga.
- Page 44 8.2 How to update software Haier MSD318QT F/W upgrade with USB SOP Step 1: Ready for F/W Upgrade 1.1 Prepare a USB memory . from computer’s USB port! Step 2: F/W Upgrade 2.1 AC ON 2.2,Then input USB, press POWER.
-
Page 45: Trouble-Shooting
9. Trouble shooting 9-1. Simple check - 43-... -
Page 46: Main Board Failure Check
9-2. Main board failure check Service guide 1) Black creen Is power LCD normal? Check Q2,Q3 and the 2) White screen on VCC pins of J9 Check if Q31 is working Signal on J9 Check if J9 is - 44 -... - Page 47 3) Panel display abnormally connector J9 is at normal level - 45-...
- Page 48 4) No sound No sound Check the input Check if there is sound input source signal Check if the volume control is Reset at 0 level or muted volume Check the Check if there is output at J 1 1 speakers Check if the power supply Check if there is +12V input at...
- Page 49 5 TV failure TV no channel Fix the RF Check if there is RF signal input Check the power Check if there is supply circuit to +5V at PIN2 of this PIN Check if there is I2C signal at PIN6 & Check if there is PIN7 of TUNER1 intermediate...
- Page 50 6) HDMI no picture or picture abnormal If CN10 is R301,R310,R319,R317, R111,R112,R113,R114,R116, R117,R100,R105,R106,R108. R351,R338,R343 Q305 Q11,Q12 - 48 -...
- Page 51 7) PC no picture or picture abnormal - 49 -...
- Page 52 8) YPBPR, AV no picture or picture abnormal Check Y - 50 -...
- Page 53 Failure Mode Part Name Description Phenomena Failure cause White Screen B/L normal, only white screen display M a y b e c a u s e d by surge current Black Screen B/L normal, and EDS only Black screen display FIIcker Crosstalk Vcom imbalance...
- Page 54 Part Name Description Phenomena Failure cause I n c o m i n g I n s p e c t i o n Standard Bright dot dark dot in Dot Defect pannel Bladder between Polarizer and top glass Polarizer Bubble Bladder in Polarizer P a n e l o r Tine or rigidity arose...
-
Page 55: Panel Failure
9-3. Pannel failure Failure Mode Part Name Description Phenomena Failure cause Block Defect :TCP cracking or cracking Dim or L/D :TCP Sunken V B/D Vertical bar :TCP lead cracking :ACF bonding short :Awful environment and something electric enter V Dim Vertal gray line into LCD :Mis-align between TCP and... - Page 56 Failure Mode Part Name Description Phenomena Failure cause Mechanlcal When Caused Nolse turn panel,appear b y M e c h a n i c a cacophony noise of backlight unit Ripple Connectric circle Causeed by between mechanism and pannel B/L off B/L lose action *Connect badness...
- Page 57 Failure Mode Part Name Description Phenomena Failure cause Brightness B/L unit badness at bottom of LCM Light leakage brighter than normal B / L b r i g h t n e s s Sheet in B/L unit Mechanlcal or B/ asymmetric is uneven Uniformity...
- Page 58 Sincere Forever Haier Group Haier Industrial Park, No.1, Haier Road 266101, Qingdao, China http://www.haier.com Printed in China...
- Page 59 7) PC no picture or picture abnormal - 49 -...
- Page 60 8) YPBPR, AV no picture or picture abnormal Check Y - 50 -...
- Page 61 Failure Mode Part Name Description Phenomena Failure cause White Screen B/L normal, only white screen display M a y b e c a u s e d by surge current Black Screen B/L normal, and EDS only Black screen display FIIcker Crosstalk Vcom imbalance...
- Page 62 Part Name Description Phenomena Failure cause I n c o m i n g I n s p e c t i o n Standard Bright dot dark dot in Dot Defect pannel Bladder between Polarizer and top glass Polarizer Bubble Bladder in Polarizer P a n e l o r Tine or rigidity arose...
-
Page 63: Pannel Failure
9-3. Pannel failure Failure Mode Part Name Description Phenomena Failure cause Block Defect :TCP cracking or cracking Dim or L/D :TCP Sunken V B/D Vertical bar :TCP lead cracking :ACF bonding short :Awful environment and something electric enter V Dim Vertal gray line into LCD :Mis-align between TCP and... - Page 64 Failure Mode Part Name Description Phenomena Failure cause Mechanlcal When Caused Nolse turn panel,appear b y M e c h a n i c a cacophony noise of backlight unit Ripple Connectric circle Causeed by between mechanism and pannel B/L off B/L lose action *Connect badness...
- Page 65 Failure Mode Part Name Description Phenomena Failure cause Brightness B/L unit badness at bottom of LCM Light leakage brighter than normal B / L b r i g h t n e s s Sheet in B/L unit Mechanlcal or B/ asymmetric is uneven Uniformity...
- Page 66 Sincere Forever Haier Group Haier Industrial Park, No.1, Haier Road 266101, Qingdao, China http://www.haier.com Printed in China...