Table of Contents
Advertisement
Advertisement
Table of Contents

Related Manuals for Miele PT 7136 Vario


Summary of Contents for Miele PT 7136 Vario
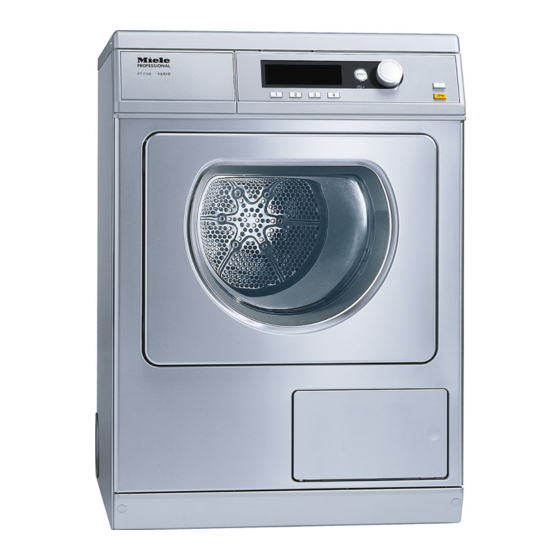
- Page 1 Operating and installation instructions for vented tumble dryer PT 7136 Vario en - GB To avoid the risk of accidents or damage to the machine, it is essential to read these instructions before it is installed, commissioned and used for the first time.
-
Page 2: Caring For The Environment
Caring for the environment Disposing of the packing Energy saving tips material To avoid unnecessarily long drying times and high consumption of energy: The transport and protective packing has been selected from materials which – Make sure that your laundry is are environmentally friendly for disposal thoroughly spun before drying. -
Page 3: Table Of Contents
Contents Caring for the environment ......... . 2 Warning and Safety instructions . - Page 4 Contents Problem solving guide ..........34 Problem solving guide .
-
Page 5: Warning And Safety Instructions
If using dry cleaning kits, do so at your own risk, and follow the instructions provided on the packaging. Any other applications may be dangerous. Miele cannot be held liable for damage resulting from incorrect or improper use or operation. - Page 6 Do not install or use a damaged tumble dryer. Do not make any alterations to the tumble dryer, unless authorised to do so by Miele. Do not connect the tumble dryer to the mains electricity supply by an extension lead. Extension leads are a fire hazard and do not...
- Page 7 Unauthorised repairs could result in unforeseen dangers for the user, for which Miele cannot accept liability. Repairs should only be undertaken by a Miele authorised service technician, otherwise any subsequent damage will not be covered by the guarantee. Ensure current is not supplied to the tumble dryer until after maintenance or repair work has been carried out.
- Page 8 Warning and Safety instructions Please observe the instructions in "Installation and connection" and "Technical data". The socket must be easily accessible after installation in order to disconnect the tumble dryer from the electricity supply. For hard-wired machines, the all-pole isolator provided on-site must be easily accessible after installation in order to disconnect the tumble dryer from the electricity supply.
- Page 9 Warning and Safety instructions Correct use The maximum load of dry laundry for this tumble dryer is 6.5 kg. See the Programme chart for the maximum recommended loads in individual programmes. Do not let anyone sit or lean on the door, as this can cause the tumble dryer to tip up.
- Page 10 Warning and Safety instructions The tumble dryer must only be used when it is connected to a suitable ducting system. The installation site must be adequately ventilated. The ducting must not be connected to – a chimney or vent flue which is in use, –...
- Page 11 Warning and Safety instructions If more than one tumble dryer is being installed using a joint ducting system, each dryer must have its own non-return flap to the joint ducting system. Otherwise the dryers could be damaged, endangering their electrical safety. The fluff filter must be cleaned regularly.
- Page 12 Warning and Safety instructions To prevent the risk of fire, the following textiles must not be dried in this tumble dryer: – items which have not been washed. – items, such as workwear, which have not been thoroughly cleaned and which are still soiled with grease, oil or other deposits (such as cosmetics, lotions etc).
- Page 13 Warning and Safety instructions Danger. This tumble dryer must not be connected to a controllable socket (e.g. a timer switch or a peak load shut-off device). If the dryer programme were to be interrupted before the end of the cooling down phase, the laundry could self-combust. To prevent the risk of fire, the following must not be tumble dried: –...
- Page 14 Warning and Safety instructions Benzine, petrol, paraffin or any easily flammable liquid must not be stored or used near the tumble dryer. Danger of fire and explosion. Do not allow air contaminated with chlorine, fluorine or other vapours containing solvents to get into the tumble dryer. Fire hazard.
- Page 15 If non-Miele parts are used, guarantee, performance and product liability claims may be invalidated. A Miele tumble dryer can be stacked on top of a Miele washing machine using the appropriate stacking kit (available as an optional accessory). Please make sure you order the correct one for the Miele tumble dryer and Miele washing machine.
-
Page 16: Operating The Tumble Dryer
Before using the machine for the first d PC/Optical interface time, ensure that it is correctly This is used by Miele service installed and connected. See technicians during servicing work for "Installation and connection". testing purposes. -
Page 17: Display
Operating the tumble dryer Display Entry menu Cottons Programme selection ... Minimum iron Settings F ... Woollens handcare 10:00 Smoothing When the tumble dryer is switched on, the entry menu (with four favourite programmes listed) appears with Programme selection highlighted. Multi-function selector Turning the multi-function selector moves the highlighting to the next option. -
Page 18: Settings Menu J
Operating the tumble dryer Programme selection menu Programme Back A selection Cottons Minimum iron Delicates You can use the multi-function selector to select any programme. The highlighting will move up or down depending on the direction the multi-function selector is turned in. -
Page 19: Operating The Tumble Dryer In Laundrette Mode
Operating the tumble dryer Operating the tumble dryer in Laundrette mode The entry menu will vary depending on the Controls setting selected. ^ The dryer is operated either with shortcut buttons D, E, F, G or the multi-function selector. WS-shortcut keys, basic Cottons Normal+ Minimum iron... -
Page 20: Notes And Tips On Laundry Care
Notes and tips on laundry care 1. Sort the laundry – New dark-coloured garments should be washed and dried separately Garment care label symbols from light-coloured garments the first few times they are washed, to avoid Drying the risk of colours running and Normal/higher temperature discolouring other garments or even the plastic components in the tumble... -
Page 21: Load The Tumble Dryer
Notes and tips on laundry care 2. Load the tumble dryer . . . e.g. Machine iron or Hand iron if the laundry needs further processing Using the tumble dryer after drying. incorrectly could cause a fire. Read See separate booklet the "Warning and Safety instructions"... -
Page 22: Short Instructions
Short instructions A Sort the laundry It is very important to read the "Notes and tips on laundry care" section before proceeding. B Load the tumble dryer To avoid damaging your laundry, when shutting the door check that no items of laundry have become trapped in the door opening. - Page 23 Short instructions C Select a programme ^ Switch the dryer on by pressing the On/Off K button. Please note: – If no further selection is made within 15 minutes, the dryer will switch off automatically. 2. Selecting a programme from the –...
- Page 24 Short instructions D Start the programme – Interruption to the power supply The Start button will flash as soon as a – Time remaining programme can be started. Programme duration/Estimated time ^ Press the Start button. remaining The Start button will now light up. When a programme is selected, the –...
- Page 25 Short instructions E Remove the laundry when the Check that all items have been programme has finished removed from the drum. Anything Anti-crease (if selected) and Finish will left in the dryer could be damaged appear in the display to indicate that by overdrying when it is next used.
-
Page 26: Selecting A Programme
Selecting a programme Selecting/changing a programme Entry menu Cottons Programme selection ... Minimum iron Settings F ... Woollens handcare 10:00 Smoothing ^ Press shortcut button D. Main menu Cottons Normal Duration 0:50 h Low temp. Timer Y Save Back A ^ By turning the multi-function selector you can then highlight the following options in the display: Programme (Cottons) or the drying level (Normal), and confirm your selection by... - Page 27 Selecting a programme Note: If you do not make a selection in the sub-menu within approx. 20 seconds, the display will revert to the main menu. – Programmes with drying levels Cottons Normal+ Drying levels from Machine iron - Extra dry ^ Use the multi-function selector to select the drying level you want, and confirm your selection.
-
Page 28: Low Temperature
Selecting a programme Low temperature Select Low temperature for all delicate or minimum iron fabrics with the r care label (e.g. acrylic garments). – Delicate fabrics are dried at a lower temperature. – The programme duration is longer. ^ Press shortcut button D Low temp. Saving a favourite programme You can programme the shortcut buttons to call up the four most frequently used drying programmes. -
Page 29: Timer
Timer Depending on the Delay start setting, you can use the Timer to set the time you wish a programme to finish or start at, or you can delay the start of the programme. To open the Timer sub-menu Cottons Normal+ Low temp. -
Page 30: Changing The Programme Sequence
Take care when in the vicinity of the appliance, * Either during the commissioning when opening the door and process or subsequently, a Miele ser- handling freshly dried laundry. vice technician can re-set the payment Danger of burning. -
Page 31: Cleaning And Care
Cleaning and care Cleaning the fluff filter The fluff filter should be checked and cleaned regularly, but always clean immediately if the Clean out airways message shows in the display. Fluff from items being dried is collected by a two-part cartridge fluff filter which needs to be removed and taken apart for cleaning. -
Page 32: Cleaning The Filter Whilst Dry
Cleaning and care Cleaning the filter whilst dry ^ Open the door. ^ Turn the catches a on the left and right covers until you hear them click. ^ Holding the catches, pull the covers ^ Use your fingers or a vacuum cleaner towards the middle and out as shown to remove the fluff from the two b, and clean them. -
Page 33: Replacing The Filter
^ Slowly turn the inner section of the A range of Miele branded cleaning filter clockwise until it you hear it and conditioning agents is available click. to order via the Miele Spare Parts Department or via the internet at www.miele-shop.com. -
Page 34: Problem Solving Guide
Problem solving guide Problem solving guide With the help of the following notes minor faults in the performance of the appliance, some of which may result from incorrect operation, can be put right without contacting the Service Department. Repair work to electrical appliances should only be carried out by a suitably qualified person in strict accordance with current local and national safety regulations. - Page 35 Problem solving guide Problem Possible cause Remedy Clean out airways Reminder to clean the – Clean the fluff filter. Clean the fluff filter. filter. To delete the fault message: Check ducting. – Confirm with OK. appears after a while.* Clean out airways There is a blockage –...
-
Page 36: An Unsatisfactory Drying Result
Problem solving guide An unsatisfactory drying result Problem Possible cause Remedy The laundry is not The load consisted of – Finish drying using the sufficiently dry. different fabrics. Hot air programme (timed drying). – Next time, select a more suitable programme (see "Programme chart"... -
Page 37: Other Problems
Problem solving guide Other problems Problem Possible cause Remedy The drying You might be asked to Please check all possible process goes on clean the ducting system causes, described below. too long or even again. switches off. The fluff filter is blocked. –... - Page 38 Problem solving guide Problem Possible cause Remedy There is a build-up of There is more than one – The dryer must only be condensed water in the tumble dryer vented connected to a joint drum. together. ducting system if a non-return flap is in place.
- Page 39 Problem solving guide Problem Possible cause Remedy The programme There is no power to – Is the dryer switched on? does not start and the dryer. – Is the door closed properly? the display is dark. – Has the fuse or circuit breaker tripped? When the power comes back on after a power cut, confirm...
-
Page 40: Changing The Lamp
^ Apply a little pressure and whilst doing so turn your wrist in the direction of the arrow to open the cover. The cover will open downwards. The temperature resistant lamp should only be ordered from your Miele dealer or the Miele Spare Parts Department. -
Page 41: After Sales Service
– the Miele Service Department (see back cover for contact details). Optional accessories for this dryer are available from your Miele Dealer or from When contacting the your Dealer or the the Miele Spare Parts Department. Service Department, please quote the... -
Page 42: Installation And Connection
Installation and connection View from the front a Vent ducting h Fixing bracket (for installing on a concrete plinth) b Mains connection cable c Control panel d Door e Access panel to fluff filter f Four height adjustable screw feet g Plinth... -
Page 43: Side View
Miele washing machine in a washer-dryer stack. A stacking kit is b Steel plinth base (optional required which can be purchased from accessory, available open or closed) Miele. The stacking kit must be fitted by a Miele authorised service technician. -
Page 44: Installing The Tumble Dryer
Installation and connection Installing the tumble dryer Levelling the machine Make sure the dryer door can be opened without hindrance after installation. Transporting the dryer to its installation site The machine must be perfectly level to ensure safe and proper operation. When moving the dryer hold it by the lid where it protrudes to the rear. -
Page 45: Securing The Tumble Dryer Against Slippage
(optional accessory). the machine and the floor. It must This must be connected and not be blocked by deep pile programmed by a Miele Service carpets, plinths, etc, which would technician. prevent a sufficient intake of cold air. Coins/tokens must be removed from... -
Page 46: Electrical Connection
THIS MACHINE MUST BE a 30 mA residual current device (RCD). EARTHED An electrical safety test must be carried out after installation and after any ser- vice work. The mains connection cable may only be replaced by an original Miele spare part. -
Page 47: Single Phase Ac 230 V - Country Variant
Installation and connection Single phase AC 230 V - country variant This device is intended for connection to a power supply system where the maximum value of external phase neutral loop impedance Z 0.39 Ohms at the point of distributor supply connection is not exceeded. -
Page 48: Installation - Extraction Ducting
Installation - extraction ducting General Avoid: – very long ducting systems. Before operating the tumble dryer, a suitable ducting system – too many tight bends or corners. must be installed to carry the moist Otherwise the drying result will be less air from the dryer to the outside. -
Page 49: To Calculate The Total Duct Length
Installation - extraction ducting To calculate the total duct 4. Refer to Table II for the appropriate duct diameter required. length Table I Friction against the inner walls of the vent ducting will slow down the Component Additional duct expelled air as it passes through the length ducting. -
Page 50: Calculation Example
Installation - extraction ducting Installation to the rear, left or Calculation example right hand side of the machine To the rear The connection is opened at the factory. ^ Fit one of the venting systems described on the following pages. To the left or right side of the machine. -
Page 51: Venting System With Plastic Piping
100 mm, an adapter is necessary (e.g. 100 to 125 mm) to connect the pipe to the dryer. 1. Wall vent kit (separate fitting instructions are supplied with the Miele wall vent kit) 2. Adpater 3. Plastic piping, diameter DN 100... -
Page 52: Venting System With Flexible Ducting
(* optional accessories) 1. Window vent kit (fitted in a "plexiglass" pane) (separate fitting instructions are supplied with the Miele window vent kit) 2. Adapter for flexible ducting hose ^ The ducting (2) is connected to adapter (1) which is fitted into the... - Page 53 Installation - extraction ducting Connection to an exhaust flue 1. Pipe with connection piece (= supplied with wall vent kit) 2. Adapter for flexible ducting hose 3. Exhaust flue insulated against damp The exhaust air must not be vented into a chimney or vent flue which is in use, nor should it be connnected to ducting which ventilates rooms with fireplaces.
-
Page 54: Main Venting Duct
1 Connection to the main venting duct Dryers for the pipe diameter 2 Miele non-return flap* from Table II 3 Additional Miele adapter* 4 Miele vent hose, very flexible* 1.25 ^ Push the non-return flap (2) completely into the adapter (3). -
Page 55: Technical Data
Technical data Height 850 mm Width 595 mm Depth 710 mm Depth with door open 1188 mm Weight 57.5 kg Drum volume 130 l Maximum capacity 6.5 kg dry weight Length of connection cable 1600 mm Voltage Connected load Fuse rating See data plate Lamp wattage Test certificates awarded... - Page 56 Alteration rights reserved/4113 M.-Nr. 09 755 980 / 00...