Table of Contents
Advertisement
SPLIT TYPE AIR CONDITIONER
INDOOR UNIT/OUTDOOR UNIT
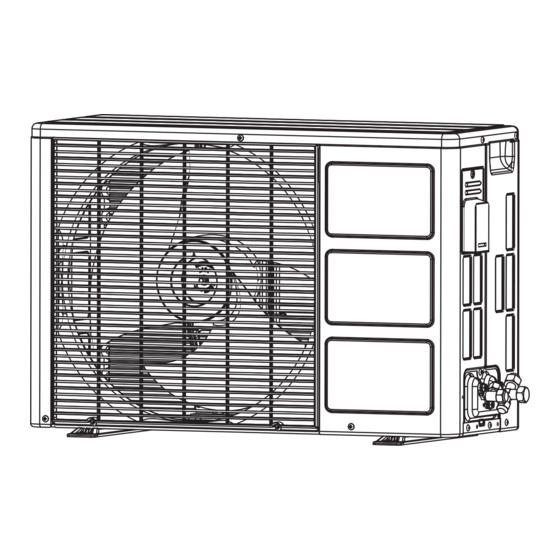
OUTDOOR UNIT
RAC-S10CET
RAC-S13CET
Instruction manual
To obtain the best performance, please read this instruction manual completely.
คู ่ ม ื อ การใช้ ง าน
เพื ่ อ ได้ ร ั บ การทํ า งานที ่ ด ี ท ี ่ ส ุ ด โปรดอ่ า นคู ่ ม ื อ อย่ า งละเอี ย ด
MODEL
RAS-S10CET / RAC-S10CET
RAS-S13CET / RAC-S13CET
INDOOR UNIT
RAS-S10CET
RAS-S13CET
– 1 –
Page 1~22
หน้ า
23-44
Advertisement
Table of Contents

Related Manuals for Hitachi RAS-S10CET


Summary of Contents for Hitachi RAS-S10CET
-
Page 1: Outdoor Unit
SPLIT TYPE AIR CONDITIONER INDOOR UNIT/OUTDOOR UNIT MODEL RAS-S10CET / RAC-S10CET RAS-S13CET / RAC-S13CET OUTDOOR UNIT INDOOR UNIT RAS-S10CET RAC-S10CET RAS-S13CET RAC-S13CET Instruction manual Page 1~22 To obtain the best performance, please read this instruction manual completely. คู ่ ม ื อ การใช้ ง าน... -
Page 2: Safety Precaution
SAFETY PRECAUTION Please read the “Safety Precaution” carefully before operating the unit to ensure correct usage of the unit. ● Pay special attention to signs of “ Warning” and “ Caution”. The “Warning” section contains matters which, ● if not observed strictly, may cause death or serious injury. The “Caution” section contains matters which may result in serious consequences if not observed properly. - Page 3 PRECAUTIONS DURING OPERATION The product shall be operated under the manufacturer specifi cation and ● not for any other intended use. Do not attempt to operate the unit with wet hands, this could cause fatal ● accident. Do not direct the cool air coming out from the air-conditioner panel to face ●...
-
Page 4: Names And Functions Of Each Part
Air outlet Drain pipe Condensed water drain to outside. RAC-S13CET Connecting cord and insulation pipe for piping Air inlet (Back, Left side) Air outlet MODEL NAME AND DIMENSIONS MODEL WIDTH (mm) HEIGHT (mm) DEPTH (mm) RAS-S10CET/RAS-S13CET RAC-S10CET RAC-S13CET – 4 –... - Page 5 INDOOR UNIT INDICATORS FILTER LAMP When the device is operated for a total of about 200 hours, the FILTER lamp lights to indicate that it is time to clean the fi lter. The lamp goes out when the “ (AUTO SWING)” button is pressed while the device is on “STANDBY MODE”.
-
Page 6: Names And Functions Of Remote Control Unit
NAMES AND FUNCTIONS OF REMOTE CONTROL UNIT REMOTE CONTROLLER This controls the operation of the indoor unit. Signal range to reach indoor unit is about 7 meters. If inverter lamp is used, the range of control may be shorter. This unit can be fi xed on a wall using the fi xture provided. Before fi xing it, make sure the indoor unit can be controlled from the remote controller. -
Page 7: Cooling Operation
COOLING OPERATION Use the device for cooling when the outdoor temperature is 21 ~ 43°C. If indoors humidity is very high (over 80%), some dew may form on the air outlet grille of the indoor unit. Press the button so that the display indicates (COOL). -
Page 8: Dehumidifying Operation
DEHUMIDIFYING OPERATION Use the device for dehumidifying when the room temperature is over 16°C. When it is under 15°C, the dehumidifying function will not work. Press the button. Dehumidifying operation starts with a beep. The FAN SPEED is set at LOW automatically. The FAN SPEED button does not work. -
Page 9: Circulation Operation
CIRCULATION OPERATION Press the button so that the display indicates (CIRCULATE). Circulating operation starts with a beep. Press the FAN SPEED button and select the desired FAN SPEED (the display indicates your choice). Press the temperature control button to set to the desired temperature. - Page 10 ONE-TOUCH POWERFUL Press the button. Operation start with a signal received sound “beep”. ● Unit will be forced operate in (COOL) with SUPER COOL ● fan speed for 20 minutes. Indicator appear during this period while temperature and fan speed setting display remain unchanged.
-
Page 11: Operation
HOW TO SET THE SLEEP MODE Press the button, and the display changes as shown below. Mode Indication 1 hour 2 hours 3 hours 7 hours Sleep timer Sleep timer off Sleep Timer: The device will continue working for the designated number of hours and then turn off. -
Page 12: Off Time Setting
HOW TO SET THE TIMER ■ ON Timer and OFF Timer are available. ■ Operation stop at setting time OFF Timer Reservation OFF TIME setting ● Select the OFF TIME by pressing the (OFF TIMER) Button. ● Setting time will change according to the below sequence when you press the button. -
Page 13: Air Flow Louvers Adjustments
AIR FLOW LOUVERS ADJUSTMENTS Adjustment of the conditioned air in the upward and downward directions. The horizontal air defl ector is automatically set to the proper angle suitable for each operation. The defl ector can be swung up and down continuously and also set to the desired angle using the “... -
Page 14: How To Exchange The Batteries In The Remote Controller
HOW TO EXCHANGE THE BATTERIES IN THE REMOTE CONTROLLER When using the remote control, if there is no response from the air conditioner unit and or the remote control has fading and dim displays, the batteries in the remote control device need to be removed and replaced with new ones Remove the cover as shown in the fi... -
Page 15: Suitable Room Temperature
THE IDEAL WAYS OF OPERATION Suitable Room Temperature Install curtain or blinds Warning It is possible to reduce heat Freezing temperature entering the is bad for health and a room through waste of electric power. windows. Ventilation Effective Usage Of Timer At night, please use the “OFF or ON timer Caution operation mode”, together with your wake up... - Page 16 FOR USER’S INFORMATION The Air Conditioner And The Heat Source In The Room Caution If the amount of heat in the room is above the cooling capability of the air conditioner (for example: more people entering the room, using heating equipments and etc.), the preset room temperature cannot be achieved.
-
Page 17: Attaching The Air Purifying Filters
ATTACHING THE AIR PURIFYING FILTERS CAUTION Cleaning and maintenance must be carried out when fi lter lamp lights. Before cleaning, stop operation and switch off the power supply. Open the front panel ● Pull up the front panel by holding it at both sides with both hands. -
Page 18: Maintenance
MAINTENANCE CAUTION Cleaning and maintenance must be carried out when fi lter lamp lights. Before cleaning, stop operation and switch off the power supply. PRE-FILTER Clean the Pre-fi lter, as it removes dust inside the room. In case the Pre-fi lter is full of dust, the air fl... - Page 19 CLEANING OF FRONT PANEL ● Remove the front panel and wash with clean water. Wash it with a soft sponge. After using neutral detergent, wash thoroughly with clean water. When front panel is not removed, wipe it with a ● soft dry cloth.
- Page 20 CAUTION Please use earth line. ● Do not place the earth line near water or gas pipes, lightning-conductor, or the earth line of telephone. Improper installation of earth line may cause electric shock. A circuit breaker should be installed depending on the mounting site of the unit. Without a circuit ●...
- Page 21 AFTER SALE SERVICE AND WARRANTY WHEN ASKING FOR SERVICE, CHECK THE FOLLOWING POINTS CONDITION CHECK THE FOLLOWING POINTS Is the fuse all right? ● Is the voltage extremely high or low? ● When it does not operate ● Is the circuit breaker “ON”? Was the air fi...
- Page 22 Please note: On switching on the equipment, particularly when the room light is dimmed, a slight brightness fl uctuation may occur. This is of no consequence. The conditions of the local Power Supply Companies are to be observed. Note Avoid to use the room air conditioner for cooling operation when the outside temperature is below ●...
- Page 23 เครื ่ อ งปรั บ อากาศแบบแยกส่ ว น ชุ ด ทํ า ความเย็ น / ชุ ด ระบายความร้ อ น รุ ่ น RAS-S10CET / RAC-S10CET RAS-S13CET / RAC-S13CET ชุ ด ทํ า ความเย็ น ชุ ด ระบายความร้ อ น...
- Page 24 ข้ อ ควรระวั ง เพื ่ อ ความปลอดภั ย ควรอ่ า น “ข้ อ ควรระวั ง เพื ่ อ ความปลอดภั ย ”อย่ า งละเอี ย ดถี ่ ถ ้ ว นก่ อ นทํ า การติ ด ตั ้ ง เครื ่ อ งปรั บ อากาศ ●...
- Page 25 ควรใช ้ ง านเคร ื ่ อ งปร ั บ อากาศตามค ู ่ ม ื อ ท ี ่ โ รงงานก ํ า หนด และไม ่ ค วรใช ้ เ คร ื ่ อ งเพ ื ่ อ ● วั ต ถุ ป ระสงค์ อ ื ่ น นอกจากทํ า ความเย็ น เท่ า นั ้ น ห้...
- Page 26 ช่ อ งระบายลมออก ชื ่ อ รุ ่ น และขนาด ความสู ง ความกว้ า ง ความลึ ก รุ ่ น (มิ ล ลิ เ มตร) (มิ ล ลิ เ มตร) (มิ ล ลิ เ มตร) RAS-S10CET/RAS-S13CET RAC-S10CET RAC-S13CET – 26 –...
-
Page 27: Operation Lamp
ไฟแสดงสถานะการทํ า งานของชุ ด ทํ า ความเย็ น ไฟเตื อ นทํ า ความสะอาดแผ่ น กรองอากาศ (FILTER LAMP) เมื ่ อ ระบบถู ก ใช้ ง านโดยรวมกว่ า 200 ชั ่ ว โมง ไฟเตื อ นทํ า ความสะอาดจะติ ด เพื ่ อ แสดงว่ า ถึ... -
Page 28: Powerful Mode
ปุ ่ ม ปรั บ การไหลเวี ย นอากาศ ใช้ ป ุ ่ ม นี ้ เ พื ่ อ ปรั บ การไหลเวี ย นอาการในห้ อ งหรื อ เริ ่ ม การทํ า งาน ปุ ่ ม ลดความชื ้ น ใช้ ป ุ ่ ม นี ้ เ พื ่ อ ลดระดั บ ความชื ้ น ภายในห้ อ งหรื อ เริ ่ ม การทํ า งาน ปุ... - Page 29 การใช้ ง านในโหมดทํ า ความเย็ น ควรใช้ โ หมดทํ า ความเย็ น เมื ่ อ อุ ณ หภู ม ิ ภ ายนอกอยู ่ ใ นระดั บ 21~43°C ถ้ า ความชื ้ น ภายในห้ อ งสู ง มาก (มากกว่ า 80%) อาจก่ อ ให้ เ กิ ด หยดน้ ํ า กดปุ...
- Page 30 การใช้ ง านโหมดลดความชื ้ น ควรใช้ โ หมดลดความชื ้ น เมื ่ อ อุ ณ หภู ม ิ ห ้ อ งมากกว่ า 16°C เมื ่ อ อุ ณ หภู ม ิ ต ่ ํ า กว่ า 15°C โหมดลดความชื ้ น จะไม่ ท ํ า งาน กดปุ...
- Page 31 การเลื อ กระดั บ ความแรงพั ด ลม กดปุ ่ ม ความเร็ ว พั ด ลม (FAN SPEED) และเลื อ กความเร็ ว พั ด ลมตามต้ อ งการ(หน้ า จอแสดงตามที ่ ท ่ า นเลื อ กไว้ ) กดปุ ่ ม ควบคุ ม อุ ณ หภู ม ิ เ พื ่ อ ตั ้ ง อุ ณ หภู ม ิ ต ามต้ อ งการ กดปุ...
- Page 32 ONE-TOUCH POWERFUL กดปุ ่ ม เมื ่ อ เริ ่ ม ทํ า งาน เครื ่ อ งจะส่ ง สั ญ ญาณเสี ย งดั ง ปี ๊ บ • เครื ่ อ งจะทํ า งานในระดั บ ความเย็ น สู ง สุ ด (COOL) •...
- Page 33 วิ ธ ี ก ารตั ้ ง โหมดนอน กดปุ ่ ม นอน และ หน้ า จอจะเปลี ่ ย นดั ง ภาพแสดงข้ า งล่ า ง รู ป แบบ คํ า ชี ้ แ นะ 2ชม 3ชม 7ชม 1ชม ตั ้ ง เวลานอน ปิ...
-
Page 34: Off Timer
การตั ้ ง เวลาล่ ว งหน้ า ปุ ่ ม เปิ ด เครื ่ อ งตั ้ ง เวลา (ON Timer) และปุ ่ ม ปิ ด เครื ่ อ งตั ้ ง เวลา (OFF Timer) ใช้ ป ระโยชน์ ไ ด้ ■... - Page 35 การปรั บ ทิ ศ ทางลมเย็ น บานสวิ ง แนวนอนนั ้ น ถู ก ตั ้ ง แบบอั ต โนมั ต ิ เ พื ่ อ ให้ ไ ด้ ม ุ ม ที ่ เหมาะสมกั บ การใช้ ง านแต่ ล ะครั ้ ง หน้ า ปั ด สามารถสวิ ง ขึ ้ น และลงอย่...
- Page 36 วิ ธ ี ก ารเปลี ่ ย นแบตเตอรี ่ ร ี โ มทคอนโทรล รี โ มทคอนโทรลต้ อ งทํ า การถอดแบตเตอรี ่ อ อกหรื อ เปลี ่ ย นแบตเตอรี ่ ในกรณี ขณะที ่ ใ ช้ ง านรี โ มทคอนโทรลแต่ ไม่ ม ี ก ารตอบสนองจากเครื ่ อ งปรั บ อากาศ หรื อ รี โ มทคอนโทรลมี ก ารรั บ สั ญ ญาณบกพร่ อ งหรื อ จอแสดงค่ า เริ ่ ม จาง เปิ...
- Page 37 – 37 –...
- Page 38 – 38 –...
- Page 39 การติ ด เครื ่ อ งกรองปรั บ อากาศ ข้ อ ควรระวั ง การทํ า ความสะอาดและการดู แ ลรั ก ษาควรทํ า เมื ่ อ ไฟกรองสว่ า ง ก่ อ นการทํ า ความสะอาดให้ ห ยุ ด การทํ า งานและ ปิ ด เครื ่ อ งจํ า หน่ า ยไฟ เปิ...
- Page 40 การบํ า รุ ง รั ก ษา ข้ อ ควรระวั ง การทํ า ความสะอาดและการดู แ ลรั ก ษาควรทํ า เมื ่ อ ไฟกรองสว่ า ง ก่ อ นการทํ า ความสะอาดให้ ห ยุ ด การทํ า งานและ ปิ ด เครื ่ อ งจํ า หน่ า ยไฟ เครื...
- Page 41 – 41 –...
- Page 42 ข้ อ ควรระวั ง กรุ ณ าติ ด ตั ้ ง สายดิ น ● ไม่ ค วรเดิ น สายดิ น ใกล้ ท ่ อ น้ ํ า หรื อ ท่ อ แก๊ ส สายล่ อ ฟ้ า หรื อ สายดิ น ของสายโทรศั พ ท์ การติ...
- Page 43 ข้ อ ควรจํ า – 43 –...
- Page 44 ข้ อ ควรจํ า ในการเปิ ด เครื ่ อ งมื อ โดยเฉพาะเมื ่ อ ไฟในห้ อ งสลั ว อาจจะเกิ ด ความสว่ า งเล็ ก น้ อ ย สิ ่ ง นี ้ จ ะไม่ ม ี ผ ลตาม มาสภาวะของ บริ ษ ั ท แหล่ ง ไฟฟ้ า ท้ อ งถิ ่ น จะเป็ น ที ่ ถ ู ก จั บ ตามอง ข้...
- Page 45 บั น ทึ ก ข้ อ ความ ......................................................................................................................................................................................................................................................................................................................................................................................................................................................................................................................................................................................................................................................................................................................................................................................................................................................................................................................................................................................................................................................................................................................................................................................................................................................................................
- Page 46 บั น ทึ ก ข้ อ ความ ......................................................................................................................................................................................................................................................................................................................................................................................................................................................................................................................................................................................................................................................................................................................................................................................................................................................................................................................................................................................................................................................................................................................................................................................................................................................................................