Table of Contents
Advertisement
Fluid Components International LLC (FCI). All rights reserved.
Doc. No. 06EN003401
Installation, Operation
& Maintenance Manual
Installation, Betrieb und Wartungshandbuch
Manual de Instalación, Operación y Mantenimiento
安装、操作和维护手册
FLT
93 Series FlexSwitch
®
Flow, Level, Temperature Switch / Monitor
Models: FLT93B, FLT93C, FLT93F,
FLT93L, FLT93S
™
Advertisement
Table of Contents
Troubleshooting

Related Manuals for FCI FLT93B


Summary of Contents for FCI FLT93B
- Page 1 & Maintenance Manual Installation, Betrieb und Wartungshandbuch Manual de Instalación, Operación y Mantenimiento 安装、操作和维护手册 93 Series FlexSwitch ® ™ Flow, Level, Temperature Switch / Monitor Models: FLT93B, FLT93C, FLT93F, FLT93L, FLT93S Fluid Components International LLC (FCI). All rights reserved. Doc. No. 06EN003401...
- Page 2 © Copyright 2018 by Fluid Components International LLC. All rights reserved. Manufactured in accordance with one or more of the following patents: 5,600,528; 6,340,243. FCI is a registered trademark of Fluid Components International LLC. Information subject to change without notice.
- Page 3 Series FlexSwitch 06EN003401 Rev. C ® Table of Contents 1 GENERAL........................................1 Description............................................1 Theory of Operation ..........................................1 Sensing Element ..........................................1 Control Circuit ...........................................1 Technical Specifications ........................................2 2 INSTALLATION ......................................5 Receiving/Inspection ........................................5 Packing/Shipping/Returns ........................................5 Factory Calibration Note........................................5 Pre-Installation Procedure ........................................5 Use Standard ESD Precautions .....................................5 Prepare or Verify Sensing Element Location .................................5 Verify Dimensions .........................................5 Verify Sensing Element Flow Direction and Placement Orientation (Flow Application) ....................5...
- Page 4 06EN003401 Rev. C Series FlexSwitch ® Liquid Flow Applications ......................................23 Adjustment by Observation ......................................25 Flow Applications ........................................25 Level Applications ........................................26 Temperature Applications ......................................26 Converting Temp Out Voltage to Temp in Degrees F or Degrees C ..........................28 Fail-Safe Alarm Setting .........................................34 Low Flow Alarm Settings ......................................34 High Flow Alarm Settings ......................................34 Low Level Alarm Settings (Sensing Element Normally Wet) ............................35...
- Page 5 Series FlexSwitch 06EN003401 Rev. C ® APPENDIX A DRAWINGS ..................................45 APPENDIX B GLOSSARY ...................................75 APPENDIX C APPROVAL INFORMATION ...............................77 EC Information ..........................................77 Safety Instructions for the Use of the FLT93 Flowswitch in Hazardous Areas ......................79 Annex 1 ............................................83 SIL Information ..........................................89 APPENDIX D TEMPERATURE COMPENSATION ...........................91 Introduction .............................................91 Factory Temperature Compensation Settings ................................91...
- Page 6 06EN003401 Rev. C Series FlexSwitch ® INTENTIONALLY LEFT BLANK Fluid Components International LLC...
-
Page 7: General
Description The FLT Series models are multipurpose measurement instruments. The models included in this manual are FLT93B (Basic), FLT93C (Sanitary), FLT93F (Fast Response), FLT93L (In-Line) and FLT93S (Heavy Duty). Each model is a single instrument that is capable of detecting fluid flow and temperature. -
Page 8: Technical Specifications
(i.e., tantalum, chromium carbide, Kynar). Package size: TRS (8.5 x 8 mm) radial lead plug-in type Model L FCI part number: 019933-01 Standard: 316L stainless steel with all-welded construction. Tyco part number: 37411600410 Optional: Hastelloy C, Monel 400 and titanium. - Page 9 Series FlexSwitch GENERAL ® For Level/Interface Service The above typical service power selections are for reference only. De- pending on application requirements, surface temperature rating require- ƒ Accuracy ments, and rangeability expectations, alternate power selections may be Models S, B recommended.
- Page 10 GENERAL Series FlexSwitch ® INTENTIONALLY LEFT BLANK Fluid Components International LLC...
-
Page 11: Installation
Use Standard ESD Precautions Use standard ESD precautions when opening an instrument enclosure or handling the control circuit. FCI recommends the use of the fol- lowing precautions: Use a wrist band or heel strap with a 1 megohm resistor connected to ground. If the instrument is in a shop setting use workstations with static conductive mats on the work table and floor with a 1 megohm resistor connected to ground. -
Page 12: Install The Sensing Element
INSTALLATION Series FlexSwitch ® Install the Sensing Element Male NPT Mounting When mounting the sensing element to the process pipe, it is important that a lubricant/sealant be applied to the male threads of all connec- tions. Be sure to use a lubricant/sealant compatible with the process environment. All connections should be tightened firmly. To avoid leaks, do not overtighten or cross-thread connections. -
Page 13: Packing Gland Assembly
Series FlexSwitch INSTALLATION ® Packing Gland Assembly For applications involving the use of a packing gland (low or medium pressure) refer to the drawings in Appendix A for additional detail. 1. Threaded or flanged packing gland mounts are available. The valve assembly with appropriate connections are customer supplied. Follow the male NPT mounting procedure above to attach the pipe thread portion or flange mounting portion as applicable. -
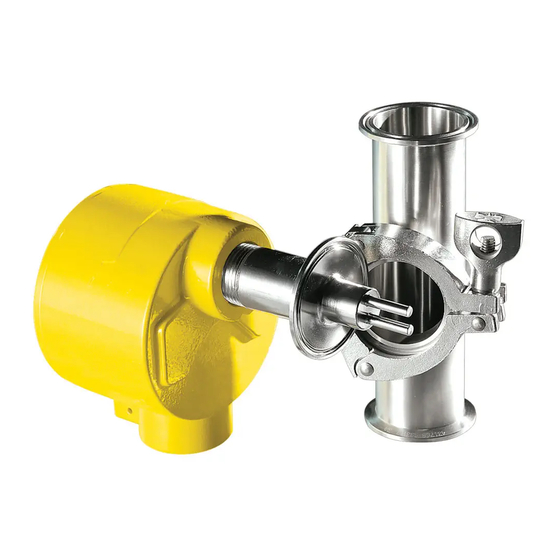
Page 14: Sanitary Assembly (Flt93C)
Table 2-1 shows the smallest (maximum AWG number) copper wire that is used in the electrical cables. Use a lower gauge of wire for less of a voltage drop. Contact FCI concerning greater distances than those listed in the table. The sensing element cable must be shielded. If the cable is spliced the shield wire must be continued through the splice. -
Page 15: Cable And Conduit Entry Devices
Series FlexSwitch INSTALLATION ® Maximum Distance for AWG Connection 10 ft. 50 ft 100 ft. 250 ft. 500 ft. 1000 ft. (3m) (15m) (31m) (76m) (152m) (305m) AC/DC Power Relay (6A) Flow Element Wires* * Requires a shielded cable with the shield wire connected to the terminal board only. Table 2-1 Maximum AWG Number Cable and Conduit Entry Devices The cable and conduit entry devices and blanking elements shall be of a certified flameproof type Ex db and Ex tb suitable for T ratings up to... - Page 16 INSTALLATION Series FlexSwitch ® 3. Place center of ring lug barrel in appropriate crimping tool chamber. Squeeze tool handles together with just enough force to hold barrel in place (do not deform barrel). 4. Insert stripped end of ground wire into barrel. Place the wire such that the insulation does not enter barrel and that the stripped wire end does not extend beyond barrel.
-
Page 17: Wiring The Local Enclosure Configuration
Series FlexSwitch INSTALLATION ® Wiring the Local Enclosure Configuration Warning: Ensure that all power is OFF before wiring any circuit. This procedure is for instruments with the control circuit located in the sensing element enclosure. Remove the control circuit from the terminal board socket by loosening the two thumbscrews on top of the transformer bracket. Note: the screws are captive. -
Page 18: Wiring The Remote Enclosure Configuration
INSTALLATION Series FlexSwitch ® Wiring The Remote Enclosure Configuration This procedure is for instruments with the control circuit located remotely (remote housing) from the sensing element (local enclosure). Locate the Remote Hardware Location Warning: Ensure that all power is off before wiring any circuit. Drawings in Appendix A show the remote enclosure along with the physical dimensions to properly mount it. -
Page 19: Wiring Output Signal Terminals
Series FlexSwitch INSTALLATION ® Wiring Output Signal Terminals The primary outputs on the FLT are the relays. Voltage ouputs relative to flow/level and temperature are provided on the terminal board at TB3. The signal voltage at positions 1 and 2 represents the process change (non-linear to flow). The signal voltage at positions 3 and 4 is propor- tional to the temperature at the sensing element. - Page 20 INSTALLATION Series FlexSwitch ® Figure 2-7 Power Jumper Diagram Fluid Components International LLC...
- Page 21 Series FlexSwitch INSTALLATION ® Figure 2-8 120 VAC Input Power Wiring Diagram Figure 2-9 230 VAC Input Power Wiring Diagram Fluid Components International LLC...
- Page 22 ® Figure 2-13 24 VAC/VDC Input Power Wiring Diagram Figures 2-11, 2-12 and 2-13 can be cross referenced in Appendix A with FCI drawings 022580 [Wiring Diagram FLT93/5208 Integral Control Circuit] and 022581 [Wiring Diagram FLT93/5208 Remote Control Circuit]. Fluid Components International LLC...
-
Page 23: Operation
Unless a custom factory setup or calibration is specified, the instrument is delivered in a standard factory configuration. The standard default jumper configuration is shown in Table 3-1. FLT93S/FLT93B 0.75 watts for air or liquid level applications. (J13) Heater Power FLT93F 0.25 watts for air or liquid level applications. -
Page 24: Alarm Setpoint Adjustments
OPERATION Series FlexSwitch ® Alarm Setpoint Adjustments Numerical Adjustment Versus Adjustment by Observation An alarm setpoint is established using either numerical adjustment or adjustment by observation. The adjustment by observation requires the customer to establish normal process operation and adjust the alarm setpoint relative to this condition. The numerical approach requires mea- suring normal and alarm process conditions with a voltmeter and setting up the instrument in the calibrate mode based on these values. -
Page 25: Numerical Alarm Setpoint Adjustment
(110-ohm Heater) FLT93F Element Wattage 0.57 watts 0.52 watts 0.49 watts 0.25 watts* (560-ohm Heater) *J13 is standard for FLT93S/FLT93B and J14 is standard for FLT93F Table 3-2 Selectable Heater Wattage Control Jumper Flow/Level Temperature FLT93F Element Wattage N.A. 0.25 watts (560-ohm Heater) Alarm No. - Page 26 OPERATION Series FlexSwitch ® Figure 3-2 5208 Control Circuit Component Locations 9. Follow either the Detecting Decreasing Flow or the Detecting Increasing Flow procedure for each flow application alarm. Detecting Decreasing Flow (Low Flow Alarm) Stop the process flow and allow the signal to stabilize. Record the no-flow signal.
- Page 27 Series FlexSwitch OPERATION ® FIELD ADJUSTABLE AIR OR GAS SET POINT Potentiometer (POT) R25 AND R26 Adjust Clockwise, Turns WATER LED ON LED ON ABOVE SETPOINT SET POINT LED OFF Adjust BELOW SETPOINT Counter- clockwise, FLOW Turns LED OFF C00204-1-2 Figure 3-3 Flow Application Signal Output Detecting Increasing Flow (High Flow Alarm) Establish the excessive process flow condition and allow the signal to stabilize.
-
Page 28: Wet/Dry Liquid Level Applications
OPERATION Series FlexSwitch ® Disconnect the voltmeter from P1. Replace the enclosure cover. Note: The alarm can be set for a specific flow rate. Follow the Air/Gas Flow Applications procedure up to step 7 except establish the specific flow rate rather than the normal flow. The output signal will be the setpoint value. Determine whether the alarm should actuate with decreasing or increasing flow and skip to the appropriate step 4 in Detecting Decreasing Flow or Detect- ing Increasing Flow, respectively. -
Page 29: Liquid Flow Applications
Application: J20 or J18 (Flow/Level) for alarm No. 1 or No. 2, respectively. Heater Power: J32 (3 watts for FLT93S/FLT93B or 0.57 watts for FLT93F). Apply power to the instrument. Verify the yellow LED is on. Allow fifteen minutes for the instrument to warm-up. - Page 30 OPERATION Series FlexSwitch ® Note: The output signal at connector P1 varies inversely with changes in the process flow rate. The output signal level is also rela- tive to the type of process media being measured. See Figure 3-3. Establish the normal process flow condition and allow the signal to stabilize. Record the normal flow signal value.
-
Page 31: Adjustment By Observation
Series FlexSwitch OPERATION ® For the appropriate alarm, determine whether the status LED is on or off (red for No. 1 or green for No. 2). If the LED is on, turn the setpoint adjustment potentiometer (R26 for Alarm No. 1 or R25 for Alarm No. 2) slowly counterclockwise just until the LED turns off. -
Page 32: Level Applications
OPERATION Series FlexSwitch ® Level Applications Ensure that the instrument has been properly installed in the vessel. Apply power to the instrument. Allow fifteen minutes for the sensing element to stabilize. Remove the enclosure cover to access the control circuit for adjustments. Detecting Dry Condition (Adjustment With Sensing Element Wet) Verify that the sensing element is wet. - Page 33 Series FlexSwitch OPERATION ® Detecting Increasing Temperature (High Temperature Alarm) Move the Mode switch to the CAL position. Adjust the calibrate potentiometer (R24) until the voltmeter equals the desired temperature signal as indicated in Table 3-7. For the appropriate alarm, determine whether the status LED is on or off (red for Alarm No. 1 or green for Alarm No. 2). If the LED is off, turn the setpoint adjustment potentiometer (R26 for Alarm No.
-
Page 34: Converting Temp Out Voltage To Temp In Degrees F Or Degrees C
OPERATION Series FlexSwitch ® Converting Temp Out Voltage to Temp in Degrees F or Degrees C This formula is useful when monitoring the temperature output voltage with a data acquisition system where the formula can be used in the program. Use the following formula to determine what the temperature is in degrees Fahrenheit, if the FLT temperature output voltage is known. - Page 35 Series FlexSwitch OPERATION ® 0.00385 OHMS/OHMS/ºC 1000 OHM PLATINUM SENSORS TEMPERATURE VERSUS VOLTAGE OUTPUT, FLT93 Temp Output °F °C Temp Output °F °C Temp Output °F °C Temp Output °F °C Voltage Voltage Voltage Voltage 1.400 -104 1.600 1.800 2.000 1.405 -103 1.605...
- Page 36 OPERATION Series FlexSwitch ® 0.00385 OHMS/OHMS/ºC 1000 OHM PLATINUM SENSORS TEMPERATURE VERSUS VOLTAGE OUTPUT, FLT93 Temp Output °F °C Temp Output °F °C Temp Output °F °C Temp Output °F °C Voltage Voltage Voltage Voltage 2.200 2.400 2.600 2.800 2.205 2.405 2.605 2.805...
- Page 37 Series FlexSwitch OPERATION ® 0.00385 OHMS/OHMS/ºC 1000 OHM PLATINUM SENSORS TEMPERATURE VERSUS VOLTAGE OUTPUT, FLT93 Temp Output °F °C Temp Output °F °C Temp Output °F °C Temp Output °F °C Voltage Voltage Voltage Voltage 3.000 3.200 3.400 3.600 3.005 3.205 3.405 3.605...
- Page 38 OPERATION Series FlexSwitch ® 0.00385 OHMS/OHMS/ºC 1000 OHM PLATINUM SENSORS TEMPERATURE VERSUS VOLTAGE OUTPUT, FLT93 Temp Output °F °C Temp Output °F °C Temp Output °F °C Temp Output °F °C Voltage Voltage Voltage Voltage 3.800 4.000 4.200 4.400 3.805 4.005 4.205 4.405...
- Page 39 Series FlexSwitch OPERATION ® 0.00385 OHMS/OHMS/ºC 1000 OHM PLATINUM SENSORS TEMPERATURE VERSUS VOLTAGE OUTPUT, FLT93 Temp Output °F °C Temp Output °F °C Temp Output °F °C Temp Output °F °C Voltage Voltage Voltage Voltage 4.600 4.800 5.000 5.200 4.605 4.805 5.005 5.205...
-
Page 40: Fail-Safe Alarm Setting
OPERATION Series FlexSwitch ® Fail-Safe Alarm Setting These procedures set the second relay to detect component failure (fail-safe). Low Flow Alarm Settings Install the following jumpers for the low flow fail-safe setup: J18, J20, J23, J24, J27. Figure 3-5. Low Flow Fail-Safe Alarm The following information is assumed: Relay is de-energized in the ALARM condition. -
Page 41: Low Level Alarm Settings (Sensing Element Normally Wet)
Series FlexSwitch OPERATION ® Low Level Alarm Settings (Sensing Element Normally Wet) Install the following jumpers for the low level fail-safe setup: J18, J20, J23, J24, J27. Figure 3-7. Low Level Fail-Safe Alarm The following information is assumed: Relay is de-energized in the ALARM condition. Alarm 1 setpoint is adjusted for the mean value between the air and liquid signals. - Page 42 OPERATION Series FlexSwitch ® INTENTIONALLY LEFT BLANK Fluid Components International LLC...
-
Page 43: Maintenance
See Section 2, Operation, for ESD details. The FCI instrument requires very little maintenance. There are no moving parts or mechanical parts subject to wear in the instrument. The sensor assembly which is exposed to the process media is all stainless steel construction and is only susceptible to chemical attack based on the corrosion relationship of the RTD thermowell material with the process media. - Page 44 MAINTENANCE Series FlexSwitch ® INTENTIONALLY LEFT BLANK Fluid Components International LLC...
-
Page 45: Troubleshooting
Series FlexSwitch TROUBLESHOOTING ® TROUBLESHOOTING Warning: Only qualified personnel should attempt to test this instrument. The operator assumes all responsibilities for safe practices while troubleshooting. Caution: The control circuit contains electrostatic discharge (ESD) sensitive devices. Use standard ESD precautions when handling the control circuit. -
Page 46: Troubleshooting The Flow Element
TROUBLESHOOTING Series FlexSwitch ® Troubleshooting the Flow Element Use Tables 5-1 and 5-2 to determine if the flow element is wired correctly or has failed. Turn off the input power to the instrument. Unplug the control circuit from its socket and measure the resistances below from the terminal board. If the instrument is set up in remote configuration (flow element enclosure separate from the control circuit enclosure), and the ohm readings are incorrect, disconnect the flow element cable at the local (flow element) enclosure. - Page 47 Series FlexSwitch TROUBLESHOOTING ® Figure 5-1 Terminal Board, Test Points Fluid Components International LLC...
-
Page 48: Troubleshooting The Control Circuit
TROUBLESHOOTING Series FlexSwitch ® Troubleshooting the Control Circuit Is the Yellow Power indicator LED: Yellow LED dim or off Dim, With the power applied, measure the 9-volt reference voltage at P1, pins 2 (blue) to Off or 4 (black). See Figure 3-2 for the location of P1. Verify a voltage of 9 volts DC ±2% Blinking (8.82-9.18 V). -
Page 49: Enclosures
Spares FCI recommends an extra control circuit to be kept as a spare. The control circuit part number is 5208-XXX. The dash number can be found on the control circuit, the enclosure and on the order documents. Also recommended is an extra terminal board as a spare, part number 020786-01. - Page 50 TROUBLESHOOTING Series FlexSwitch ® INTENTIONALLY LEFT BLANK Fluid Components International LLC...
-
Page 51: Appendix A Drawings
Series FlexSwitch APPENDIX A - DRAWINGS ® APPENDIX A DRAWINGS 3/4” NPT with Local Hazardous Location Type 4X Enclosure Fluid Components International LLC... - Page 52 APPENDIX A - DRAWINGS Series FlexSwitch ® 3/4” NPT with Local Hazardous Location Type 4X Enclosure: 3-Port Remote Type 4X Fluid Components International LLC...
- Page 53 Series FlexSwitch APPENDIX A - DRAWINGS ® 1” NPT with Local Hazardous Location Type 4X Enclosure Fluid Components International LLC...
- Page 54 APPENDIX A - DRAWINGS Series FlexSwitch ® 1” NPT with Local Hazardous Location Type 4X Enclosure: 3-Port Remote Type 4X Fluid Components International LLC...
- Page 55 Series FlexSwitch APPENDIX A - DRAWINGS ® Flanged with Local Hazardous Location Type 4X Enclosure Fluid Components International LLC...
- Page 56 APPENDIX A - DRAWINGS Series FlexSwitch ® Flanged with Local Hazardous Location Type 4X Enclosure: 3-Port Remote Type 4X Fluid Components International LLC...
- Page 57 Series FlexSwitch APPENDIX A - DRAWINGS ® 1-1/4” NPT Low Pressure Packing Gland with Local Hazardous Location Type 4X Enclosure Fluid Components International LLC...
- Page 58 APPENDIX A - DRAWINGS Series FlexSwitch ® 1-1/4” NPT Low Pressure Packing Gland with Local Hazardous Location Type 4X Enclosure: 3-Port Remote Type 4X Fluid Components International LLC...
- Page 59 Series FlexSwitch APPENDIX A - DRAWINGS ® Flanged Low Pressure Packing Gland with Local Hazardous Location Type 4X Enclosure Fluid Components International LLC...
- Page 60 APPENDIX A - DRAWINGS Series FlexSwitch ® Flanged Low Pressure Packing Gland with Local Hazardous Location Type 4X Enclosure: 3-Port Remote Type 4X Fluid Components International LLC...
- Page 61 Series FlexSwitch APPENDIX A - DRAWINGS ® 1-1/4” NPT, Medium Pressure Packing Gland with Local Hazardous Location Type 4X Enclosure Fluid Components International LLC...
- Page 62 APPENDIX A - DRAWINGS Series FlexSwitch ® 1-1/4” NPT, Medium Pressure Packing Gland with Local Hazardous Location Type 4X Enclosure: 3-Port Remote Type 4X Fluid Components International LLC...
- Page 63 Series FlexSwitch APPENDIX A - DRAWINGS ® Flanged, Medium Pressure Packing Gland with Local Hazardous Location Type 4X Enclosure Fluid Components International LLC...
- Page 64 APPENDIX A - DRAWINGS Series FlexSwitch ® Flanged, Medium Pressure Packing Gland with Local Hazardous Location Type 4X Enclosure: 3-Port Remote Type 4X Fluid Components International LLC...
- Page 65 Series FlexSwitch APPENDIX A - DRAWINGS ® 3/4” MNPT Compression Fitting with Local Hazardous Location Type 4X Enclosure Fluid Components International LLC...
- Page 66 APPENDIX A - DRAWINGS Series FlexSwitch ® 3/4” MNPT Compression Fitting with Local Hazardous Location Type 4X Enclosure: 3-Port Remote Type 4X Fluid Components International LLC...
- Page 67 Series FlexSwitch APPENDIX A - DRAWINGS ® Flanged Compression Fitting with Local Hazardous Location Type 4X Enclosure Fluid Components International LLC...
- Page 68 APPENDIX A - DRAWINGS Series FlexSwitch ® Flanged Compression Fitting with Local Hazardous Location Type 4X Enclosure: 3-Port Remote Type 4X Fluid Components International LLC...
- Page 69 Series FlexSwitch APPENDIX A - DRAWINGS ® FLT93F Style Head : 1/4” NPT with Local Hazardous Location Type 4X Enclosure Fluid Components International LLC...
- Page 70 APPENDIX A - DRAWINGS Series FlexSwitch ® FLT93F Style Head: 1/4” NPT with Local Hazardous Location Type 4X Enclosure: 3-Port Remote Type 4X Fluid Components International LLC...
- Page 71 Series FlexSwitch APPENDIX A - DRAWINGS ® FLT93L: 3/4” NPT with Local Hazardous Location Type 4X Enclosure Fluid Components International LLC...
- Page 72 APPENDIX A - DRAWINGS Series FlexSwitch ® FLT93L: 3/4” NPT with Local Hazardous Location Type 4X Enclosure: 3-Port Remote Type 4X Fluid Components International LLC...
- Page 73 Series FlexSwitch APPENDIX A - DRAWINGS ® FLT93L: 1” NPT with Local Hazardous Location Type 4X Enclosure Fluid Components International LLC...
- Page 74 APPENDIX A - DRAWINGS Series FlexSwitch ® FLT93L: 1” NPT with Local Hazardous Location Type 4X Enclosure: 3-Port Remote Type 4X Fluid Components International LLC...
- Page 75 Series FlexSwitch APPENDIX A - DRAWINGS ® FLT93L: Flanged with Local Hazardous Location Type 4X Enclosure Fluid Components International LLC...
- Page 76 APPENDIX A - DRAWINGS Series FlexSwitch ® FLT93L: Flanged with Local Hazardous Location Type 4X Enclosure: 3-Port Remote Type 4X Fluid Components International LLC...
- Page 77 Series FlexSwitch APPENDIX A - DRAWINGS ® FLT93C : Sanitary Flange with Local Hazardous Location Type 4X Enclosure Fluid Components International LLC...
- Page 78 APPENDIX A - DRAWINGS Series FlexSwitch ® FLT93 Surface Mount: Local Wiring Diagram Fluid Components International LLC...
- Page 79 Series FlexSwitch APPENDIX A - DRAWINGS ® FLT93 Surface Mount : Remote Wiring Diagram Fluid Components International LLC...
- Page 80 APPENDIX A - DRAWINGS Series FlexSwitch ® FLT93 PWB Module: 5208 Fluid Components International LLC...
-
Page 81: Appendix B Glossary
Series FlexSwitch APPENDIX B - GLOSSARY ® APPENDIX B GLOSSARY Abbreviations Delta-R (DR) Differential Resistance Delta-T (DT) Differential Temperature Digital Multimeter DPDT Double Pole Double Throw Fluid Components Intl Heater Light Emitting Diode Potentiometer Return Authorization Resistance Temperature Detector SFPS Standard Feet Per Second SPDT Single Pole Double Throw... - Page 82 APPENDIX B - GLOSSARY Series FlexSwitch ® INTENTIONALLY LEFT BLANK Fluid Components International LLC...
-
Page 83: Appendix C Approval Information
Series FlexSwitch APPENDIX C - APPROVAL INFORMATION ® APPENDIX C APPROVAL INFORMATION EC Information Fluid Components International LLC... - Page 84 APPENDIX C - APPROVAL INFORMATION Series FlexSwitch ® INTENTIONALLY LEFT BLANK Fluid Components International LLC...
-
Page 85: Safety Instructions For The Use Of The Flt93 Flowswitch In Hazardous Areas
Series FlexSwitch APPENDIX C - APPROVAL INFORMATION ® Safety Instructions for the Use of the FLT93 Flowswitch in Hazardous Areas Approval KEMA 02ATEX2166 X and Approval IEC certificate IECEx DEK14.0080X for: Integral Version: II 2 G Ex db IIC T4…T2 Gb II 2 D Ex tb IIIC T135 °C…T300 °C Db Remote Enclosure + Electronics: II 2 G... - Page 86 APPENDIX C - APPROVAL INFORMATION Series FlexSwitch ® English- Safety instructions These safety instructions are valid for the Fluid Components, FLT93 Flowswitch to the EC type approval certificate no. KEMA 02 ATEX 2166 (certificate number on the type label) for use in potentially explosive atmospheres in Category II 2 G. 1) The installation of Ex-instruments must be made by trained personnel.
- Page 87 Consignes de sécurité Ces consignes de sécurité sont valables pour le modèle FLT93 Flowswitch de la société Fluid Components (FCI) conforme au certificat d’ é preuves de type KEMA 02 ATEX 2166 (numéro du certificat sur l’ é tiquette signalétique) conçu pour les applications dans lesquelles un matériel de la catégorie II2G est nécessaire.
- Page 88 APPENDIX C - APPROVAL INFORMATION Series FlexSwitch ® Português - Normas de segurança Estas normas de segurança são válidas para os Fluid Components, FLT93 Flowswitch conforme o certificado de teste de modelo N.º KEMA 02 ATEX 2166 (número do certificado na plaqueta com os dados do equipamento) são apropriados para utilização em atmosferas explosivas categoria II 2 G.
-
Page 89: Annex
Type designation Flow, Level or Temperature FlexSwitch Series FLT93 The Flow, Level or Temperature FlexSwitch Series FLT93 are divided into three styles: Insertion style: FLT93S, FLT93F and FLT93C Basic insertion style: FLT93B In-line style: FLT93L Model decoding FLT93S, FLT93F and FLT93C series Insertion style FLT93... - Page 90 II till V Pos. Explanation Value Explanation Model FLT93B is a preconfigured version of FCI's model FLT93S in the following configuration: FLT series Basic Type of sensor: S style (insertion style with larger OD thermowells) Type of sensor FLT93B Process temperature: -40 °C to + 177 °C...
- Page 91 Series FlexSwitch APPENDIX C - APPROVAL INFORMATION ® Annex 1 to Certificate of Conformity IECEx DEK 14.0080X, issue 0 Annex 1 to IECEx TR NL/DEK/ExTR14.0088/00 Annex 1 to EU Type Examination Certificate KEMA 02ATEX2166 X, issue 4 Model decoding FLT93L series In-line style FLT93L custom custom...
- Page 92 APPENDIX C - APPROVAL INFORMATION Series FlexSwitch ® Annex 1 to Certificate of Conformity IECEx DEK 14.0080X, issue 0 Annex 1 to IECEx TR NL/DEK/ExTR14.0088/00 Annex 1 to EU Type Examination Certificate KEMA 02ATEX2166 X, issue 4 Thermal data The relation between temperature class, maximum surface temperature, ambient temperature and process temperature of the different configurations are indicated below.
- Page 93 Series FlexSwitch APPENDIX C - APPROVAL INFORMATION ® Annex 1 to Certificate of Conformity IECEx DEK 14.0080X, issue 0 Annex 1 to IECEx TR NL/DEK/ExTR14.0088/00 Annex 1 to EU Type Examination Certificate KEMA 02ATEX2166 X, issue 4 Pigtail version (only for ATEX) Local enclosure in pigtail variant: Temperature class Maximum surface temperature...
- Page 94 APPENDIX C - APPROVAL INFORMATION Series FlexSwitch ® INTENTIONALLY LEFT BLANK Fluid Components International LLC...
-
Page 95: Sil Information
Series FlexSwitch APPENDIX C - APPROVAL INFORMATION ® SIL Information Fluid Components International LLC... - Page 96 APPENDIX C - APPROVAL INFORMATION Series FlexSwitch ® INTENTIONALLY LEFT BLANK Fluid Components International LLC...
-
Page 97: Appendix D Temperature Compensation
Series FlexSwitch APPENDIX D - TEMP COMP ® APPENDIX D TEMPERATURE COMPENSATION Introduction Temperature compensation (Temp Comp) is an essential part of the FLT FlexSwitch circuitry. When the Temp Comp is set correctly, the instru- ment stays accurate over a process temperature range of 100 °F. The instrument is a thermal dispersion device. It relies on the temperature differential between the reference RTD, which is at the process media temperature, and the active RTD, which is heated to produce a tem- perature differential (TD). -
Page 98: Balance Procedure
APPENDIX D - TEMP COMP Series FlexSwitch ® Balance Procedure The following steps are the flow element balance procedure required to complete the Temp Comp restoration and must be used when install- ing remote units with more than 10 feet of cable. Connect the DMM to P1 with the positive lead connected to position 1 (Red) and the negative lead connected to position 2 (Blue). - Page 99 Series FlexSwitch APPENDIX D - TEMP COMP ® 10. Raise the temperature of the process media to the maximum expected temperature. The difference between the low and the high tem- perature is not to exceed 100 °F. 11. Set the flow rate to the same value used for the low temperature. Note: The flow rate must be the same at both the low and high temperature.
- Page 100 APPENDIX D - TEMP COMP Series FlexSwitch ® TEMP COMP TEMP COMP TEMP COMP FACTOR K OHMS K OHMS FACTOR K OHMS K OHMS FACTOR K OHMS K OHMS 0.042 119.75 263.16 0.013 123.38 149.25 -0.016 127.00 104.17 0.041 119.88 256.41 0.012 123.50...
-
Page 101: Appendix E Customer Service
Attn: Customer Service Department By Phone Contact the area FCI regional representative. If a field representative is unable to be contacted or if a situation is unable to be resolved, contact the FCI Customer Service Department toll free at 1 (800) 854-1993. -
Page 102: Non-Warranty Repairs Or Returns
Contact an FCI field representative to request field service. A field service technician is dispatched to the site from either the FCI factory or one of the FCI representative offices. After the work is com- plete, the technician completes a preliminary field service report at the customer site and leaves a copy with the customer. - Page 103 Series FlexSwitch APPENDIX E - CUSTOMER SERVICE ® Fluid Components International LLC...
- Page 104 APPENDIX E - CUSTOMER SERVICE Series FlexSwitch ® Fluid Components International LLC...
- Page 105 Series FlexSwitch APPENDIX E - CUSTOMER SERVICE ® WARRANTIES Goods furnished by the Seller are to be within the limits and of the sizes published by the Seller and subject to the Seller’s standard tolerances for variations. All items made by the Seller are inspected before shipment, and should any of said items prove defective due to faults in manufacture or performance under Seller approved applications, or fail to meet the written specifications accepted by the Seller, they will be replaced or repaired by Seller at no charge to Buyer provided return or notice of rejection of such material is made within a reasonable period but in no...
- Page 106 © Copyright 2018 by Fluid Components International LLC. All rights reserved. Manufactured in accordance with one or more of the following patents: 5,600,528; 6,340,243. FCI is a registered trademark of Fluid Components International LLC. Information subject to change without notice.
Need help?
Do you have a question about the FLT93B and is the answer not in the manual?
Questions and answers