Advertisement
Quick Links
Owner's Manual
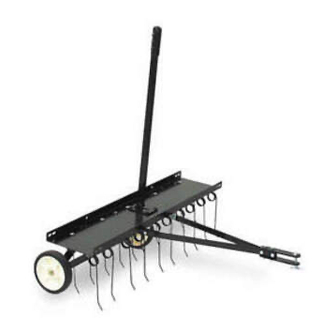
40" TINE DETHATCHER
Model No. 486.243152
Model No. 486.24316
CAUTION:
Before using this product, read
this manual and follow all Safety
Rules and Operating Instructions.
Sears, Roebuck and Co., Hoffman Estates, IL 60179 U.S.A.
www.sears.com/craftsman
PRINTED IN U.S.A.
®
STOP
DO NOT RETURN TO STORE
For Missing Parts or Assembly
Questions Call 1-866-576-8388
• Safety
• Assembly
• Operation
• Maintenance
• Parts
FORM NO. 42107 (8/14/08)
Advertisement

Related Manuals for Craftsman 486.243152


Summary of Contents for Craftsman 486.243152
- Page 1 Owner's Manual 40" TINE DETHATCHER Model No. 486.243152 Model No. 486.24316 CAUTION: Before using this product, read this manual and follow all Safety Rules and Operating Instructions. Sears, Roebuck and Co., Hoffman Estates, IL 60179 U.S.A. www.sears.com/craftsman PRINTED IN U.S.A. ® DO NOT RETURN TO STORE For Missing Parts or Assembly...
-
Page 2: Table Of Contents
SAFETY RULES ... 2 FULL SIZE HARDWARE CHART ... 3 CARTON CONTENTS ... 4 ASSEMBLY ... 4 ONE YEAR FULL WARRANTY When operated and maintained according to the instructions supplied with it, if this Tine Dethatcher fails due to a defect in material or workmanship within one year from the date of purchase, call 1-800-4-MY-HOME® to arrange for free repair (or replacement if repair proves impossible). If this product is used for commercial or rental purposes, this warranty applies for only 90 days from the date of purchase. This warranty gives you specific legal rights, and you may also have other rights which vary from state to state. Sears, Roebuck and Co., D817WA, Hoffman Estates, IL 60179 The model number and serial numbers will be found on a decal attached to the dethatcher. You should record both the serial number and the date of purchase and keep in a safe place for future reference. Any power equipment can cause injury if operated improperly or if the user does not understand how to operate the equipment. Exercise caution at all times when using power equipment. • Read this owners manual carefully for operating and service instructions before attempting to assemble or operate this equipment. -
Page 3: Full Size Hardware Chart
Ref. Qty. Description Shoulder Bolt Hex Bolt, 5/16" x 2" Lg. Hex Bolt, 5/16" x 1-1/4" Lg. Hex Bolt, 5/16" x 1" Lg. Carriage Bolt, 5/16" x 1" Hair Cotter Pin, 1/8" Hitch Pin, 3/8" HARDWARE PACKAGE CONTENTS SHOWN FULL SIZE NOT SHOWN FULL SIZE Ref. Qty. Description Nylock Nut, 5/16" Nylock Nut, 3/8" Angle Bracket Grip... -
Page 4: Carton Contents
CARTON CONTENTS 1. Hitch Mount Arms (2) 2. Lift Handle 3. Hitch Brackets (2) 4. Axle Bracket 5. Hitch Arm Mount Brackets (3) 6. Wheels (2) 7. Tine Shield Assembly TOOLS REQUIRED FOR ASSEMBLY (2) 1/2" wrenches (1) 9/16" wrench (1) 3/4" wrench or adjustable wrench (1) Pliers REMOVAL OF PARTS FROM CARTON • Remove all parts and hardware packages from the carton. Lay out all parts and hardware and identify using the illustrations on pages 3 and 4. ASSEMBLY • Assemble two (tall) hitch arm mount brackets and two (short) angle brackets to the bottom of the tine shield at the rear. Use four 5/16" x 1" hex bolts and 5/16" nylock nuts. Do not tighten yet. Position the brackets as shown in figure 1. - Page 5 • Assemble the front ends of the hitch mount arms together using two 5/16" x 1-1/4" hex bolts and 5/16" nylock nuts. Do not tighten yet. See figure 3. • Assemble the hitch brackets to the top and bottom of the hitch mount arms using two 5/16" x 2" hex bolts and 5/16" nylock nuts. Do not tighten yet. See figure • Assemble the 3/8" hitch pin through the hitch brackets and secure it with a 1/8" hair cotter pin. See figure 3. 5/16" NYLOCK NUT 5/16" x 1-1/4" HEX BOLT 5/16" x 2" HEX BOLT FIGURE 3 • Tighten the bolts and nuts assembled in figure 3. Tighten the bolts and nuts assembled in figure 1. Tighten the rear bolts and nuts assembled in figure 2. • Assemble the axle bracket to the outside of the rear angle brackets using two 5/16" x 1" hex bolts and 5/16" nylock nuts. The angled ends of the axle bracket must point as shown in figure 4. Tighten the bolts and...
-
Page 6: Operation
Regular removal of thatch is critical to maintenance of a healthy lawn. Excessive thatch prevents air, water and fertilizer from reaching the roots. To effectively dislodge excessive thatch from your lawn, read these instructions for proper adjustment and operation of the dethatcher. ADJUSTMENT OF TINE SHIELD • Move the towing vehicle onto a level surface, such as a driveway or garage floor and attach the tine dethatcher to the vehicle hitch. See figure 7. • Lower the dethatcher into operating position using the lift handle. Loosen the two nylock nuts and carriage bolts which fasten the hitch mount arms to the hitch arm mount brackets at the rear of the tine shield. Adjust the tine shield until it is level and both the front and rear spring tines are in contact with the ground. Retighten the hex nuts. See figure 7. CARRIAGE BOLT &... -
Page 7: Repair Parts
40" TINE DETHATCHER MODELS 486.243152, 486.24316 REF. PART QTY. DESCRIPTION NO. 1 23442 Hitch Arm Mount Bracket 2 23981 Hitch Bracket 3 43783 Spring Tine 4 47633 Spring Alignment Wire 5 43021 Wheel 6 24836 Tine Shield 7 23914 Hitch Mount Arm 8 24594 Lift Plate 9 24595 Axle Bracket 10 24596... - Page 8 Get it fixed, at your home or ours! For expert troubleshooting and home solutions advice: For repair – in your home – of all major brand appliances, lawn and garden equipment, or heating and cooling systems, no matter who made it, no matter who sold it! For the replacement parts, accessories and owner’s manuals that you need to do-it-yourself.