Advertisement
Available languages
Available languages
Quick Links
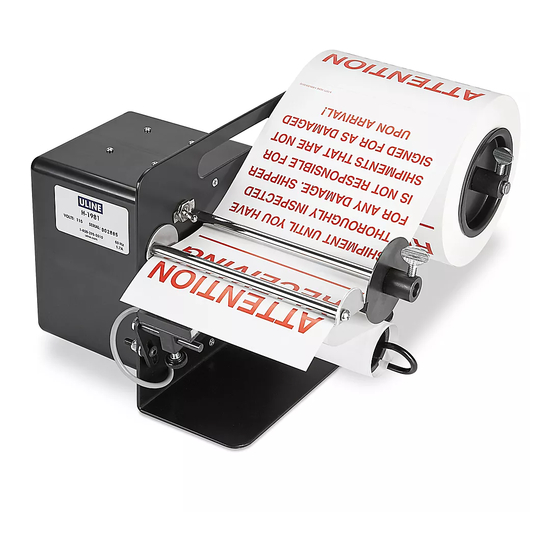
H-1276, H-1981
AUTOMATIC LABEL
DISPENSER
1. Remove 1" collar with thumb screw (A) from roll
holder bar (B). (See Figure 1)
2. Install one core insert onto roll holder bar (B).
(For labels with 3" cores.)
NOTE: For rolls with cores smaller than 3", follow
these instructions but do not use core inserts.
3. Add a roll of labels onto roll holder bar and attach it
to core insert. The labels should unwind toward front
of machine.
4. Fit second core insert into opposite side of
label core (C).
5. Re-attach 1" collar with thumb screw (A) onto roll holder
bar (B). Tighten screw to hold all items securely in
place.
THREADING LABELS
1. Remove labels from first two feet of liner.
2. Thread two feet of liner under guide bar (D)
and between the dispenser bar (E) and
dispenser plate (F). (See Figure 2)
3. Remove spring clip (G) from the take-up spool (H).
Pull empty liner back over top of and wrap around
take-up spool. Replace spring clip while holding the
liner tight.
4. Adjust the side guide (I) on the guide bar to ensure
label is secure and does not move.
PAGE 1 OF 6
1-800-295-5510
uline.com
SETUP
Figure 1
Figure 2
Para Español, vea páginas 3-4.
Pour le français, consulter les pages 5-6.
C
I
E
F
D
H
G
A
B
0922 IH-1276
Advertisement

Related Manuals for U-Line H-1276


Summary of Contents for U-Line H-1276
- Page 1 Para Español, vea páginas 3-4. Pour le français, consulter les pages 5-6. H-1276, H-1981 1-800-295-5510 uline.com AUTOMATIC LABEL DISPENSER SETUP 1. Remove 1" collar with thumb screw (A) from roll Figure 1 holder bar (B). (See Figure 1) 2. Install one core insert onto roll holder bar (B).
-
Page 2: Operation
OPERATION 1. After roll of labels is threaded through machine, Figure 3 adjust photo eye sensor (J) to be positioned in front of label liner. Point sensor toward desired label stop position. (See Figure 3) 2. Plug in dispenser and flip power switch (K) to "on" position. - Page 3 H-1276, H-1981 800-295-5510 uline.mx DESPACHADOR AUTOMÁTICO DE ETIQUETAS ADHESIVAS CONFIGURACIÓN 1. Retire el collarín de 1" con el tornillo de mariposa (A) Diagrama 1 de la varilla de soporte para rollo (B). (Vea Diagrama 1) 2. Instale un inserto para núcleo en la varilla de soporte para rollo (B).
-
Page 4: Solución De Problemas
FUNCIONAMIENTO 1. Después de pasar el rollo de etiquetas por la Diagrama 3 máquina, ajuste el sensor de ojo lector (J) de modo que esté posicionado al frente del respaldo de las etiquetas. Apunte el sensor hacia la posición de tope para etiquetas deseada. -
Page 5: Installation
H-1276, H-1981 1-800-295-5510 uline.ca DISTRIBUTEUR D'ÉTIQUETTES ADHÉSIVES AUTOMATIQUE INSTALLATION 1. Retirez le collet de 1 po avec vis à oreilles (A) de la Figure 1 barre porte-rouleau (B). (Voir Figure 1) 2. Insérez un support de mandrin dans la barre (B). -
Page 6: Dépannage
FONCTIONNEMENT 1. Une fois le rouleau d'étiquettes installé, réglez le Figure 3 capteur photoélectrique (J) pour qu'il soit positionné devant la doublure de l'étiquette. Orientez le capteur vers la position d'arrêt souhaitée sur l'étiquette. (Voir Figure 3) 2. Branchez le distributeur et basculez l'interrupteur (K) en position «...