Advertisement
Quick Links
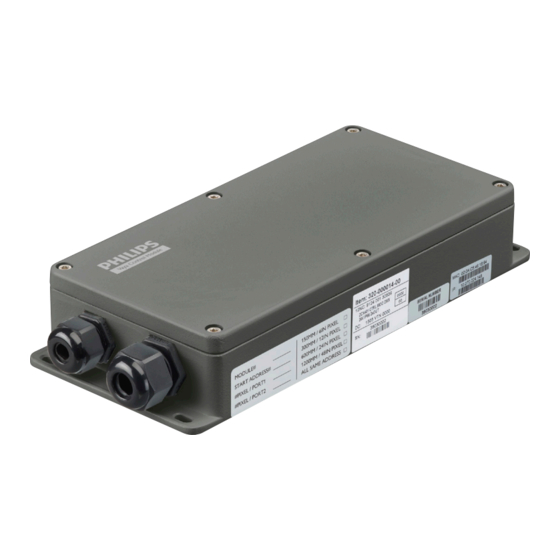
Vaya Control Module
Installation Instructions
Instructions d'installation
Installatie-instructies
インストール手順
安装指示
A
Must be installed by a qualified electrician in accordance with all
national and local electrical and construction codes and regulations.
Doit être installé par un électricien qualifié conformément aux codes et réglementations
électriques nationaux et locaux du bâtiment.
La instalación debe realizarla un electricista calificado siguiendo todos los códigos y
normativas eléctricas y de construcción, tanto nacionales como locales.
Devono essere installati da un elettricista qualificato in conformità con le norme locali e
nazionali vigenti in materia di costruzioni edilizie e installazione di impianti elettrici.
Moet door een gekwalificeerd elektricien overeenkomstig alle nationale en lokale elektrische
verordeningen worden geïnstalleerd.
Muss von einem geprüften Elektriker in Übereinstimmung mit allen nationalen und örtlichen
elektrischen Codes und Regelungen installiert werden.
国または地域の建築コードおよび規制にすべて従い、 資格のある電気技師が設置してください。
必须根据所有国家和地方的电气和施工准则及规范,由符合资格的电工进行安装。
PUB-000385-00 (R03)
Instrucciones de instalación
Installationsanweisungen
IEC
60950
9 July 2018
Istruzioni per l'installazione
A
Before installing this product, please visit the product page at
www.colorkinetics.com/vaya for the latest version of the installation
instructions. Due to continuous improvements and innovations,
installation instructions may change without notice.
Avant de procéder à l'installation de ce produit, veuillez consulter la page Web du produit
à l'adresse www.colorkinetics.com/vaya pour obtenir les instructions de montage les plus
récentes. En raison des améliorations et innovations sans cesse entreprises, les instructions
de montage peuvent être modifiées sans préavis.
Antes de instalar este producto, visite la página del producto en www.colorkinetics.com/vaya
para consultar la última versión de las instrucciones de instalación. Debido a las continuas
mejoras e innovaciones, las instrucciones de instalación pueden cambiar sin previo aviso.
Prima di installare il prodotto, visitare la pagina relativa all'indirizzo
www.colorkinetics.com/vaya per la versione più recente delle istruzioni d'installazione.
Grazie ai miglioramenti e alle innovazioni continue, le istruzioni sono soggette a modifiche
senza preavviso.
Ga voordat u dit product installeert, eerst naar de productpagina op
www.colorkinetics.com/vaya voor de meeste recente versie van de installatie-instructies.
Vanwege voortdurende verbeteringen en innovaties kunnen de installatie-instructies zonder
bericht gewijzigd worden.
Besuchen Sie vor der Installation des Produkts bitte die Produktseite unter
www.colorkinetics.com/vaya, um die aktuellen Installationsanweisungen
herunterzuladen. Aufgrund kontinuierlicher Verbesserungen und Innovationen können die
Installationsanweisungen ohne Vorankündigung geändert werden.
この製品を設置する前に、 www.colorkinetics.com/vaya の製品ページにアクセスして、 最新の設置手
順を確認してください。 改善 ・ 改良を継続的に行っているため、 取り付け手順が予告なく変更されること
があります。
安装该产品之前,请先访问产品页面 www.colorkinetics.com/vaya 以获取最新版的安装说明。由于
在不断地改进和创新,安装说明可能会有所改动,恕不另行通知。
www.colorkinetics.com/vaya
Advertisement

Related Manuals for Philips ZCX401


Summary of Contents for Philips ZCX401
- Page 1 Vaya Control Module Installation Instructions Instructions d’installation Instrucciones de instalación Istruzioni per l’installazione Installatie-instructies Installationsanweisungen インストール手順 安装指示 Must be installed by a qualified electrician in accordance with all Before installing this product, please visit the product page at national and local electrical and construction codes and regulations. www.colorkinetics.com/vaya for the latest version of the installation instructions.
-
Page 2: Installation Planning
Confirm all components received Confirmez la réception de l’intégralité des composants Compruebe si ha recibido todos los componentes Confermare tutti i componenti ricevuti Controleer alle ontvangen componenten Bestätigen Sie, dass Sie alle Bestandteile erhalten haben すべてのコンポーネントが揃っていることを確認します。 确认收到了所有部件 Installation planning Planification de l’installation Planificación de la instalación Pianificazione dell’installazione 設置計画... -
Page 3: Permanent Installation
Permanent installation Installation permanente Instalación permanente Installazione permanente 固定設置 Permanente installatie Feste Installation 永久式安装 Control module dimensions Dimensions du module de contrôle Dimensiones del módulo de control Dimensioni modulo di controllo Afmetingen regelmodule Abmessungen des Steuermodul 制御モジュールの寸法 控制模块尺寸 Mounting screws customer supplied (M3.5) 208 mm (8.19 in) Vis de montage fournies par le client (M3.5) 184 mm (7.24 in) - Page 4 When using DMX devices from Philips Color Kinetics, you must reverse the Orange and the Orange/White wires. Lorsque vous utilisez des appareils DMX de Philips Color Kinetics, vous devez inverser le fil orange et le fil orange/blanc. Si utiliza dispositivos DMX desde Philips Color Kinetics, deberá invertir los cables naranja y naranja/blanco.
-
Page 5: Ethernet Pinouts
Connect data - Ethernet Brancher Données – Ethernet Conecte el cable de datos - Ethernet Effettuare il collegamento Dati – Ethernet 接続 データ – Ethernet Verbinden Data – ethernet Verbinden Daten – Ethernet 连接数据 – 以太网 From Controller (Ethernet) Depuis le contrôleur (Ethernet) Desde el controlador (Ethernet) Dal controller (Ethernet) Vanuit controller (Ethernet) - Page 6 Connect power supply to line voltage Branchez l’alimentation secteur sur la tension réseau Conecte la fuente de alimentación a la tensión de línea Collegare il cavo di alimentazione alla tensione di linea Sluit de voeding aan op de lijnspanning Schließen Sie die Stromversorgung am Netz an 電源を線間電圧に接続します...
- Page 7 Configure control module using SmartJack Pro Configurez le module de contrôle à l’aide de SmartJack Pro Configure el módulo de control utilizando SmartJack Pro Configurare il modulo di controllo utilizzando SmartJack Pro Configureer de regelmodule met SmartJack Pro Steuerungsmodul mit SmartJack Pro konfigurieren SmartJack Pro を使用して制御モジュールを構成します...
- Page 8 No representation or warranty as to the accuracy or completeness of the information included herein is given and any liability for any action in reliance thereon is disclaimed. Philips and the Philips Shield Emblem are registered trademarks of Koninklijke Philips N.V. All www.colorkinetics.com/vaya...